Popular Woodworking 2007-06 № 162, страница 15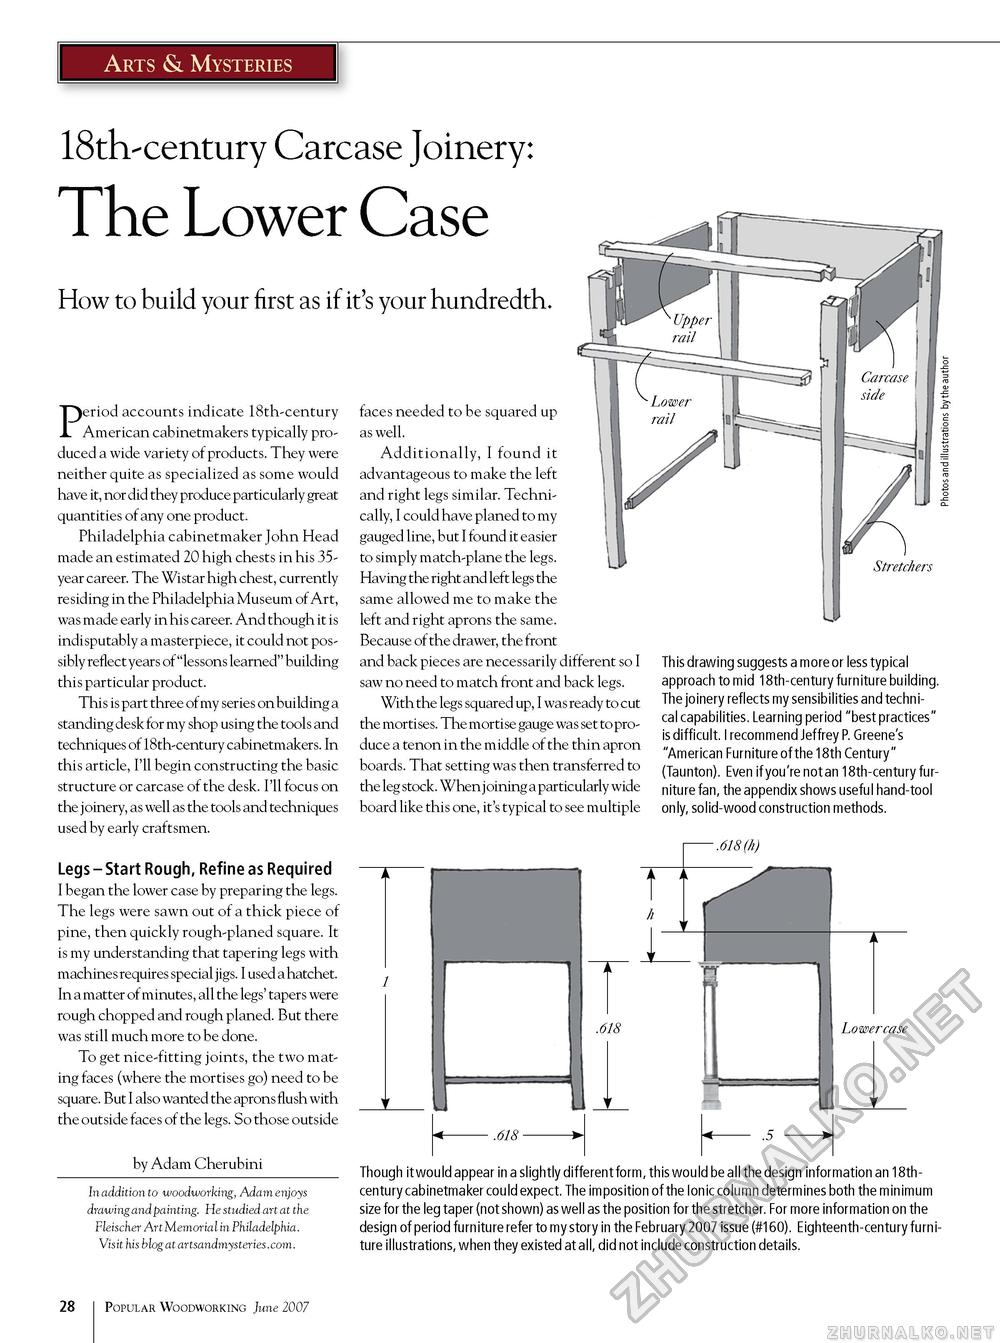
Arts & Mysteries 18th-century Carcase Joinery: The Lower Case How to build your first as if it's your hundredth. Period accounts indicate 18th-century American cabinetmakers typically produced a wide variety of products. They were neither quite as specialized as some would have it, nor did they produce particularly ggreat quantities of any one product. Philadelphia cabinetmaker John Head made an estimated 20 high chests in his 35-year career. The Wistar high chest, currently residing in the Philadelphia Museum of Art, was made early in his career. And though it is indisputably a masterpiece, it could not possibly reflect years of ""lessons learned" building this particular product. This is part three of my series on building a standing desk for my shop using the tools and techniques of 18th-century cabinetmakers. In this article, I'll begin constructing the basic structure or carcase of the desk. I'll focus on the joinery, as well as the tools and techniques used by early craftsmen. Legs - Start Rough, Refine as Required I began the lower case by preparing the legs. The legs were sawn out of a thick piece of pine, then quickly rough-planed square. It is my understanding that tapering legs with machines requires special jigs. I used a hatchet. In a matter of minutes, all the legs' tapers were rough chopped and rough planed. But there was still much more to be done. To get nice-fitting joints, the two mating faces (where the mortises go) need to be square. But I also wanted the aprons flush with the outside faces of the legs. So those outside by Adam Cherubini In addition to woodworking, Adam enjoys drawing and painting. He studied art at the Fleischer Art Memorial in Philadelphia. Vis it his b log at artsandmys teries.com. faces needed to be squared up as well. Additionally, I found it advantageous to make the left and right legs similar. Technically, I could have planed to my gauged line, but I found it easier to simply match-plane the legs. Having the right and left legs the same allowed me to make the left and right aprons the same. Because of the drawer, the front and back pieces are necessarily different so I saw no need to match front and back legs. With the legs squared up, I was ready to cut the mortises. The mortise gauge was set to produce a tenon in the middle of the thin apron boards. That setting was then transferred to the leg stock. When j oining a particularly wide board like this one, it's typical to see multiple Stretchers This drawing suggests a more or less typical approach to mid 18th-century furniture building. The joinery reflects my sensibilities and technical capabilities. Learning period "best practices" is difficult. I recommend Jeffrey P. Greene's "American Furniture of the 18th Century" (Taunton). Even if you're not an 18th-century furniture fan, the appendix shows useful hand-tool only, solid-wood construction methods. -.618 (h) .618 .618- Though it would appear in a slightly different form, this would be all the design information an 18th-century cabinetmaker could expect. The imposition of the Ionic column determines both the minimum size for the leg taper (not shown) as well as the position for the stretcher. For more information on the design of period furniture refer to my story in the February 2007 issue (#160). Eighteenth-century furniture illustrations, when they existed at all, did not include construction details. 1 10 Popular Woodworking June 2007 |


