Popular Woodworking 2007-06 № 162, страница 26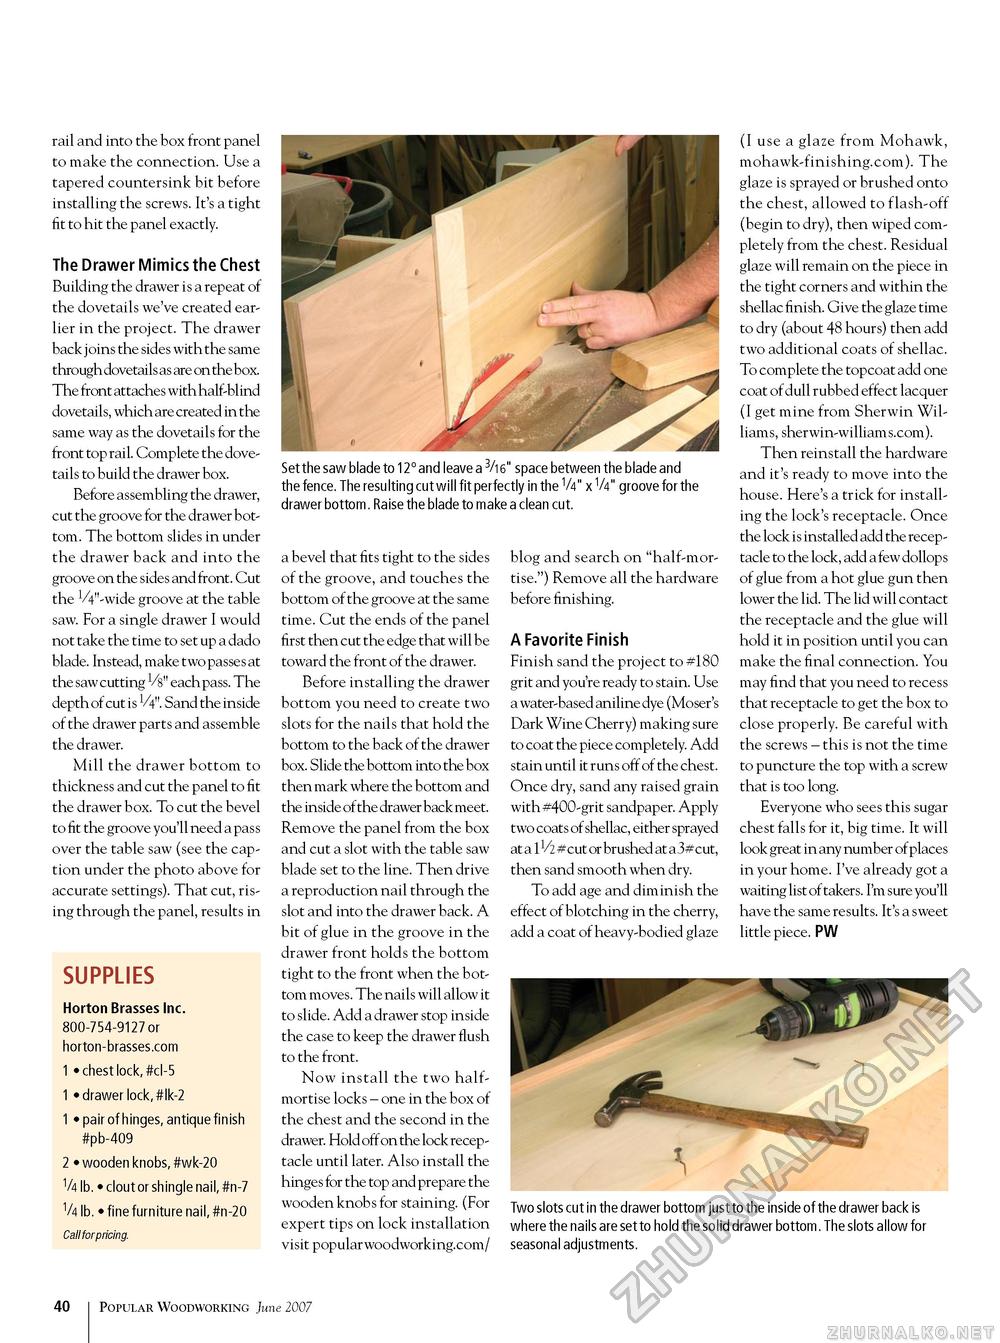
Set the saw blade to 12° and leave a 3/i 6" space between the blade and the fence. The resulting cut will fit perfectly in the V4" x V4" groove for the drawer bottom. Raise the blade to make a clean cut. rail and into the box front panel to make the connection. Use a tapered countersink bit before installing the screws. It's a tight fit to hit the panel exactly. The Drawer Mimics the chest Building the drawer is a repeat of the dovetails we've created earlier in the project. The drawer back joins the sides with the same through dovetails as are on the box. The front attaches with half-blind dovetails, which are created in the same way as the dovetails for the front top rail. Complete the dovetails to build the drawer box. Before assembling the drawer, cut the groove for the drawer bottom. The bottom slides in under the drawer back and into the groove on the sides and front. Cut the V4"-wide groove at the table saw. For a single drawer I would not take the time to set up a dado blade. Instead, make two passes at the saw cutting V8" each pass. The depth of cut is 1/4". Sand the inside of the drawer parts and assemble the drawer. Mill the drawer bottom to thickness and cut the panel to fit the drawer box. To cut the bevel to fit the groove you'll need a pass over the table saw (see the caption under the photo above for accurate settings). That cut, rising through the panel, results in a bevel that fits tight to the sides of the groove, and touches the bottom of the groove at the same time. Cut the ends of the panel first then cut the edge that will be toward the front of the drawer. Before installing the drawer bottom you need to create two slots for the nails that hold the bottom to the back of the drawer box. Slide the bottom into the box then mark where the bottom and the inside of the drawer back meet. Remove the panel from the box and cut a slot with the table saw blade set to the line. Then drive a reproduction nail through the slot and into the drawer back. A bit of glue in the groove in the drawer front holds the bottom tight to the front when the bottom moves. The nails will allow it to slide. Add a drawer stop inside the case to keep the drawer flush to the front. Now install the two half-mortise locks - one in the box of the chest and the second in the drawer. Hold off on the lock receptacle until later. Also install the hinges for the top and prepare the wooden knobs for staining. (For expert tips on lock installation visit popularwoodworking.com/ blog and search on "half-mortise.") Remove all the hardware before finishing. A Favorite Finish Finish sand the project to #180 grit and you're ready to stain. Use a water-based aniline dye (Moser's Dark Wine Cherry) making sure to coat the piece completely. Add stain until it runs off of the chest. Once dry, sand any raised grain with #400-grit sandpaper. Apply two coats of shellac, either sprayed at a 1V2 # cut or brushed at a 3# cut, then sand smooth when dry. To add age and diminish the effect of blotching in the cherry, add a coat of heavy-bodied glaze (I use a glaze from Mohawk, mohawk-finishing.com). The glaze is sprayed or brushed onto the chest, allowed to flash-off (begin to dry), then wiped completely from the chest. Residual glaze will remain on the piece in the tight corners and within the shellac finish. Give the glaze time to dry (about 48 hours) then add two additional coats of shellac. To complete the topcoat add one coat of dull rubbed effect lacquer (I get mine from Sherwin Williams, sherwin-williams.com). Then reinstall the hardware and it's ready to move into the house. Here's a trick for installing the lock's receptacle. Once the lock is installed add the receptacle to the lock, add a few dollops of glue from a hot glue gun then lower the lid. The lid will contact the receptacle and the glue will hold it in position until you can make the final connection. You may find that you need to recess that receptacle to get the box to close properly. Be careful with the screws - this is not the time to puncture the top with a screw that is too long. Everyone who sees this sugar chest falls for it, big time. It will look great in any number of places in your home. I've already got a waiting list of takers. I'm sure you'll have the same results. It's a sweet little piece. PW supplies Horton Brasses Inc. 800-754-9127 or horton-brasses.com 1 • chest lock, #cl-5 1 • drawer lock, #lk-2 1 • pair of hinges, antique finish #pb-409 2 • wooden knobs, #wk-20 V4 lb. • clout or shingle nail, #n-7 V4 lb. • fine furniture nail, #n-20 Call for pricing. Two slots cut in the drawer bottom just to the inside of the drawer back is where the nails are set to hold the solid drawer bottom. The slots allow for seasonal adjustments. 10 Popular Woodworking June 2007 |


