Popular Woodworking 2007-06 № 162, страница 23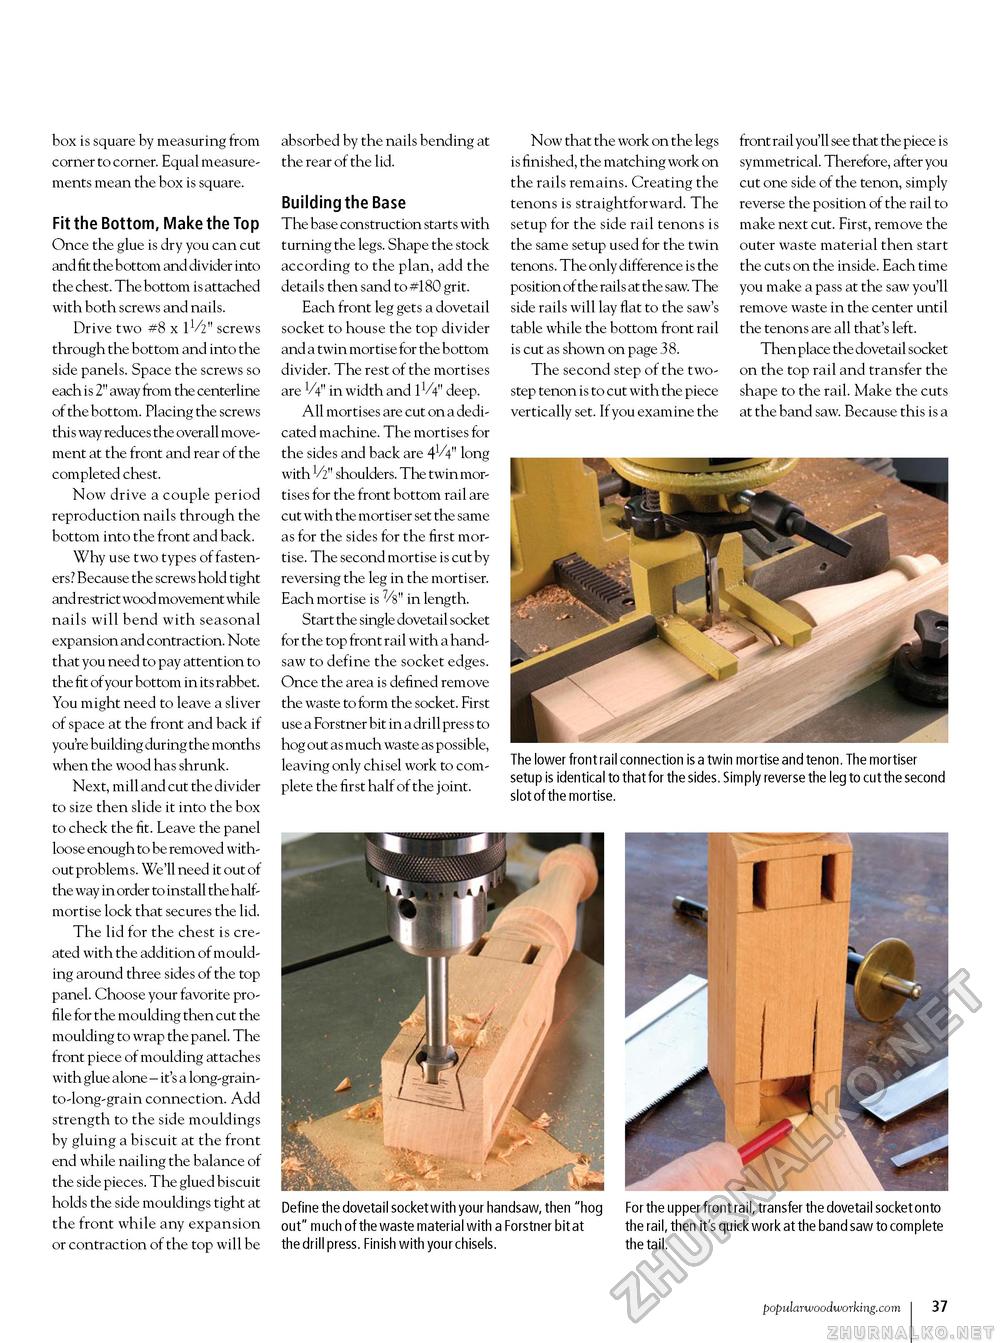
box is square by measuring from corner to corner. Equal measurements mean the box is square. Fit the Bottom, Make the Top Once the glue is dry you can cut and fit the bottom and divider into the chest. The bottom is attached with both screws and nails. Drive two #8 x 11/2" screws through the bottom and into the side panels. Space the screws so each is 2" away from the centerline of the bottom. Placing the screws this way reduces the overall movement at the front and rear of the completed chest. Now drive a couple period reproduction nails through the bottom into the front and back. Why use two types of fasteners? Because the screws hold tight and re strict wood movement while nails will bend with seasonal expansion and contraction. Note that you need to pay attention to the fit of your bottom in its rabbet. You might need to leave a sliver of space at the front and back if you're building during the months when the wood has shrunk. Next, mill and cut the divider to size then slide it into the box to check the fit. Leave the panel loose enough to be removed without problems. We'll need it out of the way in order to install the half-mortise lock that secures the lid. The lid for the chest is created with the addition of moulding around three sides of the top panel. Choose your favorite profile for the moulding then cut the moulding to wrap the panel. The front piece of moulding attaches with glue alone - it's a long-grain-to-long-grain connection. Add strength to the side mouldings by gluing a biscuit at the front end while nailing the balance of the side pieces. The glued biscuit holds the side mouldings tight at the front while any expansion or contraction of the top will be absorbed by the nails bending at the rear of the lid. Building the Base The base construction starts with turning the legs. Shape the stock according to the plan, add the details then sand to #180 grit. Each front leg gets a dovetail socket to house the top divider and a twin mortise for the bottom divider. The rest of the mortises are 1/4" in width and 1V4" deep. All mortises are cut on a dedicated machine. The mortises for the sides and back are 41/4" long with V2" shoulders. The twin mortises for the front bottom rail are cut with the mortiser set the same as for the sides for the first mortise. The second mortise is cut by reversing the leg in the mortiser. Each mortise is %" in length. Start the single dovetail socket for the top front rail with a handsaw to define the socket edges. Once the area is defined remove the waste to form the socket. First use a Forstner bit in a drill press to hog out as much waste as possible, leaving only chisel work to complete the first half of the j oint. Now that the work on the legs is finished, the matching work on the rails remains. Creating the tenons is straightforward. The setup for the side rail tenons is the same setup used for the twin tenons. The only difference is the position of the rails at the saw. The side rails will lay flat to the saw's table while the bottom front rail is cut as shown on page 38. The second step of the two-step tenon is to cut with the piece vertically set. If you examine the front rail you'll see that the piece is symmetrical. Therefore, after you cut one side of the tenon, simply reverse the position of the rail to make next cut. First, remove the outer waste material then start the cuts on the inside. Each time you make a pass at the saw you'll remove waste in the center until the tenons are all that's left. Then place the dovetail socket on the top rail and transfer the shape to the rail. Make the cuts at the band saw. Because this is a The lower front rail connection is a twin mortise and tenon. The mortiser setup is identical to that for the sides. Simply reverse the leg to cut the second slot of the mortise. Define the dovetail socket with your handsaw, then "hog For the upper front rail, transfer the dovetail socket onto out" much of the waste material with a Forstner bit at the rail, then it's quick work at the band saw to complete the drill press. Finish with your chisels. the tail. popularwoodworking.com 23 |


