Popular Woodworking 2007-06 № 162, страница 22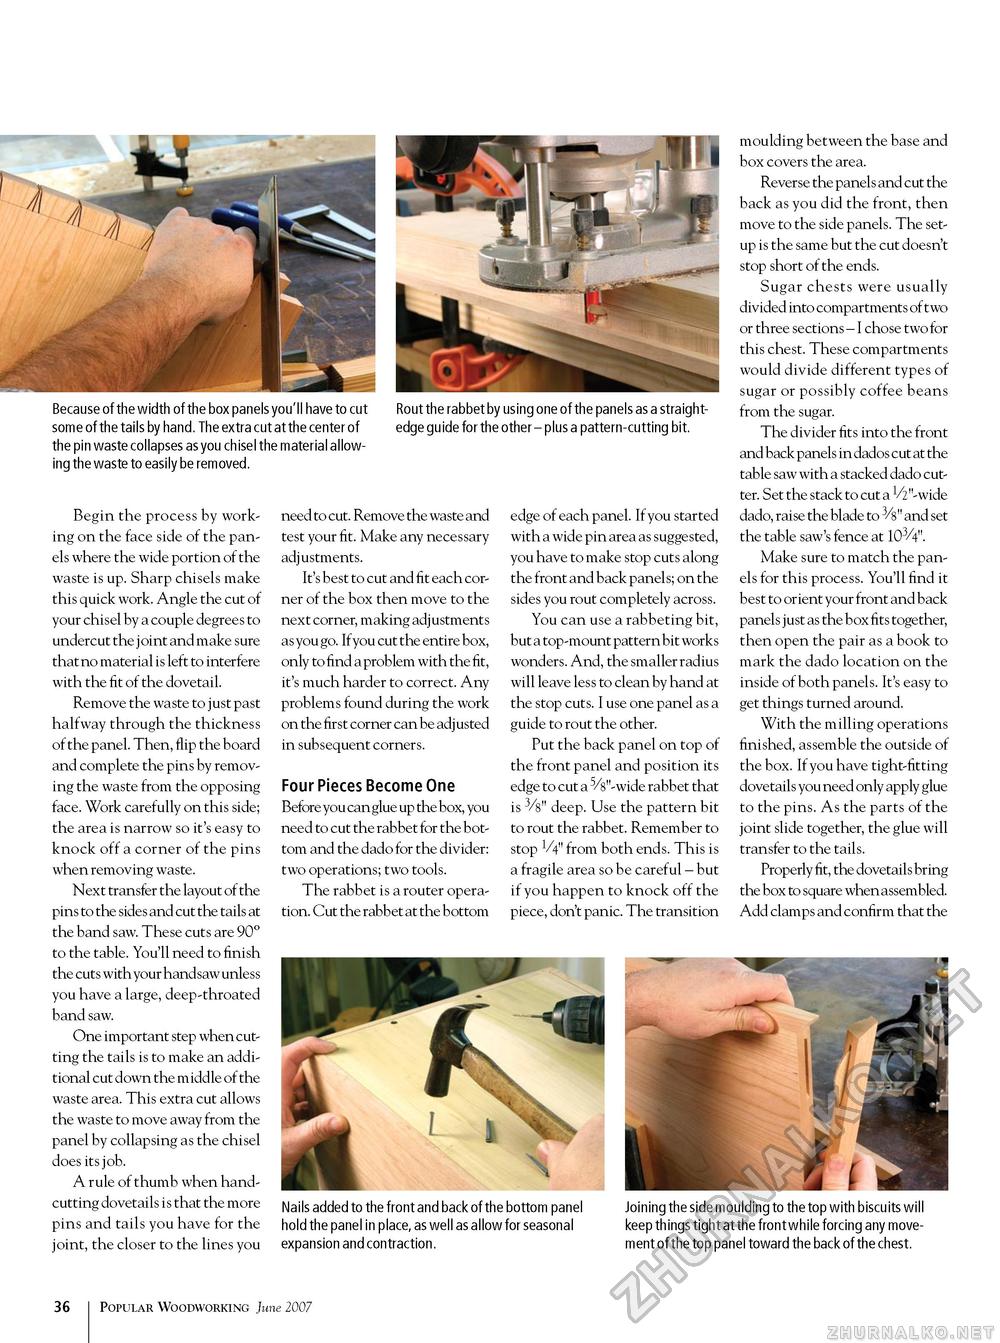
Because of the width of the box panels you'll have to cut some of the tails by hand. The extra cut at the center of the pin waste collapses as you chisel the material allowing the waste to easily be removed. Rout the rabbet by using one of the panels as a straightedge guide for the other - plus a pattern-cutting bit. Begin the process by working on the face side of the panels where the wide portion of the waste is up. Sharp chisels make this quick work. Angle the cut of your chisel by a couple degrees to undercut the j oint and make sure that no material is left to interfere with the fit of the dovetail. Remove the waste to just past halfway through the thickness of the panel. Then, flip the board and complete the pins by removing the waste from the opposing face. Work carefully on this side; the area is narrow so it's easy to knock off a corner of the pins when removing waste. Next transfer the layout of the pins to the sides and cut the tails at the band saw. These cuts are 90° to the table. You'll need to finish the cuts with your handsaw unless you have a large, deep-throated band saw. One important step when cutting the tails is to make an additional cut down the middle of the waste area. This extra cut allows the waste to move away from the panel by collapsing as the chisel does its job. A rule of thumb when hand-cutting dovetails is that the more pins and tails you have for the joint, the closer to the lines you need to cut. Remove the waste and test your fit. Make any necessary adjustments. It's best to cut and fit each corner of the box then move to the next corner, making adjustments as you go. If you cut the entire box, only to find a problem with the fit, it's much harder to correct. Any problems found during the work on the first corner can be adj usted in subsequent corners. Four Pieces Become One Before you can glue up the box, you need to cut the rabbet for the bottom and the dado for the divider: two operations; two tools. The rabbet is a router operation. Cut the rabbet at the bottom edge of each panel. If you started with a wide pin area as suggested, you have to make stop cuts along the front and back panels; on the sides you rout completely across. You can use a rabbeting bit, but a top-mount pattern bit works wonders. And, the smaller radius will leave less to clean by hand at the stop cuts. I use one panel as a guide to rout the other. Put the back panel on top of the front panel and position its edge to cut a -wide rabbet that is 3/8" deep. Use the pattern bit to rout the rabbet. Remember to stop 1/4" from both ends. This is a fragile area so be careful - but if you happen to knock off the piece, don't panic. The transition moulding between the base and box covers the area. Reverse the panels and cut the back as you did the front, then move to the side panels. The setup is the same but the cut doesn't stop short of the ends. Sugar chests were usually divided into compartments of two or three sections - I chose two for this chest. These compartments would divide different types of sugar or possibly coffee beans from the sugar. The divider fits into the front and back panels in dados cut at the table saw with a stacked dado cutter. Set the stack to cut a V2"-wide dado, raise the blade to 3/8" and set the table saw's fence at 103/4". Make sure to match the panels for this process. You'll find it best to orient your front and back panels just as the box fits together, then open the pair as a book to mark the dado location on the inside of both panels. It's easy to get things turned around. With the milling operations finished, assemble the outside of the box. If you have tight-fitting dovetails you need only apply glue to the pins. As the parts of the joint slide together, the glue will transfer to the tails. Properly fit, the dovetails bring the box to square when assembled. Add clamps and confirm that the Nails added to the front and back of the bottom panel hold the panel in place, as well as allow for seasonal expansion and contraction. Joining the side moulding to the top with biscuits will keep things tight at the front while forcing any movement of the top panel toward the back of the chest. 10 Popular Woodworking June 2007 |


