Popular Woodworking 2007-06 № 162, страница 21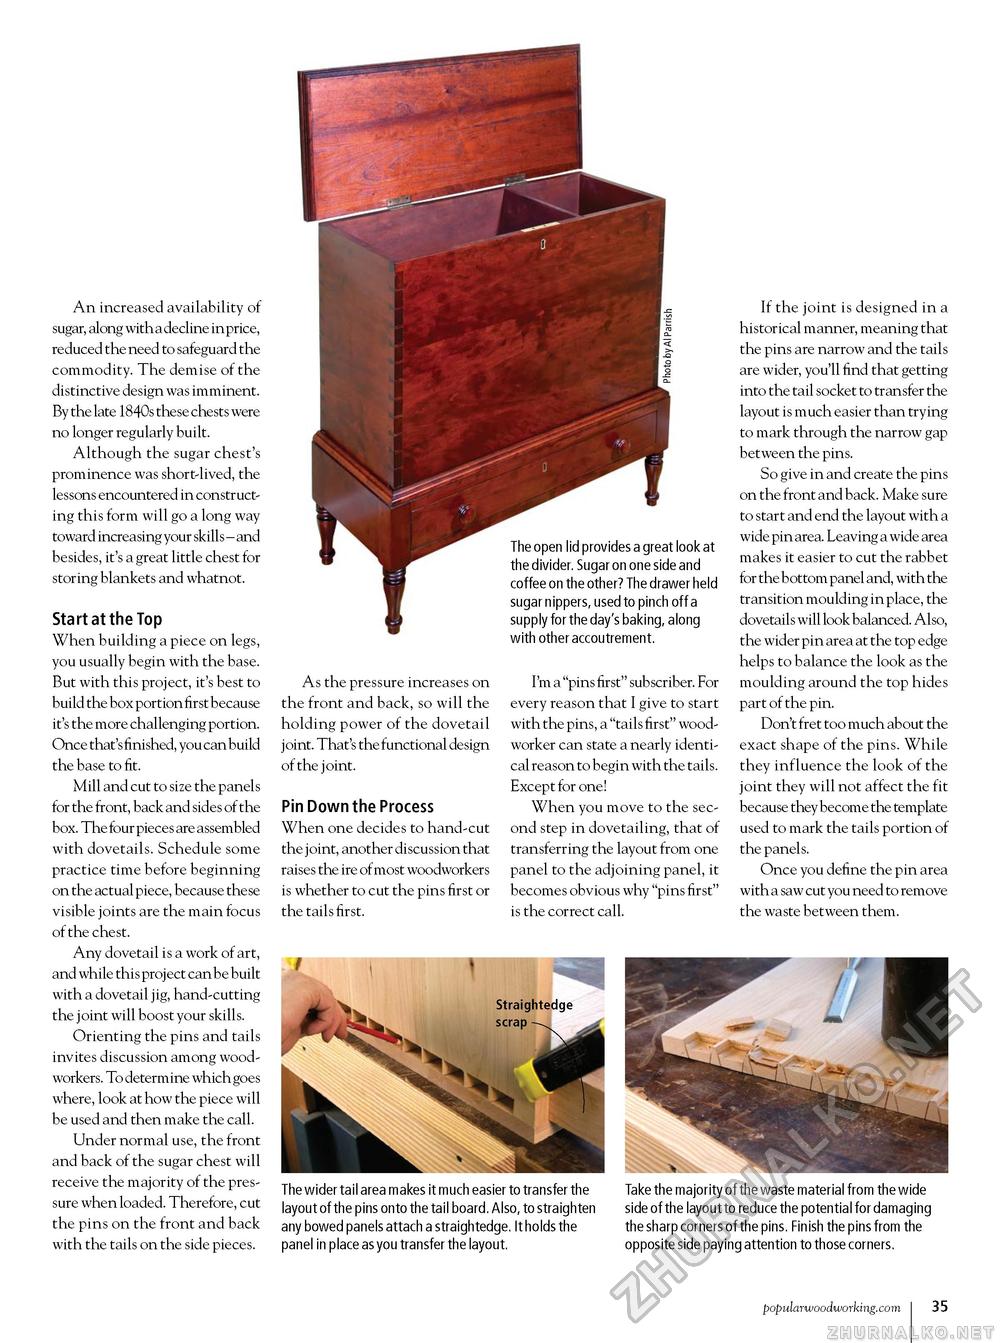
An increased availability of sugar, along with a decline in price, reduced the need to safeguard the commodity. The demise of the distinctive design was imminent. By the late 1840s these chests were no longer regularly built. Although the sugar chest's prominence was short-lived, the lessons encountered in constructing this form will go a long way toward increasing your skills - and besides, it's a great little chest for storing blankets and whatnot. Start at the Top When building a piece on legs, you usually begin with the base. But with this project, it's best to build the box portion first because it's the more challenging portion. Once that's finished, you can build the base to fit. Mill and cut to size the panels for the front, back and sides of the box. The four pieces are assembled with dovetails. Schedule some practice time before beginning on the actual piece, because these visible joints are the main focus of the chest. Any dovetail is a work of art, and while this project can be built with a dovetail jig, hand-cutting the joint will boost your skills. Orienting the pins and tails invites discussion among woodworkers. To determine which goes where, look at how the piece will be used and then make the call. Under normal use, the front and back of the sugar chest will receive the majority of the pressure when loaded. Therefore, cut the pins on the front and back with the tails on the side pieces. As the pressure increases on the front and back, so will the holding power of the dovetail joint. That's the functional design of the joint. Pin Down the Process When one decides to hand-cut the joint, another discussion that raises the ire of most woodworkers is whether to cut the pins first or the tails first. The open lid provides a great look at the divider. Sugar on one side and coffee on the other? The drawer held sugar nippers, used to pinch off a supply for the day's baking, along with other accoutrement. I'm a ""pins first" subscriber. For every reason that I give to start with the pins, a ""tails first" woodworker can state a nearly identical reason to begin with the tails. Except for one! When you move to the second step in dovetailing, that of transferring the layout from one panel to the adjoining panel, it becomes obvious why ""pins first" is the correct call. If the joint is designed in a historical manner, meaning that the pins are narrow and the tails are wider, you'll find that getting into the tail socket to transfer the layout is much easier than trying to mark through the narrow gap between the pins. So give in and create the pins on the front and back. Make sure to start and end the layout with a wide pin area. Leaving a wide area makes it easier to cut the rabbet for the bottom panel and, with the transition moulding in place, the dovetails will look balanced. Also, the wider pin area at the top edge helps to balance the look as the moulding around the top hides part of the pin. Don't fret too much about the exact shape of the pins. While they influence the look of the joint they will not affect the fit because they become the template used to mark the tails portion of the panels. Once you define the pin area with a saw cut you need to remove the waste between them. The wider tail area makes it much easier to transfer the layout of the pins onto the tail board. Also, to straighten any bowed panels attach a straightedge. It holds the panel in place as you transfer the layout. Take the majority of the waste material from the wide side of the layout to reduce the potential for damaging the sharp corners of the pins. Finish the pins from the opposite side paying attention to those corners. popularwoodworking.com 23 |


