Popular Woodworking 2007-06 № 162, страница 47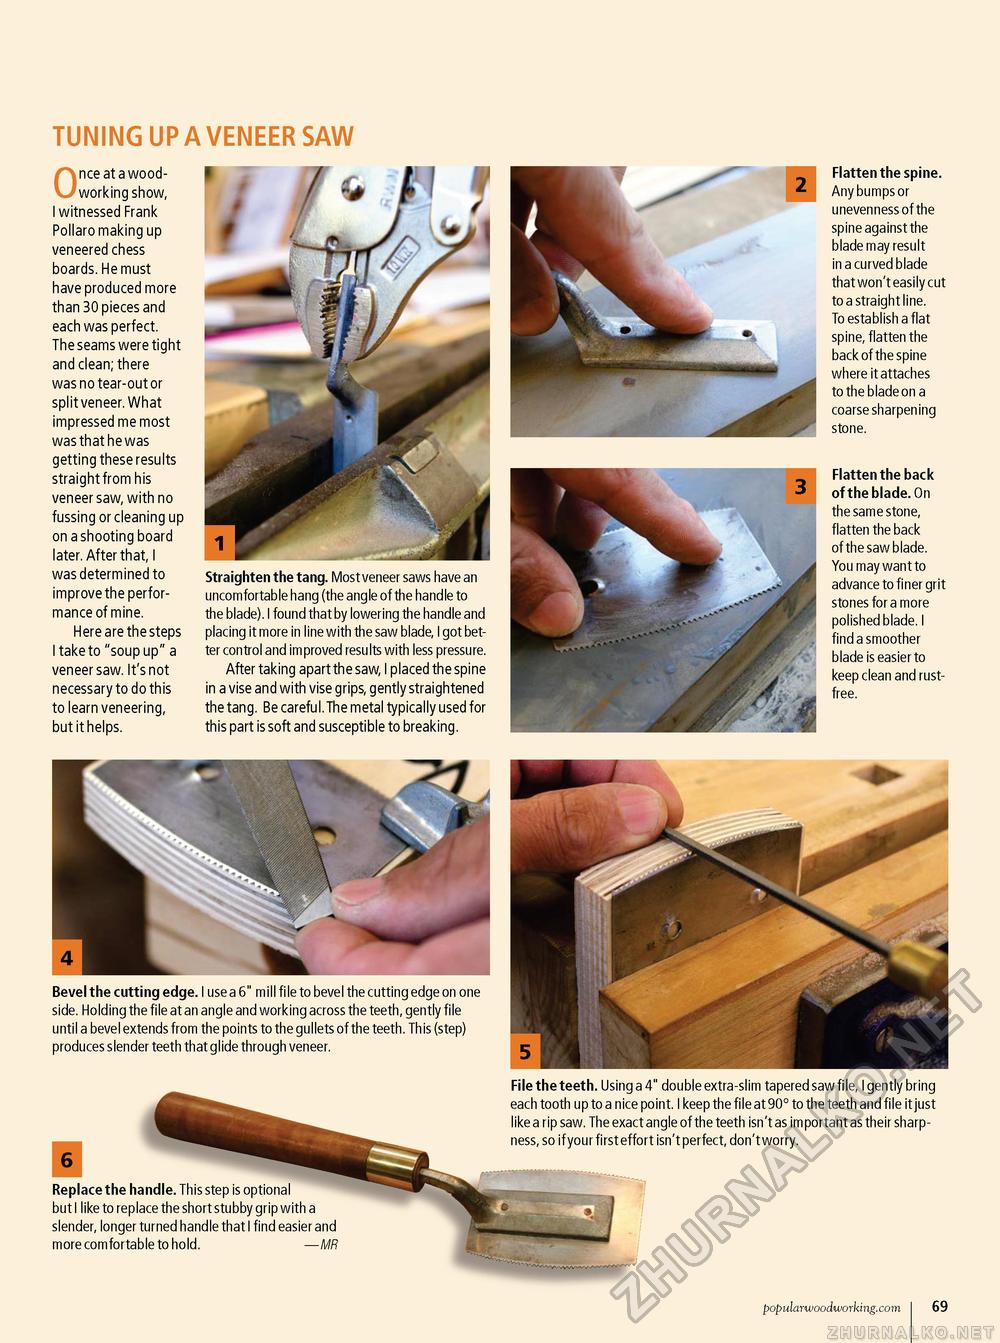
tuning up a veneer saw Once at a woodworking show, I witnessed Frank Pollaro making up veneered chess boards. He must have produced more than 30 pieces and each was perfect. The seams were tight and clean; there was no tear-out or split veneer. What impressed me most was that he was getting these results straight from his veneer saw, with no fussing or cleaning up on a shooting board later. After that, I was determined to improve the performance of mine. Here are the steps I take to "soup up" a veneer saw. It's not necessary to do this to learn veneering, but it helps. Straighten the tang. Most veneer saws have an uncomfortable hang (the angle of the handle to the blade). I found that by lowering the handle and placing it more in line with the saw blade, I got better control and improved results with less pressure. After taking apart the saw, I placed the spine in a vise and with vise grips, gently straightened the tang. Be careful. The metal typically used for this part is soft and susceptible to breaking. Flatten the spine. Any bumps or unevenness of the spine against the blade may result in a curved blade that won't easily cut to a straight line. To establish a flat spine, flatten the back of the spine where it attaches to the blade on a coarse sharpening stone. Flatten the back of the blade. On the same stone, flatten the back of the saw blade. You may want to advance to finer grit stones for a more polished blade. I find a smoother blade is easier to keep clean and rust-free. Bevel the cutting edge. I use a 6" mill file to bevel the cutting edge on one side. Holding the file at an angle and working across the teeth, gently file until a bevel extends from the points to the gullets of the teeth. This (step) produces slender teeth that glide through veneer. 6 File the teeth. Using a 4" double extra-slim tapered saw file, I gently bring each tooth up to a nice point. I keep the file at 90° to the teeth and file it just like a rip saw. The exact angle of the teeth isn't as important as their sharpness, so if your first effort isn't perfect, don't worry. replace the handle. This step is optional but I like to replace the short stubby grip with a slender, longer turned handle that I find easier and more comfortable to hold. — MR popularwoodworking.com 23 |


