Popular Woodworking 2007-06 № 162, страница 44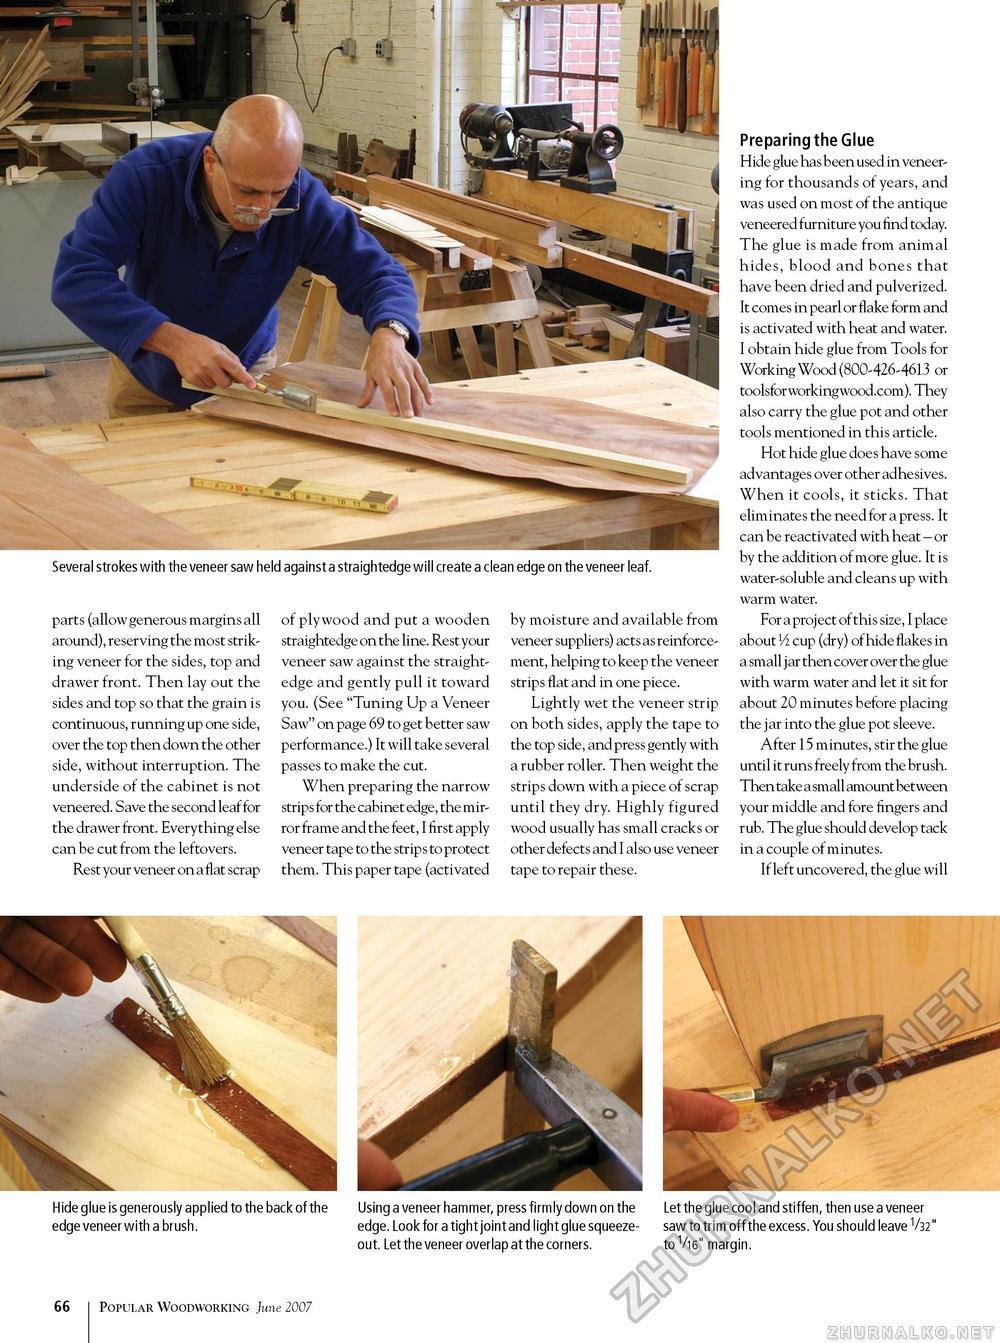
Several strokes with the veneer saw held against a straightedge will create a clean edge on the veneer leaf. parts (allow generous margins all around), reserving the most striking veneer for the sides, top and drawer front. Then lay out the sides and top so that the grain is continuous, running up one side, over the top then down the other side, without interruption. The underside of the cabinet is not veneered. Save the second leaf for the drawer front. Everything else can be cut from the leftovers. Rest your veneer on a flat scrap of plywood and put a wooden straightedge on the line. Rest your veneer saw against the straightedge and gently pull it toward you. (See "Tuning Up a Veneer Saw" on page 69 to get better saw performance.) It will take several passes to make the cut. When preparing the narrow strips for the cabinet edge, the mirror frame and the feet, I first apply veneer tape to the strip s to protect them. This paper tape (activated by moisture and available from veneer suppliers) acts as reinforcement, helping to keep the veneer strips flat and in one piece. Lightly wet the veneer strip on both sides, apply the tape to the top side, and press gently with a rubber roller. Then weight the strips down with a piece of scrap until they dry. Highly figured wood usually has small cracks or other defects and I also use veneer tape to repair these. Preparing the Glue Hide glue has been used in veneering for thousands of years, and was used on most of the antique veneered furniture you find today. The glue is made from animal hides, blood and bones that have been dried and pulverized. It comes in pearl or flake form and is activated with heat and water. I obtain hide glue from Tools for Working Wood (800-426-4613 or toolsforworkingwood.com). They also carry the glue pot and other tools mentioned in this article. Hot hide glue does have some advantages over other adhesives. When it cools, it sticks. That eliminates the need for a press. It can be reactivated with heat - or by the addition of more glue. It is water-soluble and cleans up with warm water. For a project of this size, I place about / cup (dry) of hide flakes in a small j ar then cover over the glue with warm water and let it sit for about 20 minutes before placing the jar into the glue pot sleeve. After 15 minutes, stir the glue until it runs freely from the brush. Then take a small amount between your middle and fore fingers and rub. The glue should develop tack in a couple of minutes. If left uncovered, the glue will Hide glue is generously applied to the back of the edge veneer with a brush. Using a veneer hammer, press firmly down on the edge. Look for a tight joint and light glue squeeze-out. Let the veneer overlap at the corners. Let the glue cool and stiffen, then use a veneer saw to trim off the excess. You should leave V32" to Vi6" margin. 10 Popular Woodworking June 2007 |


