Popular Woodworking 2007-06 № 162, страница 45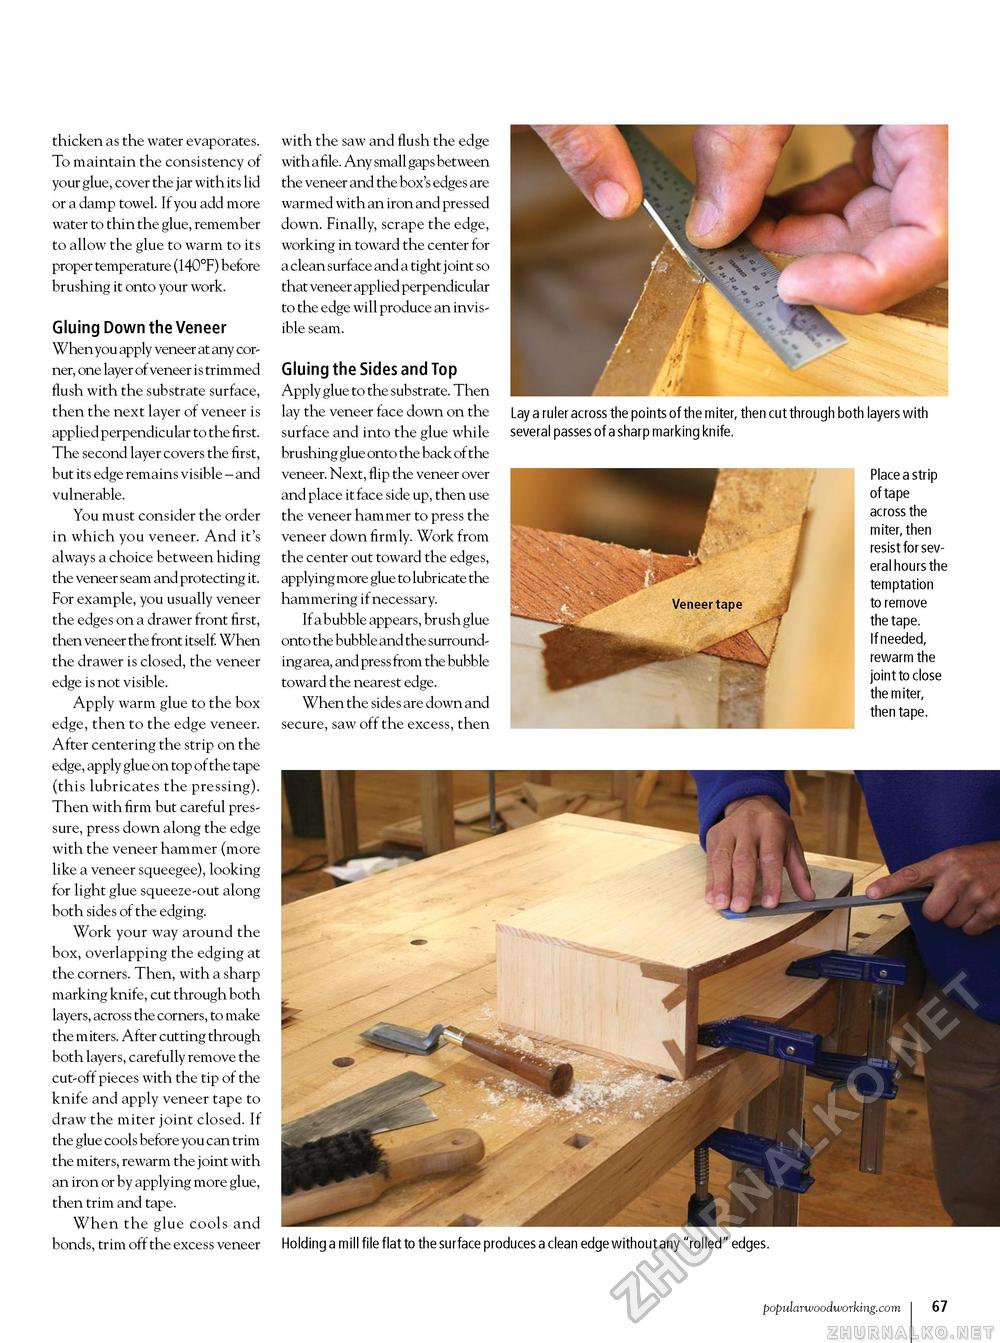
thicken as the water evaporates. To maintain the consistency of your glue, cover the jar with its lid or a damp towel. If you add more water to thin the glue, remember to allow the glue to warm to its proper temperature (140°F) before brushing it onto your work. Gluing Down the Veneer When you apply veneer at any corner, one layer of veneer is trimmed flush with the substrate surface, then the next layer of veneer is applied perpendicular to the first. The second layer covers the first, but its edge remains visible - and vulnerable. You must consider the order in which you veneer. And it's always a choice between hiding the veneer seam and protecting it. For example, you usually veneer the edges on a drawer front first, then veneer the front itself. When the drawer is closed, the veneer edge is not visible. Apply warm glue to the box edge, then to the edge veneer. After centering the strip on the edge, apply glue on top of the tape (this lubricates the pressing). Then with firm but careful pressure, press down along the edge with the veneer hammer (more like a veneer squeegee), looking for light glue squeeze-out along both sides of the edging. Work your way around the box, overlapping the edging at the corners. Then, with a sharp marking knife, cut through both layers, across the corners, to make the miters. After cutting through both layers, carefully remove the cut-off pieces with the tip of the knife and apply veneer tape to draw the miter joint closed. If the glue cools before you can trim the miters, rewarm the joint with an iron or by applying more glue, then trim and tape. When the glue cools and bonds, trim off the excess veneer with the saw and flush the edge with a file. Any small gaps between the veneer and the box's edges are warmed with an iron and pressed down. Finally, scrape the edge, working in toward the center for a clean surface and a tight j oint so that veneer applied perpendicular to the edge will produce an invisible seam. Gluing the Sides and Top Apply glue to the substrate. Then lay the veneer face down on the surface and into the glue while brushing glue onto the back of the veneer. Next, flip the veneer over and place it face side up, then use the veneer hammer to press the veneer down firmly. Work from the center out toward the edges, applying more glue to lubricate the hammering if necessary. If a bubble appears, brush glue onto the bubble and the surrounding area, and press from the bubble toward the nearest edge. When the sides are down and secure, saw off the excess, then Lay a ruler across the points of the miter, then cut through both layers with several passes of a sharp marking knife. Place a strip of tape across the miter, then resist for several hours the temptation to remove the tape. If needed, rewarm the joint to close the m iter, then tape. Holding a mill file flat to the surface produces a clean edge without any "rolled" edges. popularwoodworking.com 23 |


