Popular Woodworking 2007-06 № 162, страница 46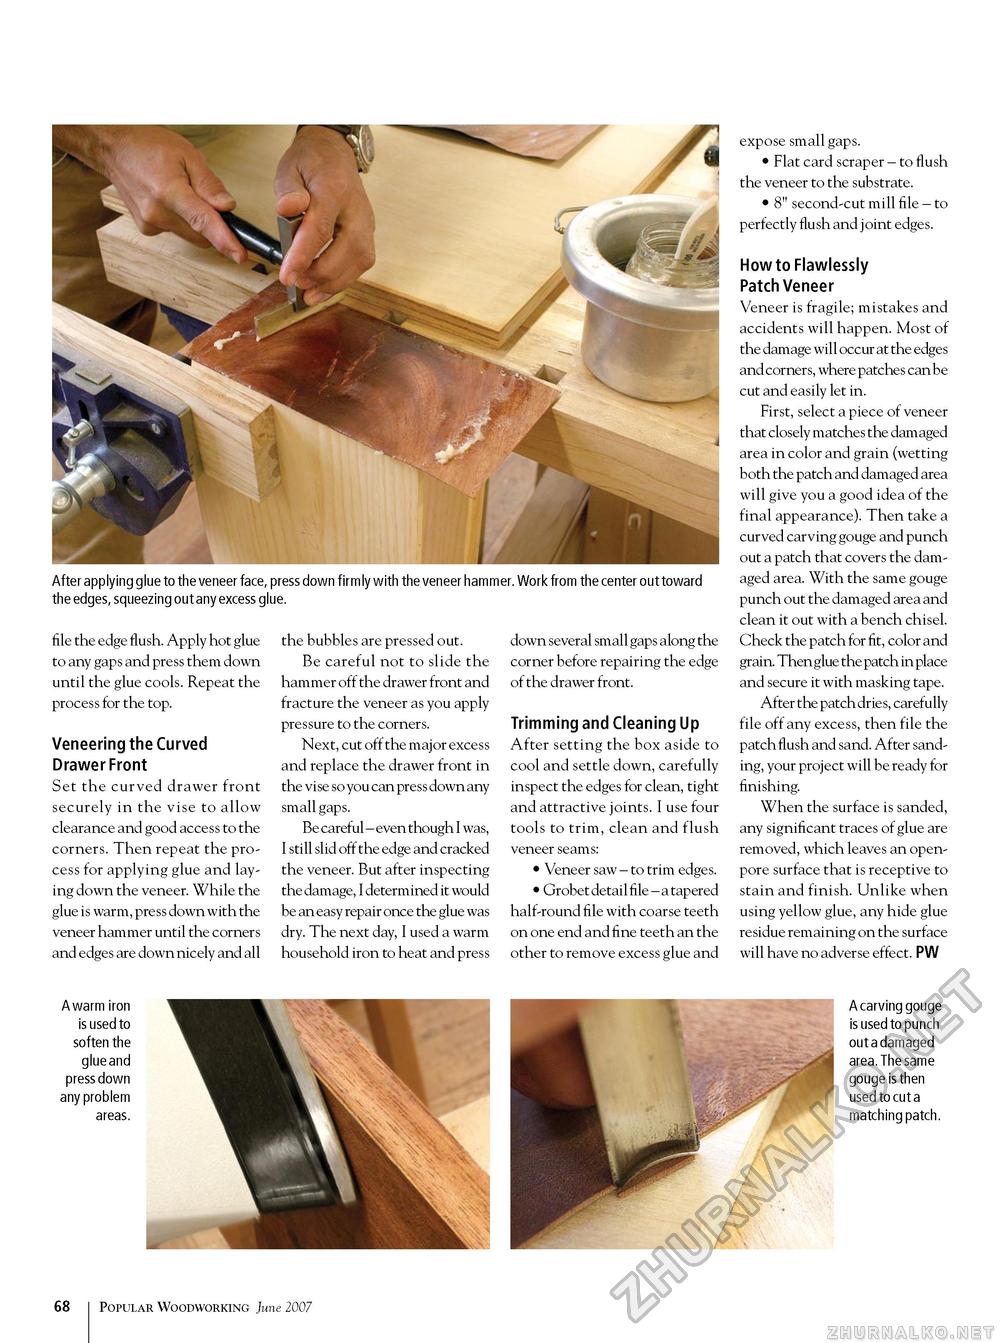
After applying glue to the veneer face, press down firmly with the veneer hammer. Work from the center out toward the edges, squeezing out any excess glue. file the edge flush. Apply hot glue to any gaps and press them down until the glue cools. Repeat the process for the top. Veneering the Curved Drawer Front Set the curved drawer front securely in the vise to allow clearance and good access to the corners. Then repeat the process for applying glue and laying down the veneer. While the glue is warm, press down with the veneer hammer until the corners and edges are down nicely and all the bubbles are pressed out. Be careful not to slide the hammer off the drawer front and fracture the veneer as you apply pressure to the corners. Next, cut off the major excess and replace the drawer front in the vise so you can press down any small gaps. Be careful - even though I was, I still slid off the edge and cracked the veneer. But after inspecting the damage, I determined it would be an easy repair once the glue was dry. The next day, I used a warm household iron to heat and press down several small gaps along the corner before repairing the edge of the drawer front. Trimming and Cleaning Up After setting the box aside to cool and settle down, carefully inspect the edges for clean, tight and attractive joints. I use four tools to trim, clean and flush veneer seams: • Veneer saw - to trim edges. • Grobet detail file - a tapered half-round file with coarse teeth on one end and fine teeth an the other to remove excess glue and expose small gaps. • Flat card scraper - to flush the veneer to the substrate. • 8" second-cut mill file - to perfectly flush and joint edges. How to Flawlessly Patch Veneer Veneer is fragile; mistakes and accidents will happen. Most of the damage will occur at the edges and corners, where patches can be cut and easily let in. First, select a piece of veneer that closely matches the damaged area in color and grain (wetting both the patch and damaged area will give you a good idea of the final appearance). Then take a curved carving gouge and punch out a patch that covers the damaged area. With the same gouge punch out the damaged area and clean it out with a bench chisel. Check the patch for fit, color and grain. Then glue the patch in place and secure it with masking tape. After the patch dries, carefully file off any excess, then file the patch flush and sand. After sanding, your project will be ready for finishing. When the surface is sanded, any significant traces of glue are removed, which leaves an open-pore surface that is receptive to stain and finish. Unlike when using yellow glue, any hide glue residue remaining on the surface will have no adverse effect. PW A warm iron is used to soften the glue and press down any problem A carving gouge is used to punch out a damaged area. The same gouge is then used to cut a matching patch. areas. 10 Popular Woodworking June 2007 |


