Popular Woodworking 2007-08 № 163, страница 65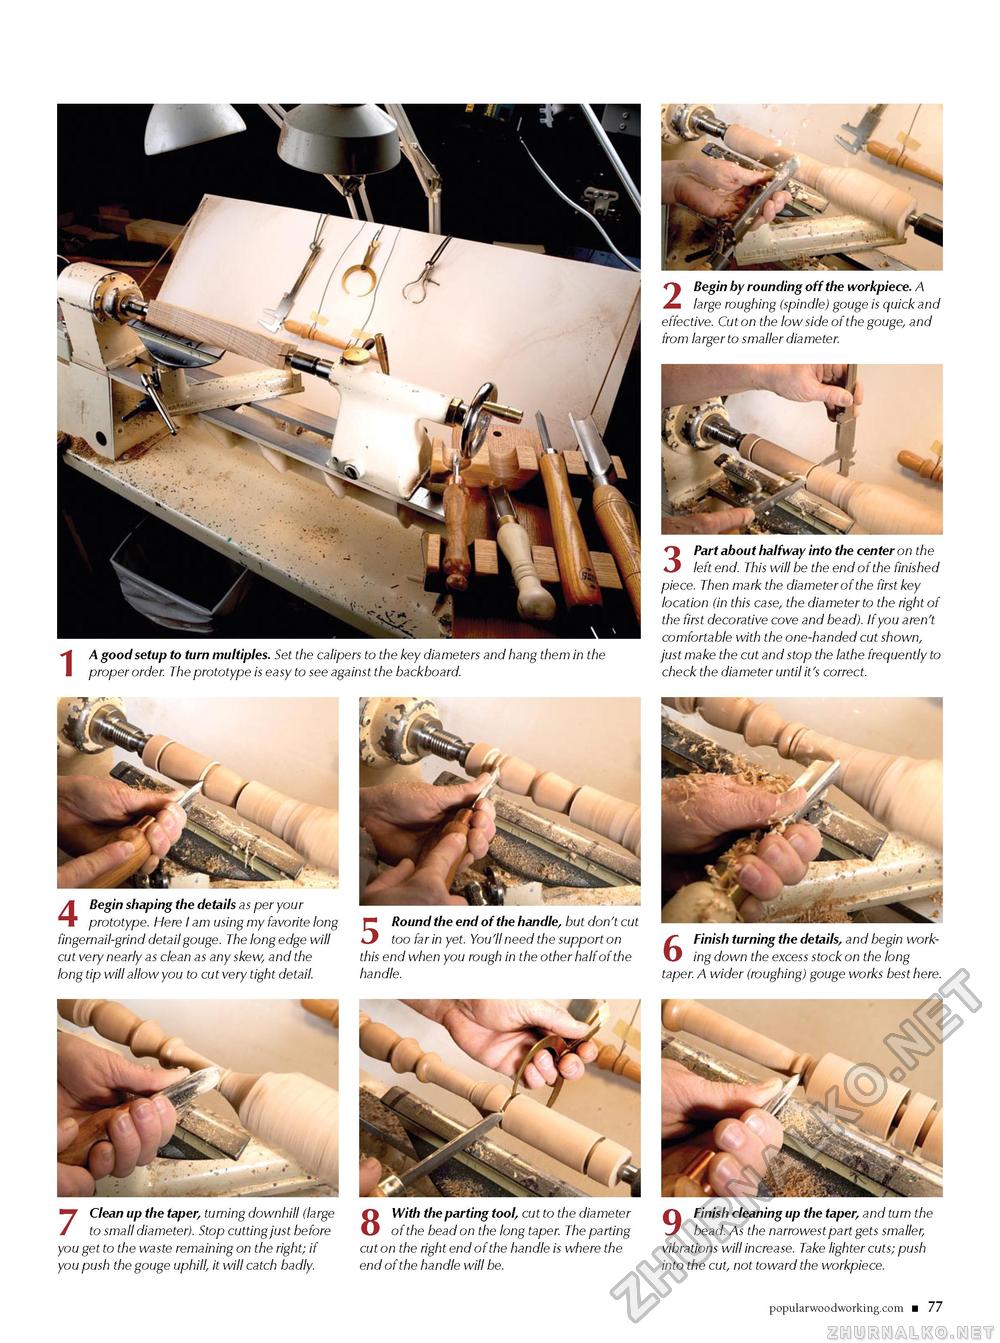
2 Begin by rounding off the workpiece. A large roughing (spindle) gouge is quick and effective. Cut on the low side of the gouge, and from larger to smaller diameter. 1 A good setup to turn multiples. Set the calipers to the key diameters and hang them in the proper order. The prototype is easy to see against the backboard. 3 Part about halfway into the center on the left end. This will be the end of the finished piece. Then mark the diameter of the first key location (in this case, the diameter to the right of the first decorative cove and bead). If you aren't comfortable with the one-handed cut shown, just make the cut and stop the lathe frequently to check the diameter until it's correct. 4 Begin shaping the details as per your prototype. Here I am using my favorite long fingernail-grind detail gouge. The long edge will cut very nearly as clean as any skew, and the long tip will allow you to cut very tight detail. 5 Round the end of the handle, but don't cut too far in yet. You'll need the support on this end when you rough in the other half of the handle. 6 Finish turning the details, and begin working down the excess stock on the long taper. A wider (roughing) gouge works best here. 7 Clean up the taper, turning downhill (large to small diameter). Stop cutting just before you get to the waste remaining on the right; if you push the gouge uphill, it will catch badly. 8 With the parting tool, cut to the diameter of the bead on the long taper. The parting cut on the right end of the handle is where the end of the handle will be. 9 Finish cleaning up the taper, and turn the bead. As the narrowest part gets smaller, vibrations will increase. Take lighter cuts; push into the cut, not toward the workpiece. popularwoodworking.com ■ 77 |


