Popular Woodworking 2007-08 № 163, страница 67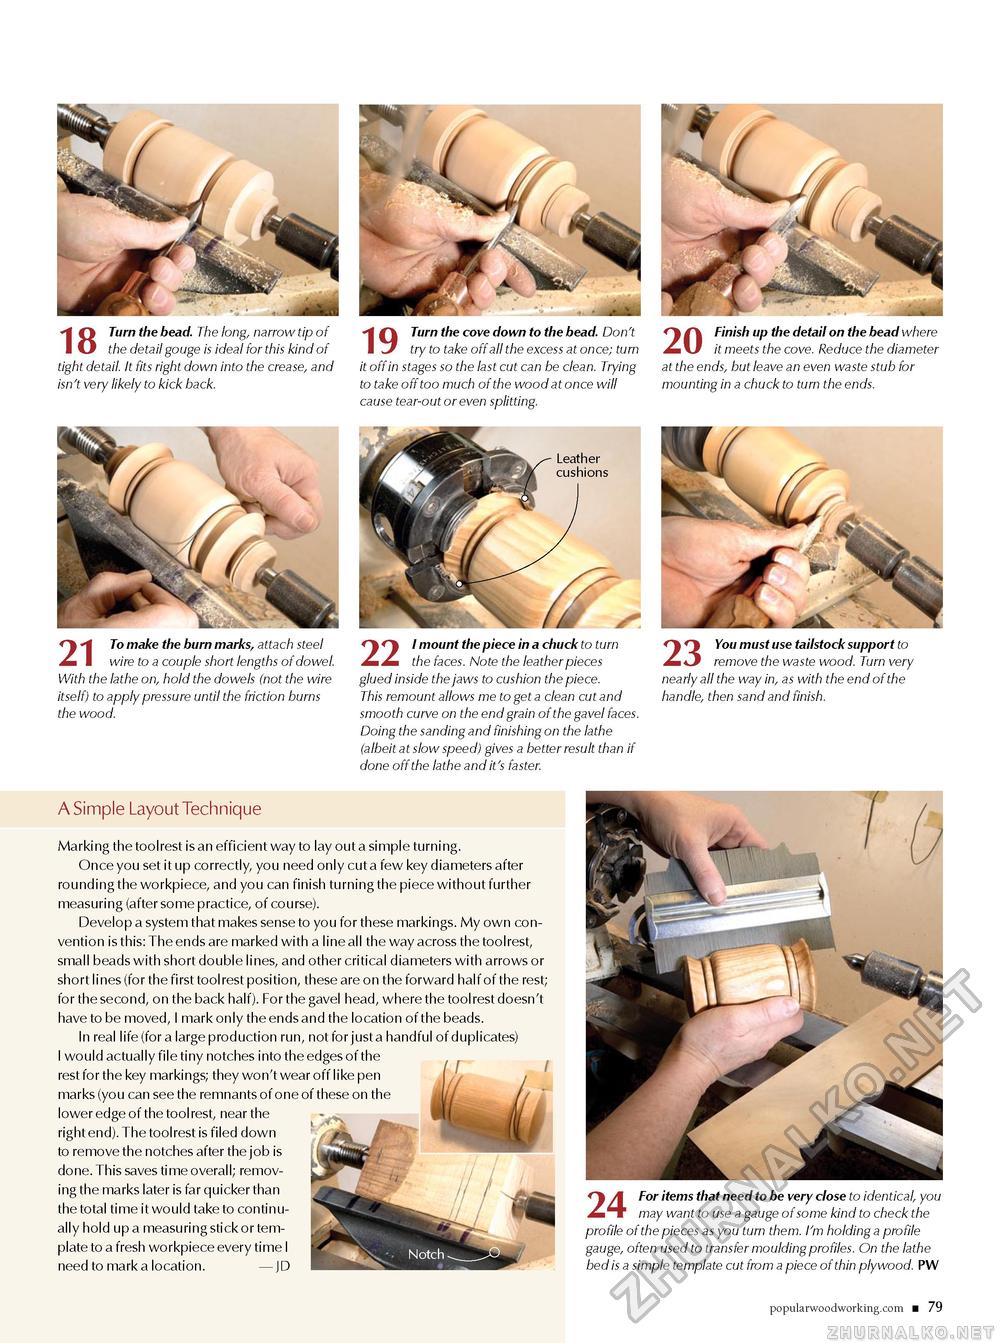
Turn the bead. The long, narrow tip of the detail gouge is ideal for this kind of tight detail. It fits right down into the crease, and isn't very likely to kick back. Turn the cove down to the bead. Don't try to take off all the excess at once; turn it off in stages so the last cut can be clean. Trying to take off too much of the wood at once will cause tear-out or even splitting. Leather cushions Finish up the detail on the bead where it meets the cove. Reduce the diameter at the ends, but leave an even waste stub for mounting in a chuck to turn the ends. To make the burn marks, attach steel wire to a couple short lengths of dowel. With the lathe on, hold the dowels (not the wire itself) to apply pressure until the friction burns the wood. I mount the piece in a chuck to turn the faces. Note the leather pieces glued inside the jaws to cushion the piece. This remount allows me to get a clean cut and smooth curve on the end grain of the gavel faces. Doing the sanding and finishing on the lathe (albeit at slow speed) gives a better result than if done off the lathe and it's faster. You must use tailstock support to remove the waste wood. Turn very nearly all the way in, as with the end of the handle, then sand and finish. A Simple Layout Technique Marking the toolrest is an efficient way to lay out a simple turning. once you set it up correctly, you need only cut a few key diameters after rounding the workpiece, and you can finish turning the piece without further measuring (after some practice, of course). Develop a system that makes sense to you for these markings. My own convention is this: The ends are marked with a line all the way across the toolrest, small beads with short double lines, and other critical diameters with arrows or short lines (for the first toolrest position, these are on the forward half of the rest; for the second, on the back half). For the gavel head, where the toolrest doesn't have to be moved, I mark only the ends and the location of the beads. In real life (for a large production run, not for just a handful of duplicates) I would actually file tiny notches into the edges of the rest for the key markings; they won't wear off like pen marks (you can see the remnants of one of these on the lower edge of the tool rest, near the right end). The toolrest is filed down to remove the notches after the job is done. This saves time overall; removing the marks later is far quicker than the total time it would take to continually hold up a measuring stick or template to a fresh workpiece every time I need to mark a location. — JD For items that need to be very close to identical, you may want to use a gauge of some kind to check the profile of the pieces as you turn them. I'm holding a profile gauge, often used to transfer moulding profiles. On the lathe bed is a simple template cut from a piece of thin plywood. PW popularwoodworking.com ■ 79 |


