Popular Woodworking 2007-08 № 163, страница 70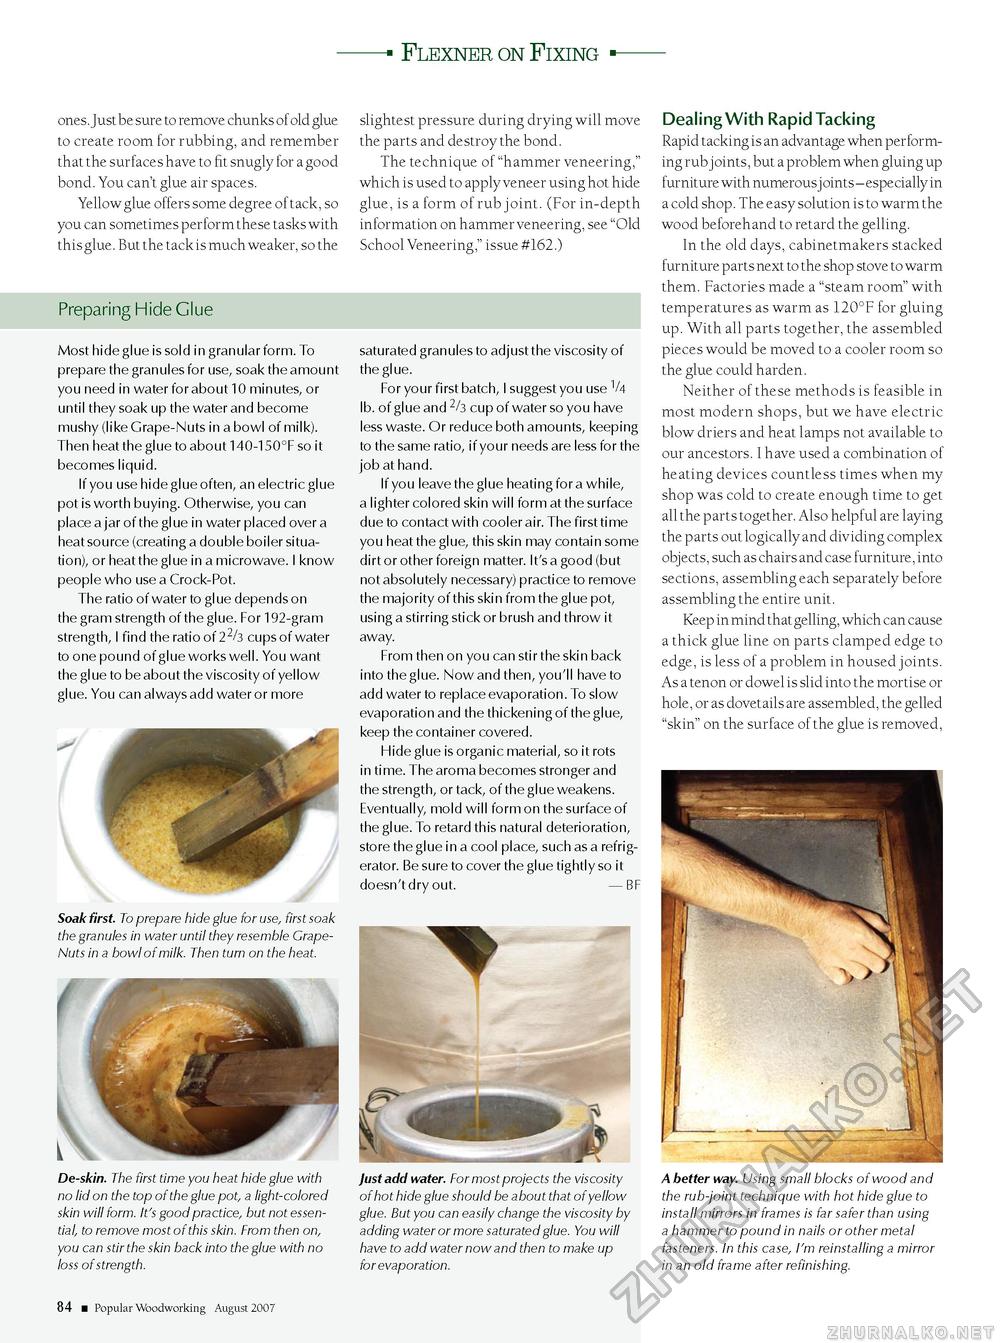
Flexner on Fixing ones. Just be sure to remove chunks of old glue to create room for rubbing, and remember that the surfaces have to fit snugly for a good bond. You can't glue air spaces. Yellow glue offers some degree of tack, so you can sometimes perform these tasks with this glue. But the tack is much weaker, so the slightest pressure during drying will move the parts and destroy the bond. The technique of "hammer veneering," which is used to apply veneer using hot hide glue, is a form of rub joint. (For in-depth information on hammer veneering, see "Old School Veneering," issue #162.) Preparing Hide Glue Most hide glue is sold in granular form. To prepare the granules for use, soak the amount you need in water for about 10 minutes, or until they soak up the water and become mushy (like Grape-Nuts in a bowl of milk). Then heat the glue to about 140-150°F so it becomes liquid. If you use hide glue often, an electric glue pot is worth buying. otherwise, you can place a jar of the glue in water placed over a heat source (creating a double boiler situation), or heat the glue in a microwave. I know people who use a Crock-Pot. The ratio of water to glue depends on the gram strength of the glue. For 192-gram strength, I find the ratio of 22/3 cups of water to one pound of glue works well. You want the gl ue to be about the viscosity of yellow glue. You can always add water or more Soak first. To prepare hide glue for use, first soak the granules in water until they resemble Crape-Nuts in a bowl of milk. Then turn on the heat. De-skin. The first time you heat hide glue with no lid on the top of the glue pot, a light-colored skin will form. It's good practice, but not essential, to remove most of this skin. From then on, you can stir the skin back into the glue with no loss of strength. saturated granules to adjust the viscosity of the glue. For your first batch, I suggest you use 1/4 lb. of glue and 2/3 cup of water so you have less waste. or reduce both amounts, keeping to the same ratio, if your needs are less for the job at hand. If you leave the glue heating for a while, a lighter colored skin will form at the surface due to contact with cooler air. The first time you heat the glue, this skin may contain some dirt or other foreign matter. It's a good (but not absolutely necessary) practice to remove the majority of this skin from the glue pot, using a stirring stick or brush and throw it away. From then on you can stir the skin back into the glue. Now and then, you'll have to add water to replace evaporation. To slow evaporation and the thickening of the glue, keep the container covered. Hide glue is organic material, so it rots in time. The aroma becomes stronger and the strength, or tack, of the glue weakens. Eventually, mold will form on the surface of the glue. To retard this natural deterioration, store the glue in a cool place, such as a refrigerator. Be sure to cover the glue tightly so it doesn't dry out. — BF Just add water. For most projects the viscosity of hot hide glue should be about that of yellow glue. But you can easily change the viscosity by adding water or more saturated glue. You will have to add water now and then to make up for evaporation. Dealing With Rapid Tacking Rapid tacking is an advantage when performing rub joints, but a problem when gluing up furniture with numerous j oints - especially in a cold shop. The e asy solution is to warm the wood beforehand to retard the gelling. In the old days, cabinetmakers stacked furniture parts next to the shop stove to warm them. Factories made a "steam room" with temperatures as warm as 120°F for gluing up. With all parts together, the assembled pieces would be moved to a cooler room so the glue could harden. Neither of these methods is feasible in most modern shops, but we have electric blow driers and heat lamps not available to our ancestors. I have used a combination of heating devices countless times when my shop was cold to create enough time to get all the parts together. Also helpful are laying the p arts out logically and dividing complex objects, such as chairs and case furniture, into sections, assembling each separately before assembling the entire unit. Keep in mind that gelling, which can cause a thick glue line on parts clamped edge to edge, is less of a problem in housed joints. As a tenon or dowel is slid into the mortise or hole, or as dovetails are assembled, the gelled "skin" on the surface of the glue is removed, A better way. Using small blocks of wood and the rub-joint technique with hot hide glue to install mirrors in frames is far safer than using a hammer to pound in nails or other metal fasteners. In this case, I'm reinstalling a mirror in an old frame after refinishing. 84 ■ Popular Woodworking August 2007 |


