Popular Woodworking 2007-10 № 164, страница 13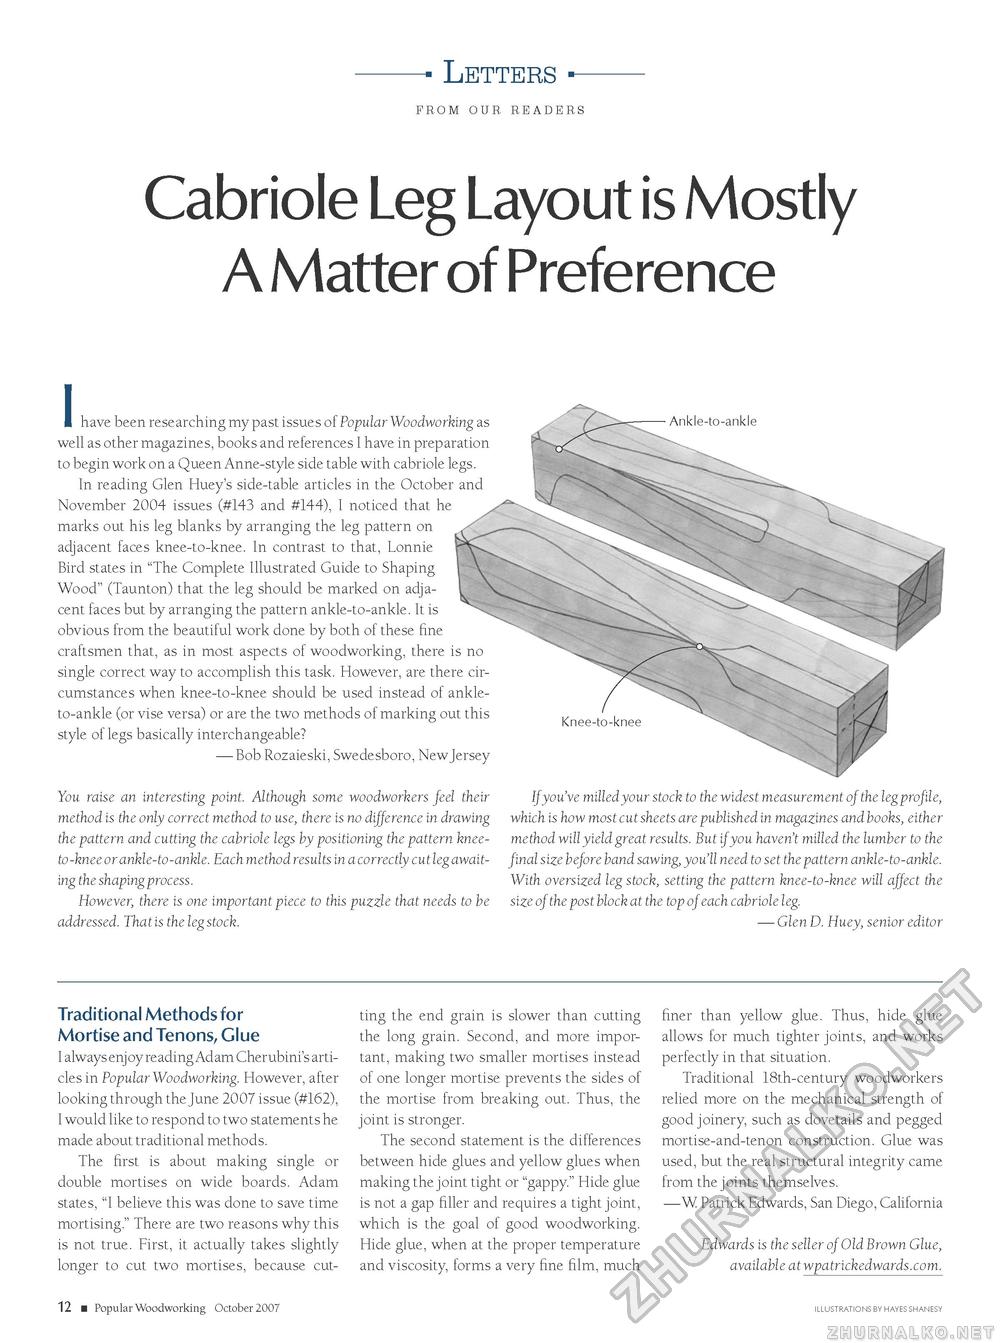
- Letters -from our readers Cabriole Leg Layout is Mostly A Matter of PreferenceI have been researching my past issues of Popular Woodworking as well as other magazines, books and references I have in preparation to begin work on a Queen Anne-style side table with cabriole legs. In reading Glen Huey's side-table articles in the October and November 2004 issues (#143 and #144), I noticed that he marks out his leg blanks by arranging the leg pattern on adjacent faces knee-to-knee. In contrast to that, Lonnie Bird states in "The Complete Illustrated Guide to Shaping Wood" (Taunton) that the leg should be marked on adjacent faces but by arranging the pattern ankle-to-ankle. It is obvious from the beautiful work done by both of these fine craftsmen that, as in most aspects of woodworking, there is no single correct way to accomplish this task. However, are there circumstances when knee-to-knee should be used instead of ankle-to-ankle (or vise versa) or are the two methods of marking out this style of legs basically interchangeable? — Bob Rozaieski, Swedesboro, New Jersey You raise an interesting point. Although some woodworkers feel their method is the only correct method to use, there is no difference in drawing the pattern and cutting the cabriole legs by positioning the pattern knee-to-knee or ankle-to-ankle. Each method results in a correctly cut leg awaiting the shaping process. However, there is one important piece to this puzzle that needs to be addressed. That is the leg stock. Ankle-to-ankle Knee-to-knee If you've milled your stock to the widest measurement of the leg profile, which is how most cut sheets are published in magazines and books, either method will yield great results. But if you haven't milled the lumber to the final size before band sawing, you'll need to set the pattern ankle-to-ankle. With oversized leg stock, setting the pattern knee-to-knee will affect the size of the post block at the top of each cabriole leg. — Glen D. Huey, senior editor Traditional Methods for Mortise and Tenons, Glue I always enjoy reading Adam Cherubini's articles in Popular Woodworking. However, after looking through the June 2007 issue (#162), I would like to respond to two statements he made about traditional methods. The first is about making single or double mortises on wide boards. Adam states, "I believe this was done to save time mortising." There are two reasons why this is not true. First, it actually takes slightly longer to cut two mortises, because cut- 12 ■ Popular Woodworking October 2007 ting the end grain is slower than cutting the long grain. Second, and more important, making two smaller mortises instead of one longer mortise prevents the sides of the mortise from breaking out. Thus, the joint is stronger. The second statement is the differences between hide glues and yellow glues when making the joint tight or "gappy." Hide glue is not a gap filler and requires a tight joint, which is the goal of good woodworking. Hide glue, when at the proper temperature and viscosity, forms a very fine film, much finer than yellow glue. Thus, hide glue allows for much tighter joints, and works perfectly in that situation. Traditional 18th-century woodworkers relied more on the mechanical strength of good joinery, such as dovetails and pegged mortise-and-tenon construction. Glue was used, but the real structural integrity came from the joints themselves. —W Patrick Edwards, San Diego, California Edwards is the seller of Old Brown Glue, available at wpatrickedwards.com. ILLUSTRATIONS BY HAYES SHANESY |


