Popular Woodworking 2007-10 № 164, страница 22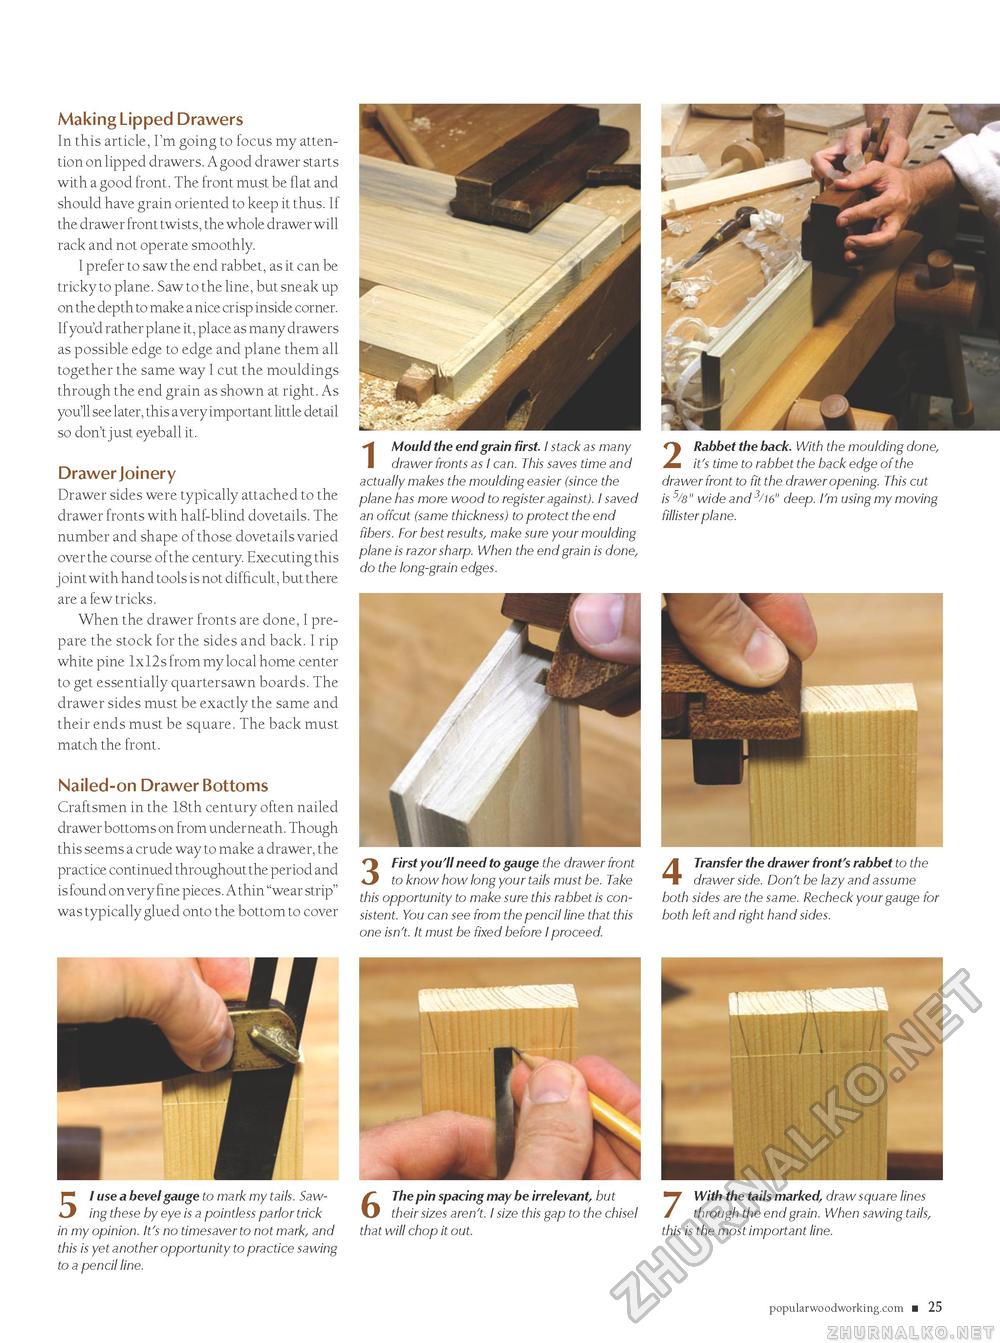
Making Lipped Drawers In this article, I'm going to focus my attention on lipped drawers. A good drawer starts with a good front. The front must be flat and should have grain oriented to keep it thus. If the drawer front twists, the whole drawer will rack and not operate smoothly. I prefer to saw the end rabbet, as it can be tricky to plane. Saw to the line, but sneak up on the depth to make a nice crisp inside corner. If you'd rather plane it, place as many drawers as possible edge to edge and plane them all together the same way I cut the mouldings through the end grain as shown at right. As you'll see later, this a very important little detail so don't just eyeball it. Drawer Joinery Drawer sides were typically attached to the drawer fronts with half-blind dovetails. The number and shape of those dovetails varied over the course of the century. Executing this joint with hand tools is not difficult, but there are a few tricks. When the drawer fronts are done, I prepare the stock for the sides and back. I rip white pine 1x12s from my local home center to get essentially quartersawn boards. The drawer sides must be exactly the same and their ends must be square. The back must match the front. Nailed-on Drawer Bottoms Craftsmen in the 18th century often nailed drawer bottoms on from underneath. Though this seems a crude way to make a drawer, the practice continued throughout the period and is found on very fine pieces. A thin "wear strip" was typically glued onto the bottom to cover 1 Mould the end grain first. I stack as many drawer fronts as I can. This saves time and actually makes the moulding easier (since the plane has more wood to register against). I saved an offcut (same thickness) to protect the end fibers. For best results, make sure your moulding plane is razor sharp. When the end grain is done, do the long-grain edges. 2 Rabbet the back. With the moulding done, it's time to rabbet the back edge of the drawer front to fit the drawer opening. This cut is 5/8" wide and3/16" deep. I'm using my moving fillister plane. 3 First you'll need to gauge the drawer front to know how long your tails must be. Take this opportunity to make sure this rabbet is consistent. You can see from the pencil line that this one isn't. It must be fixed before I proceed. 4 Transfer the drawer front's rabbet to the drawer side. Don't be lazy and assume both sides are the same. Recheck your gauge for both left and right hand sides. 51 use a bevel gauge to mark my tails. Sawing these by eye is a pointless parlor trick in my opinion. It's no timesaver to not mark, and this is yet another opportunity to practice sawing to a pencil line. 6 The pin spacing may be irrelevant, but their sizes aren't. I size this gap to the chisel that will chop it out. 7 With the tails marked, draw square lines through the end grain. When sawing tails, this is the most important line. popularwoodworking.com ■ 25 CIRCLE #152 ON FREE INFORMATION CARD. |


