Popular Woodworking 2007-12 № 166, страница 21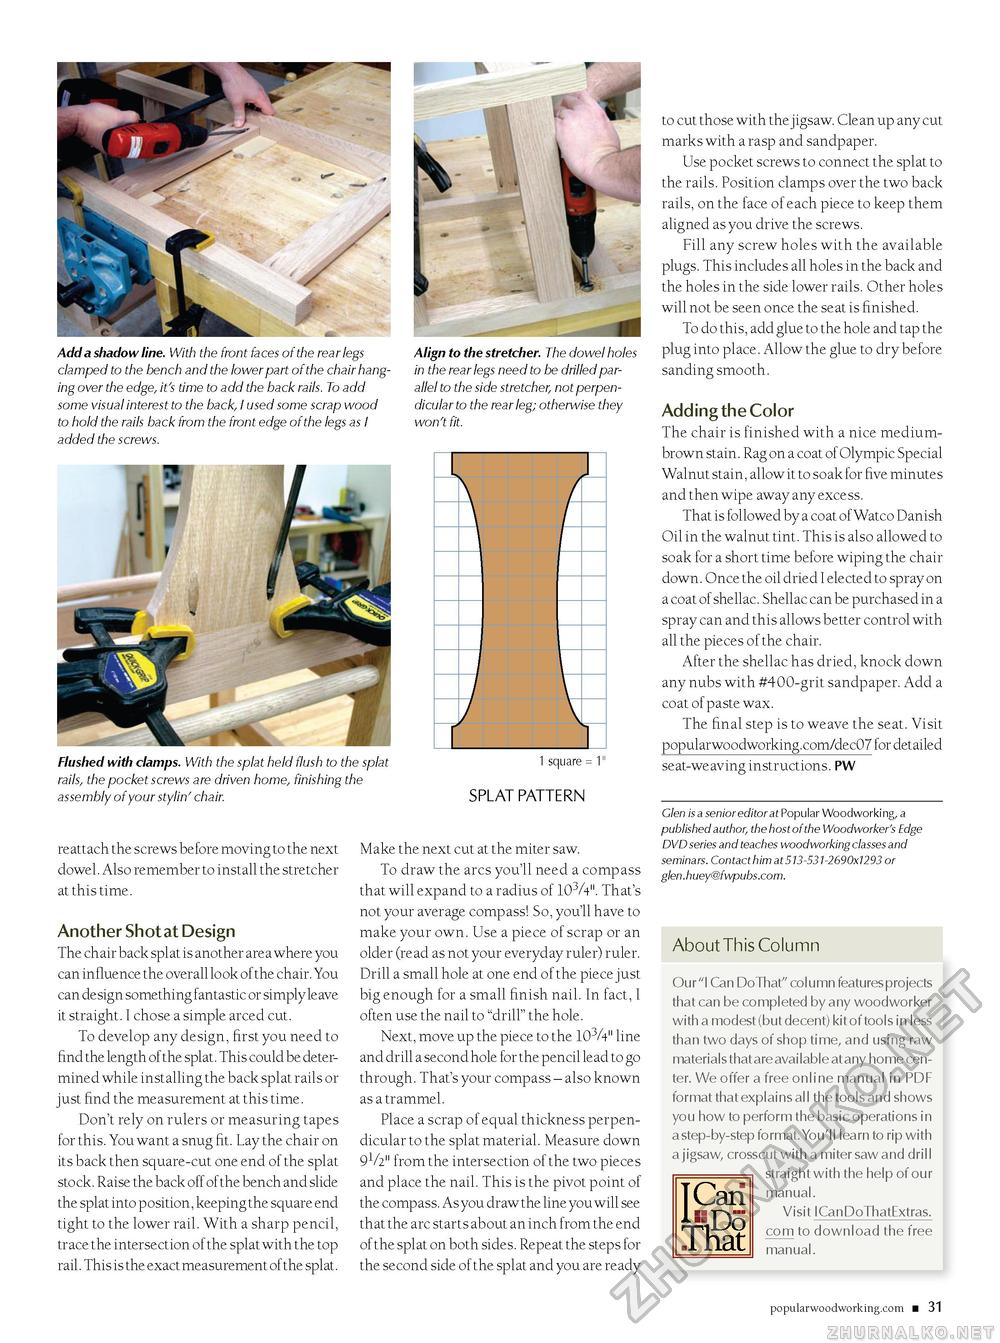
T1 JS- reattach the screws before moving to the next dowel. Also remember to install the stretcher at this time. Another Shot at Design The chair back splat is another area where you can influence the overall look of the chair. You can design something fantastic or simply leave it straight. I chose a simple arced cut. To develop any design, first you need to find the length of the splat. This could be determined while installing the back splat rails or just find the measurement at this time. Don't rely on rulers or measuring tapes for this. You want a snug fit. Lay the chair on its back then square-cut one end of the splat stock. Raise the back off of the bench and slide the splat into position, keeping the square end tight to the lower rail. With a sharp pencil, trace the intersection of the splat with the top rail. This is the exact measurement of the splat. 1 square = 1" splat pattern Make the next cut at the miter saw. To draw the arcs you'll need a compass that will expand to a radius of 103A". That's not your average compass! So, you'll have to make your own. Use a piece of scrap or an older (read as not your everyday ruler) ruler. Drill a small hole at one end of the piece just big enough for a small finish nail. In fact, I often use the nail to "drill" the hole. Next, move up the piece to the 103A" line and drill a second hole for the pencil lead to go through. That's your compass - also known as a trammel. Place a scrap of equal thickness perpendicular to the splat material. Measure down 91/2" from the intersection of the two pieces and place the nail. This is the pivot point of the compass. As you draw the line you will see that the arc starts about an inch from the end of the splat on both sides. Repeat the steps for the second side of the splat and you are ready to cut those with the jigsaw. Clean up any cut marks with a rasp and sandpaper. Use pocket screws to connect the splat to the rails. Position clamps over the two back rails, on the face of each piece to keep them aligned as you drive the screws. Fill any screw holes with the available plugs. This includes all holes in the back and the holes in the side lower rails. Other holes will not be seen once the seat is finished. To do this, add glue to the hole and tap the plug into place. Allow the glue to dry before sanding smooth. Adding the Color The chair is finished with a nice medium-brown stain. Rag on a coat of Olympic Special Walnut stain, allow it to soak for five minutes and then wipe away any excess. That is followed by a coat of Watco Danish Oil in the walnut tint. This is also allowed to soak for a short time before wiping the chair down. Once the oil dried I elected to spray on a coat of shellac. Shellac can be purchased in a spray can and this allows better control with all the pieces of the chair. After the shellac has dried, knock down any nubs with #400-grit sandpaper. Add a coat of paste wax. The final step is to weave the seat. Visit popularwoodworking.com/dec07 for detailed seat-weaving instructions. PW Glen is a senior editor at Popular Woodworking, a published author, the host of the Woodworker's Edge DVD series and teaches woodworking classes and seminars. Contact him at 513-531-2690x1293 or glen.huey@fwpubs.com. About This Column Our "I Can DoThat" column features projects that can be completed by any woodworker with a modest (but decent) kit of tools in less than two days of shop time, and using raw materials that are available at any home center. We offer a free online manual in PDF format that explains all the tools and shows you how to perform the basic operations in a step-by-step format.You'll learn to rip with a jigsaw, crosscut with a miter saw and drill straight with the help of our manual. Visit I CanDoThatExtras. com to download the free manual. Add a shadow line. With the front faces of the rear legs clamped to the bench and the lower part of the chair hanging over the edge, it's time to add the back rails. To add some visual interest to the back, I used some scrap wood to hold the rails back from the front edge of the legs as I added the screws. Align to the stretcher. The dowel holes in the rear legs need to be drilled parallel to the side stretcher, not perpendicular to the rear leg; otherwise they won't fit. Flushed with clamps. With the splat held flush to the splat rails, the pocket screws are driven home, finishing the assembly of your stylin' chair. TCari JflDo That popularwoodworking.com ■ 31 |


