Popular Woodworking 2008-06 № 169, страница 27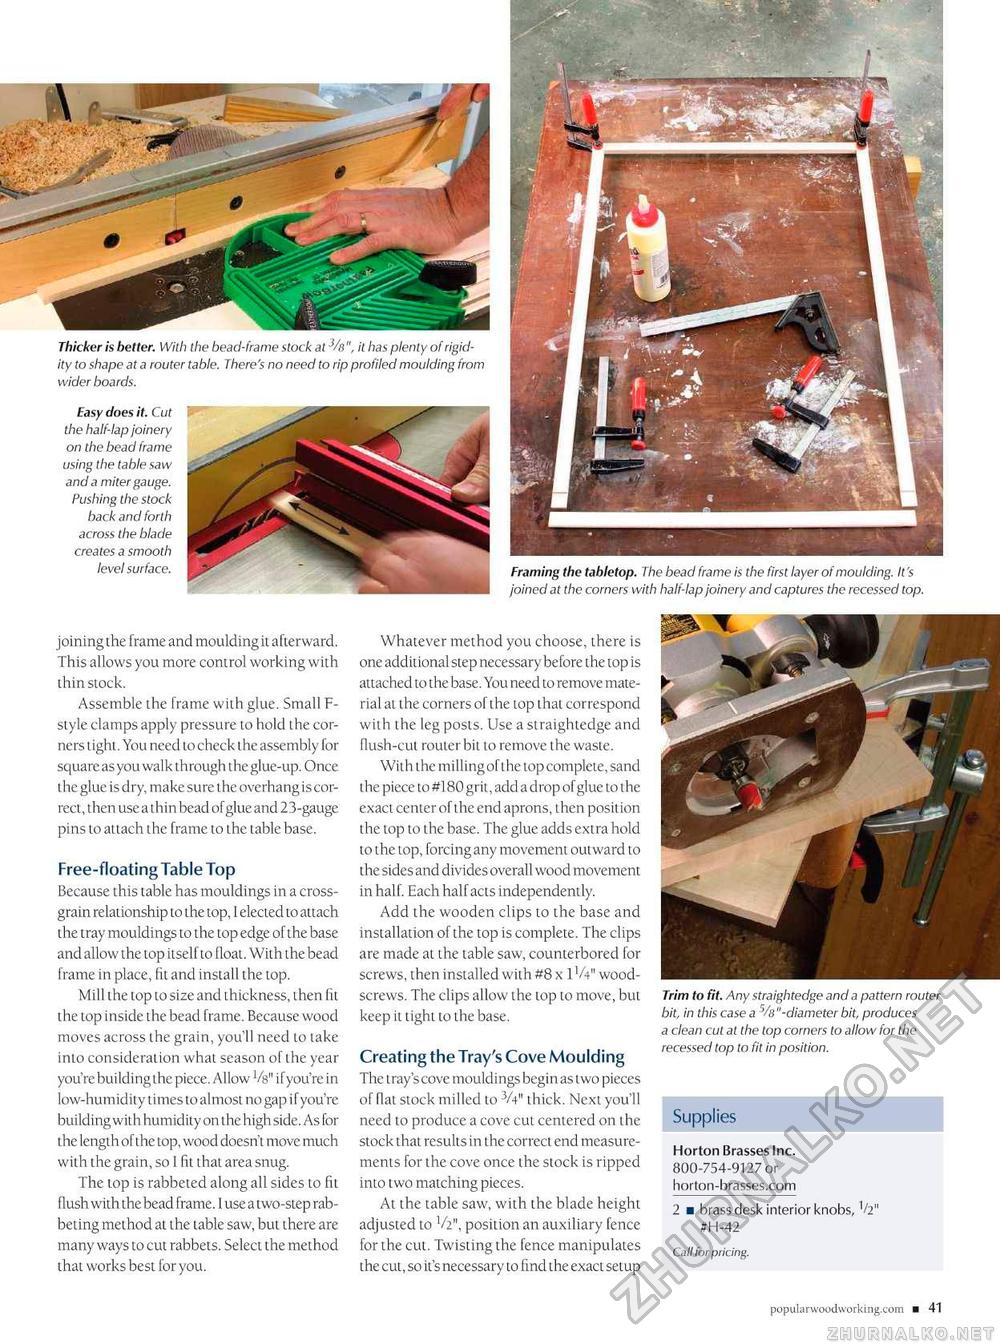
Thicker is belter. With the bead-frame stock at % ", it has plenty of rigidity to shape at a router table. There's no need to rip profiled moulding from wider boards. Easy does it. Cut the half-lap joinery on the bead frame using the table saw and a miter gauge. Pushing the stock back and forth across the blade creates a smooth level surface. joining the frame and moulding it afterward. This allows you more control working with thin stock. Assemble the frame with glue. Small F-style clamps apply pressure to hold the corners tight. You need to check the assembly for square as you walk through the glue-up. Once the glue is dry, make sure the overhang is correct, then use a thin bead of glue and 23-gauge pins to attach the frame to the table base. Free-floating Table Top Because this table has mouldings in a cross-grain relationship to the top, I elected to attach the tray mouldings to the top edge of the base and allow the top itself to float. With the bead frame in place, fit and install the top. Mill the top to size and thickness, then fit the top inside the bead frame. Because wood moves across the grain, you'll need to take into consideration what season of the year you're building the piece. Allow Vs" ifyou're in low-humidity times to almost no gap i f you're building with humidity on the highside. As for the length of the top, wood doesn't move much with the grain, so 1 fit that area snug. The top is rabbeted along all sides to fit flush with the bead frame. 1 use a two-step rabbeting method at the table saw, but there are many ways to cut rabbets. Select the method that works best for you. Framing the tabletop. The bead frame is the first layer of moulding. It's joined at the corners with half-lap joinery and captures the recessed top. Whatever method you choose, there is one additional step necessary before the top is attached to the base. You need to remove material at the corners of the top that correspond with the leg posts. Use a straightedge and flush-cut router bit to remove the waste. With the milling of the lop complete, sand the piece to#180 grit, add a drop of glue to the exact center of the end aprons, then position the top to the base. The glue adds extra hold to the top, forcing any movement outward to the sides and divides overall wood movement in half. Each half acts independently. Add the wooden clips to the base and installation of the top is complete. The clips are made at the table saw, counterbored for screws, then installed with #8x1 'A" wood-screws. The clips allow the top to move, but keep it tight to the base. Creating the Tray's Cove Moulding The tray's cove mouldings begin as two pieces of flat stock milled to 3A" thick. Next you'll need to produce a cove cut centered on the stock that results in the correct end measurements for the cove once the stock is ripped into two matching pieces. At the table saw, with the blade height adjusted to V2", position an auxiliary fence for the cut. Twisting the fence manipulates the cut, so it's necessary to find the exact setup Trim to fit. Any straightedge and a pattern rout bit, in this case a % "-diameter bit, produces a clean cut at the top corners to allow for the recessed top to fit in position. Supplies Horton Brasses Inc. 800-754-9127 or horton-brasses.com 2 ■ brass desk interior knobs, Vz" #H-42 |


