Popular Woodworking 2008-06 № 169, страница 25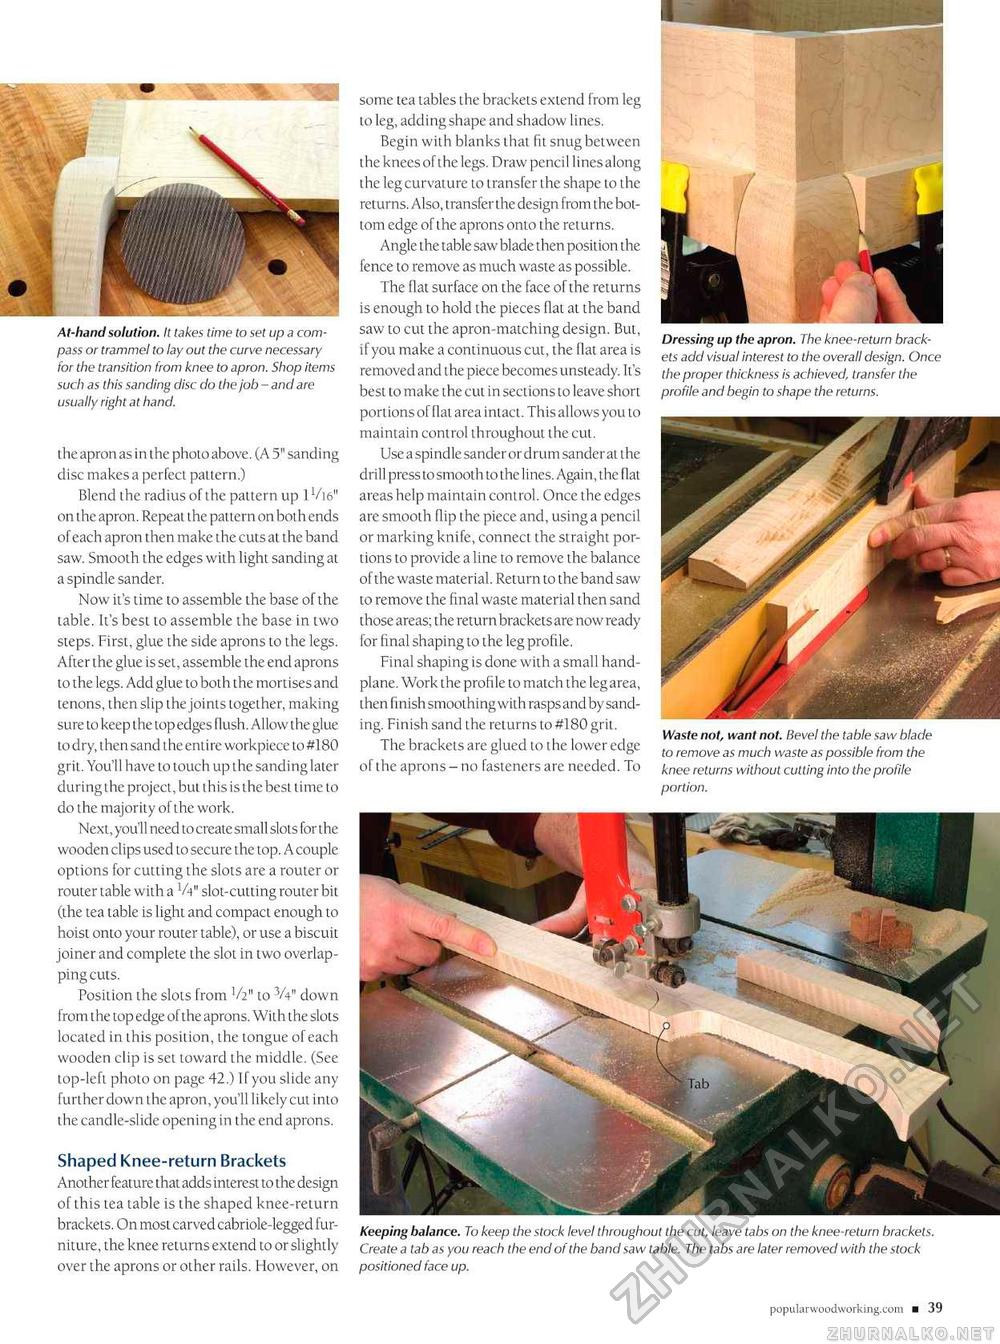
At-hand solution. It takes time to set up a compass or trammel to lay out the curve necessary for the transition from knee to apron. Shop items such as this sanding disc do the job - and are usually right at hand. the apron as in the photo above. (A 5" sanding disc makes a perfect pattern.) Blend the radius of the pattern up lVi6" on the apron. Repeal the pattern on both ends of each apron then make the cuts at the band saw. Smooth the edges with light sanding at a spindle sander. Now it's time to assemble the base of the table. It's best to assemble the base in two steps. First, glue the side aprons to the legs. After the glue is set, assemble the end aprons to the legs. Add glue to both the mortises and tenons, then slip the joints together, making sure to keep the top edges flush. Allow the glue todry, then sand the entire workpiece to #180 grit. You'll have to touch up the sanding later during the project, but this is the best time to do the majority of the work. Next, you'll need to create small slots for the wooden clips used to secure the top. A couple options for cutting the slots are a router or router table with a V4" slot-cutting router bit (the tea table is light and compact enough to hoist onto your router table), or use a biscuit joiner and complete the slot in two overlapping cuts. Position the slots from V211 to V4" down from the top edge of the aprons. With the slots located in this position, the tongue of each wooden clip is set toward the middle. (See top-left photo on page 42.) Ifyou slide any further down the apron, you'll likely cut into the candle-slide opening in the end aprons. Shaped Knee-return Brackets Another feature that adds interest to the design of this tea table is the shaped knee-return brackets. On most carved cabriole-legged furniture, the knee returns extend to or slightly over the aprons or other rails. However, on some tea tables the brackets extend from leg to leg, adding shape and shadow lines. Begin with blanks that fit snug between the knees of the legs. Draw pencil lines along the leg curvature to transfer the shape to the returns. Also, transfer the design from the bottom edge of the aprons onto the returns. Angle the table saw blade then position the fence to remove as much waste as possible. The flat surface on the face of the returns is enough to hold the pieces flat at the band saw to cut the apron-matching design. But, if you make a continuous cut, the flat area is removed and the piece becomes unsteady. It's best to make the cut in sections to leave short portions of flat area intact. This allows you to maintain control throughout the cut. Use a spi ndle sander or drum sander at the drill press to smooth to the lines. Again, the flat areas help maintain control. Once the edges are smooth flip the piece and, using a pencil or marking knife, connect the straight portions to provide a line to remove the balance of the waste material. Return to the band saw to remove the final waste material then sand those areas; the return bracketsare now ready for final shaping to the leg profile. Final shaping is done with a small hand-plane. Work the profile to match the leg area, then finish smoothing with raspsand by sanding. Finish sand the returns to #180 grit. The brackets are glued to the lower edge of the aprons - no fasteners are needed. To Waste not, want not. Bevel the table saw blade to remove as much waste as possible from the knee returns without cutting into the profile portion. Keeping balance. To keep the stock level throughout the cut, leave tabs on the knee-return brackets. Create a tab as you reach the end of the band saw table. The tabs are later removed with the stock positioned face up. |


