Popular Woodworking 2008-06 № 169, страница 36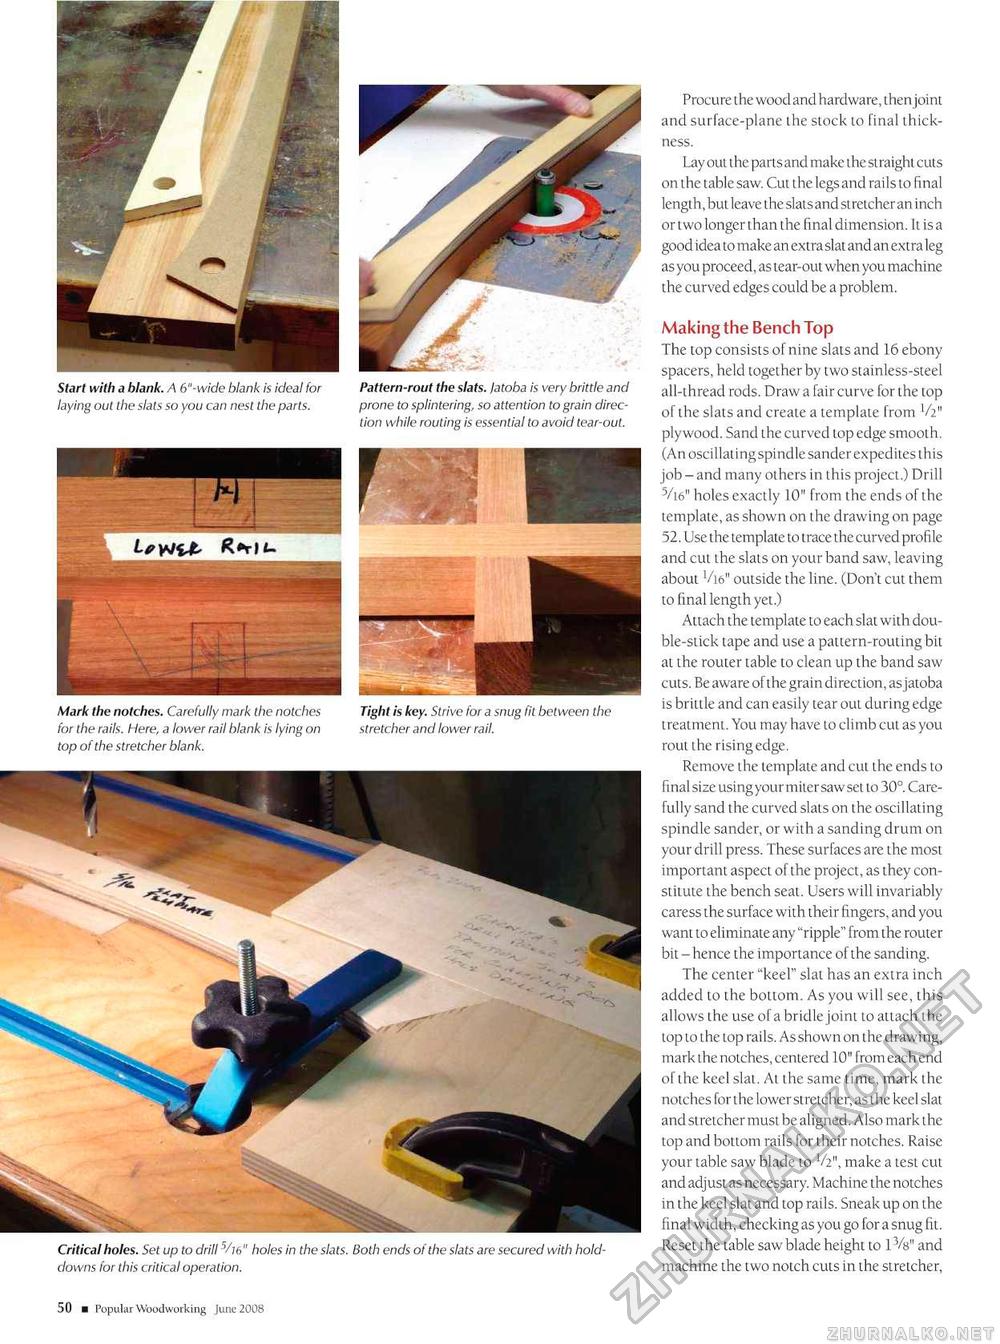
Mark the notches. Carefully mark the notches for the rails. Here, a lower rail blank is lying on top of the stretcher blank. Tight is key. Strive for a snug fit between the stretcher and lower rail. Start with a blank. A 6"-wide blank is ideal for laying out the slats so you can nest the parts. Pattern-rout the slats, latoba is very brittle and prone to splintering, so attention to grain direction while routing is essential to avoid tear-out. Critical holes. Set up to drill V/6" holes in the slats. Both ends of the slats are secured with hold-downs for this critical operation. Procure the wood and hardware, then joint and surface-plane the stock to final thickness. Lay out the parts and make the straight cuts on the table saw. Cut the legs and rails to final length, but leave the slats and stretcher an inch or two longer than the final dimension. It is a good idea to make an extra slat and an extra leg as you proceed, as tear-out when you machine the curved edges could be a problem. Making the Bench Top The top consists of nine slats and 16 ebony spacers, held together by two stainless-steel all-thread rods. Draw a fair curve for the top ofthe slats and create a template from V211 plywood. Sand the curved lop edge smooth. (An oscillating spindle sander expedites this job-and many others in this project.) Drill V:i6" holes exactly 10" from the ends of the template, as shown on the drawing on page 52. Use the template to trace the curved profile and cut the slats on your band saw, leaving about Vi6" outside the line. (Don't cut them to final length yet.) Attach the template to each slat with double-stick tape and use a pattern-routing bit at the router table to clean up the band saw cuts. Be aware ofthe grain direction, as jatoba is brittle and can easily tear out during edge treatment. You may have to climb cut as you rout the rising edge. Remove the template and cut the ends to final size using your miter saw set to 30°. Carefully sand the curved slats on the oscillating spindle sander, or with a sanding drum on your drill press. These surfaces are the most important aspect ofthe project, as they constitute the bench seat. Users will invariably caress the surface with their fingers, and you want to eliminate any "ripple" from the router bit - hence the importance of the sanding. The center "keel" slat has an extra inch added to the bottom. As you will see, this allows the use of a bridle joint to attach the top to the top rails. Asshown on the drawing, mark the notches, centered 10" from each end ofthe keel slat. At the same time, mark the notches for the lower stretcher, as the keel slat and stretcher must be aligned. Also mark the top and bottom rails for their notches. Raise your table saw blade to V21', make a test cut and adjust as necessary. Machine the notches in the keel slat and top rails. Sneak up on the final width, checking as you go for a snug fit. Reset the table saw blade height to 1 Vs" and machine the two notch cuts in the stretcher, 12 ■ Popular Woodworking June 2008 |


