Popular Woodworking 2008-08 № 170, страница 10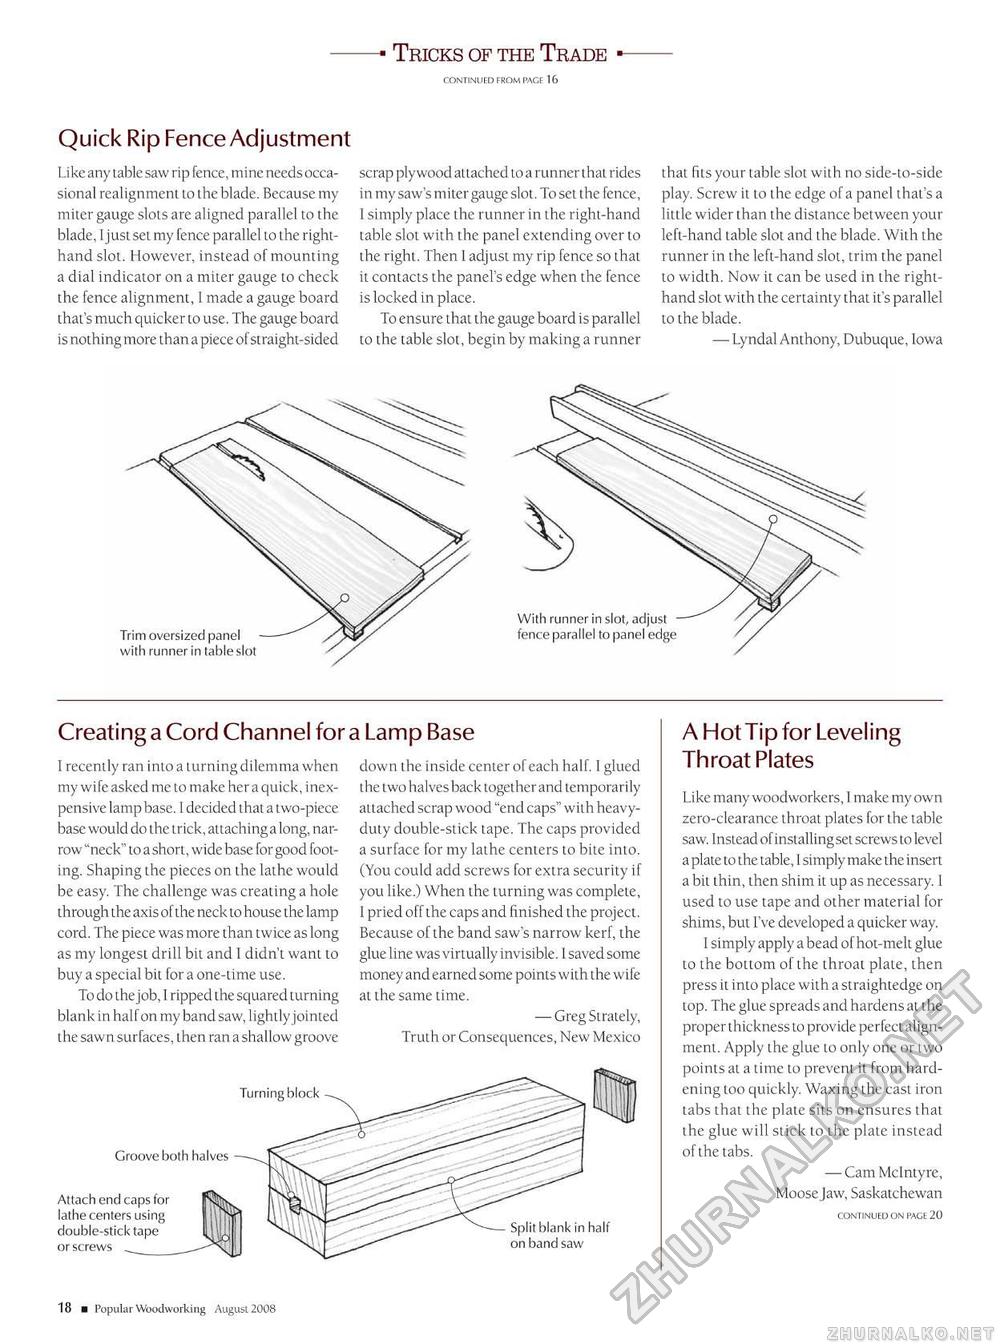
■ Tricks of the Trade ■ Quick Rip Fence Adjustment Like any table saw rip fence, mine needs occasional realignment to the blade. Because my miter gauge slots are aligned parallel to the blade, I just set my fence parallel to the right-hand slot. However, instead of mounting a dial indicator on a miter gauge to check the fence alignment, I made a gauge board that's much quicker to use. The gauge board is nothing more than a piece of straight-sided scrap plywood attached to a runner that rides in my saw's miter gauge slot. To set the fence, I simply place the runner in the right-hand table slot with the panel extending over to the right. Then I adjust my rip fence so that it contacts the panel's edge when the fence is locked in place. To ensure that the gauge board is parallel to the table slot, begin by making a runner that fits your table slot with no side-to-side play. Screw it to the edge of a panel that's a little wider than the distance between your left-hand table slot and the blade. With the runner in the left-hand slot, trim the panel to width. Now it can be used in the right-hand slot with the certainty that it's parallel to the blade. — Lyndal Anthony, Dubuque, Iowa Creating a Cord Channel for a Lamp Base I recently ran into a turning dilemma when my wife asked me to make her a quick, inexpensive lamp base. I decided that a two-piece base would do the trick, attaching a long, narrow "neck" to a short, wide base for good footing. Shaping the pieces on the lathe would be easy. The challenge was creating a hole through the axis of the neck to house the lamp cord. The piece was more than twice as long as my longest drill bit and I didn't want to buy a special bit for a one-time use. To do the job, I ripped the squared turning blank in half on my band saw, lightly jointed the sawn surfaces, then ran a shallow groove down the inside center of each half. I glued the two halves back together and temporarily attached scrap wood "end caps" with heavy-duty double-stick tape. The caps provided a surface for my lathe centers to bite into. (You could add screws for extra security if you like.) When the turning was complete, 1 pried off the caps and finished the project. Because of the band saw's narrow kerf, the glue line was virtually invisible. I saved some money and earned some points with the wife at the same time. — GregStrately, Truth or Consequences, New Mexico A Hot Tip for Leveling Throat Plates Like many woodworkers, 1 make my own zero-clearance throat plates for the table saw. Instead of installing set screws to level a plate to the table, 1 simply make the insert a bit thin, then shim it up as necessary. I used to use tape and other material for shims, but I've developed a quicker way. I simply apply a bead of hot-melt glue to the bottom of the throat plate, then press it into place with a straightedge on top. The glue spreads and hardens at the proper thickness to provide perfect alignment. Apply the glue to only one or two points at a time to prevent it from hardening loo quickly. Waxing the cast iron tabs that the plate sits on ensures that the glue will stick to the plate instead of the tabs. — Cam Mclntyre, Moose Jaw, Saskatchewan Turning block Attach end caps for lathe centers using double-stick tape Split blank in half 18 ■ Popular Woodworking August 2008 |


