Popular Woodworking 2008-08 № 170, страница 25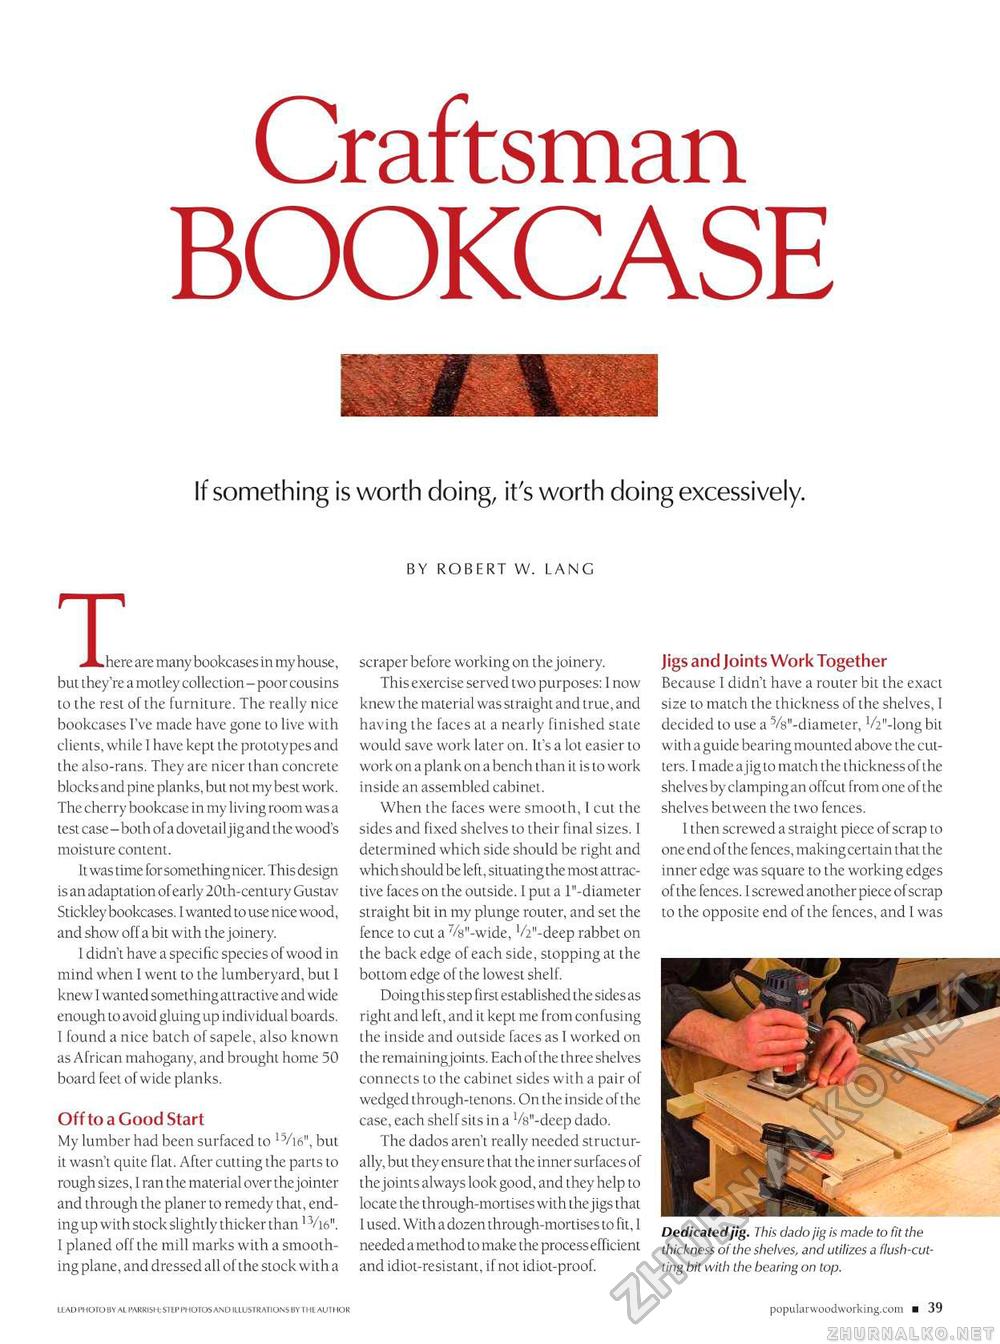
CraftsmanBOOKCASEIf something is worth doing, it's worth doing excessively. TJLhere; L here are many bookcases in my house, but they're a motley collection - poor cousins to the rest of the furniture. The really nice bookcases I've made have gone to live with clients, while I have kept the prototypes and the also-rans. They are nicer than concrete blocks and pine planks, but not my best work. The cherry bookcase in my living room was a >e - both of a dovetail j ig and the wood's It was time for something nicer. This design is an adaptation of early 20th-century Gustav Stickley bookcases. 1 wanted to use nice wood, and show off a bit with the joinery. I didn't have a specific species of wood in mind when I went to the lumberyard, but I knew I wanted something attractive and wide enough to avoid gluing up individual boards. I found a nice batch of sapele, also known as African mahogany, and brought home 50 board feet of wide planks. OfftoaGood Start My lumber had been surfaced to 15/t6", but it wasn't quite flat. After cutting the parts to rough sizes, I ran the material over the jointer and through the planer to remedy that, ending up with stock slightly thicker than13/16". 1 planed off the mill marks with a smoothing plane, and dressed all of the stock with a BY ROBERT W. LANG scraper before working on the joinery. This exercise served two purposes: I now knew the material was straight and true, and having the faces at a nearly finished state would save work later on. It's a lot easier to work on a plank on a bench than it is to work inside an assembled cabinet. When the faces were smooth, 1 cut the sides and fixed shelves to their final sizes. I determined which side should be right and which should be left, situating the most attractive faces on the outside. 1 put a l"-diameter straight bit in my plunge router, and set the fence to cut a 7/8"-wide, '/2"-deep rabbet on the back edge of each side, stopping at the bottom edge of the lowest shelf. Doing this step first established the sides as right and left, and it kept me from confusing the inside and outside faces as I worked on the remainingjoints. Each of the three shelves connects to the cabinet sides with a pair of wedged through-tenons. On the inside of the case, each shelf sits in a Vs'-deep dado. The dados aren't really needed structurally, but they ensure that the inner surfaces of the joints always look good, and they help to locate the through-mortises with the jigs that I used. With a dozen through-mortises to fit, 1 needed a method to make the process efficient and idiot-resistant, if not idiot-proof. Jigs and Joints Work Together Because I didn't have a router bit the exact size to match the thickness of the shelves, I decided to use a Vs'-diameter, V2"-longbit with a guide bearing mounted above the cutters. I made ajig to match the thickness of the shelves by clamping an offcut from one of the shelves between the two fences. 1 then screwed a straight piece of scrap to one end of the fences, making certain that the inner edge was square to the working edges of the fences. I screwed another piece of scrap to the opposite end of the fences, and I was Dedicated jig. This dado jig is made to fit the thickness of the shelves, and utilizes a flush-cut-ting bit with the bearing on top. |


