Popular Woodworking 2008-11 № 172, страница 22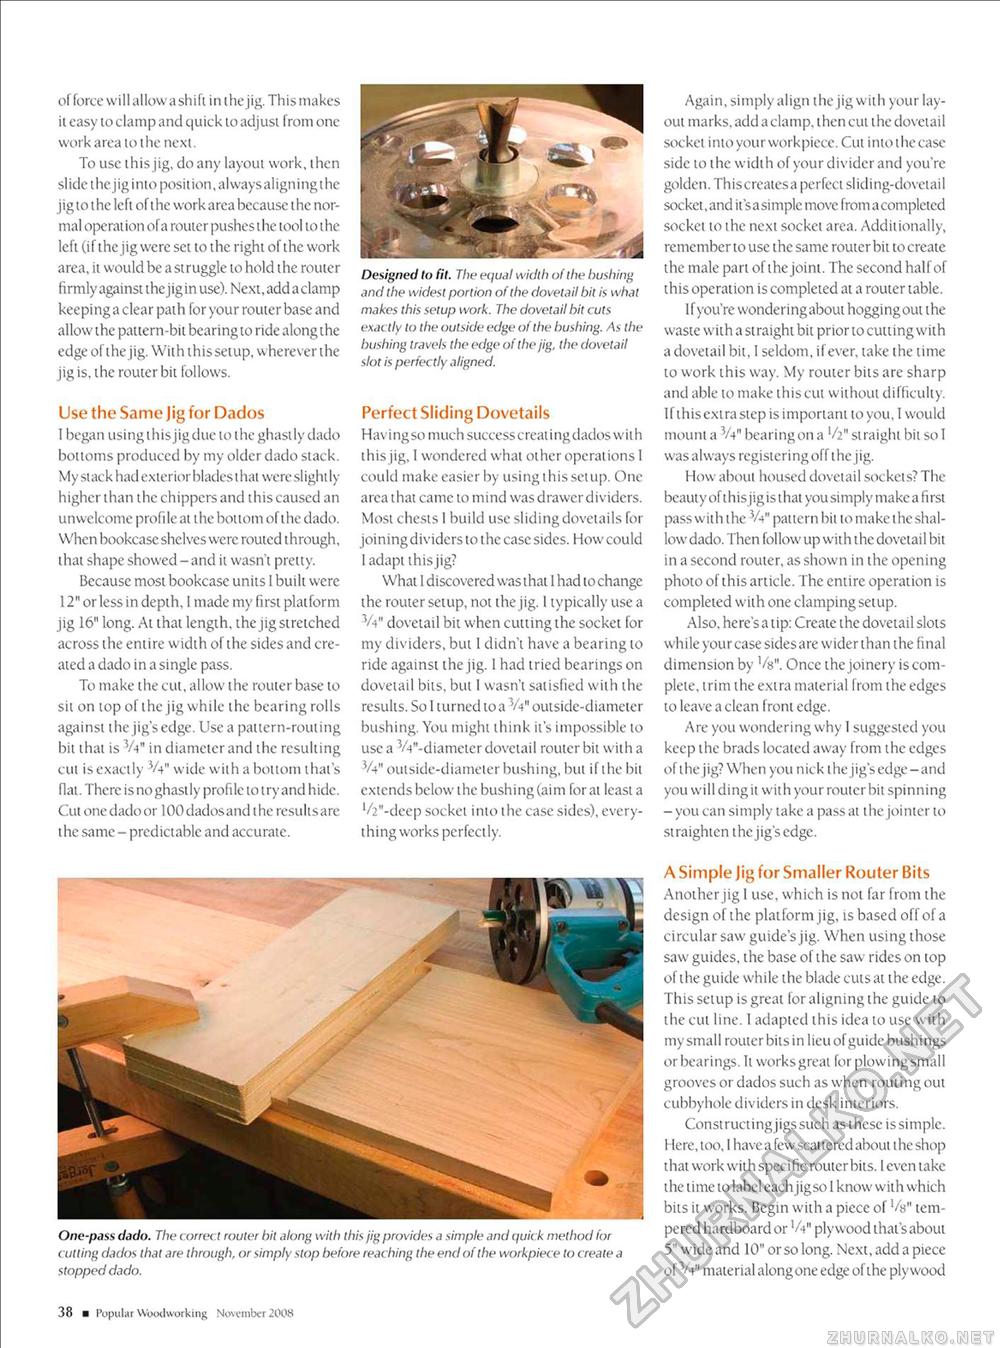
of force will al low a sh i fi i n i he j ig. Th is makes ii easy to clamp and quick to adjust from one work area to the next. To use this jig, do any layout work, then slide thejiginto position, alwaysaligningthe jig to the left of the work area because the normal operation of a router pushes the tool to the left (if the jig were set to the right of the work area, it would be a struggle to hold the router firmly against the jig in use). Next, add a clamp keeping a clear path for your router base and allow the pattern-bit bearing to ride along the edge of the jig. With thissetup, whereverthe jig is, the router bit follows. Use the Same Jig for Dados 1 began using this jig due to the ghastly dado bottoms produced by my older dado stack. My stack had exterior blades i hat were slight ly higher than the chippcrs and this caused an unwelcome profile at the bottom of the dado. When bookcase shelves were routed through, that shape showed - and it wasn't pretty. Because most bookcase units 1 built were 12" or less in depth. I made my first platform jig 16" long. At that length, the jig stretched across the entire width of the sides and created a dado in a single pass. To make the cut, allow the router base to sit on top of the jig while the bearing rolls against the jig's edge. Use a pattern-routing bit that is VV' in diameter and the resulting cut is exactly W' wide with a bottom that's flat. There is no ghastly profile to try and hide. Cut one dado or 100 dados and i he results are i he same - predictable and accurate. Designed to fit. The equal width of the hushing and the widest portion of the dovetail bit is what makes this setup work. The dovetail bit cuts exactly to the outside edge of the bushing. /\s the bushing travels the edge of the jig, the dovetail slot is perfectly aligned. Perfect Sliding Dovetails Havingso much success creatingdadoswilh this jig, 1 wondered what other operations I could make easier by using this setup. One area that came to mind was drawer dividers. Most chests 1 build use sliding dovetails for joining dividers to the case sides. How could 1 adapt this jig? What 1 discovered was that 1 had to change the router setup, not thejig. I typically use a W' dovetail bit when cutting the socket for my dividers, but 1 didn't have a bearing to ride against the jig. i had tried bearings on dovetail bits, but I wasn't satisfied with the results. So 1 turned to a V-t" outsicle-diameter bushing. You might think it's impossible to use a V4"-diameter dovetail router bit with a W' outside-diameter bushing, but if the bit extends below the bushing (aim for at least a l/2"-deep socket into the case sides), everything works perfectly. One-pass dado. The correct router bit along with this jig provides a simple and quick method for cutting dados that are through, or simply slop before reaching the end of the workpiece to create a stopped dado. Again, simply align thejig with your layout marks, add a clamp, then cut the dovetail socket into your workpiece. Cut intothecase side to the width of your divider and you're golden. Thiscreatesa perfect sliding-dovctail socket,and it'sasimple move from a completed socket to the next socket area. Additionally, remember to use the same router bit to create the male part of the joint. The second half of this operation is completed at a router table. If you're wonderingabout hogging out the waste with a straight bit prior to cutting with a dovetail bit, 1 seldom, if ever, take the time to work this way. My router bits are sharp and able to make this cut without difficulty. If thisextra step is important to you, I would mount a V4'1 bearing on a straight bit so I was always registeri ng off 1 he jig. How about housed dovetail sockets? The beaut y of this jig is that you si mply make a fi rst passwith the W' pattern bit to make the shallow dado. Then follow up with the dovetail bit in a second router, as shown in the opening photo of this article. The entire operation is completed with one clamping setup. Also, here's a tip: Create the dovetail slots while your case sides are wider than the final dimension by Vg". Once the joinery is complete, trim the extra material from the edges to leave a clean front edge. Are you wondering why I suggested you keep the brads located away from the edges of the jig? When you nick the jig's edge-and you will dingit with your routerbit spinning - you can simply take a pass at the jointer to straighten the jig's edge. A Simple Jig for Smaller Router Bits Another jig I use, which is not far from the design of the platform jig, is based off of a circular saw guide's jig. When using those saw guides, the base of the saw rides on top of the guide while the blade cuts at the edge. This setup is great for aligning the guide to the cut line. 1 adapted this idea to use with my small router bits in lieu of guide bushings or bearings. It works great for plowing small grooves or dados such as when routing out cubbyhole dividers in desk interiors. Constructing jigs such as these is simple. Here, too, I have a few scattered about the shop that work with specific router bits. I even take the time to label each jig so I know with which bits it works. Begin with a piece of l/g" tempered hardboard or 'A" plywood that's about 5" wide and 10" or so long. Next, add a piece of VV material along one edge of the plywood 38 ■ Popul ar Woodworking November 2008 |


