Popular Woodworking 2008-11 № 172, страница 24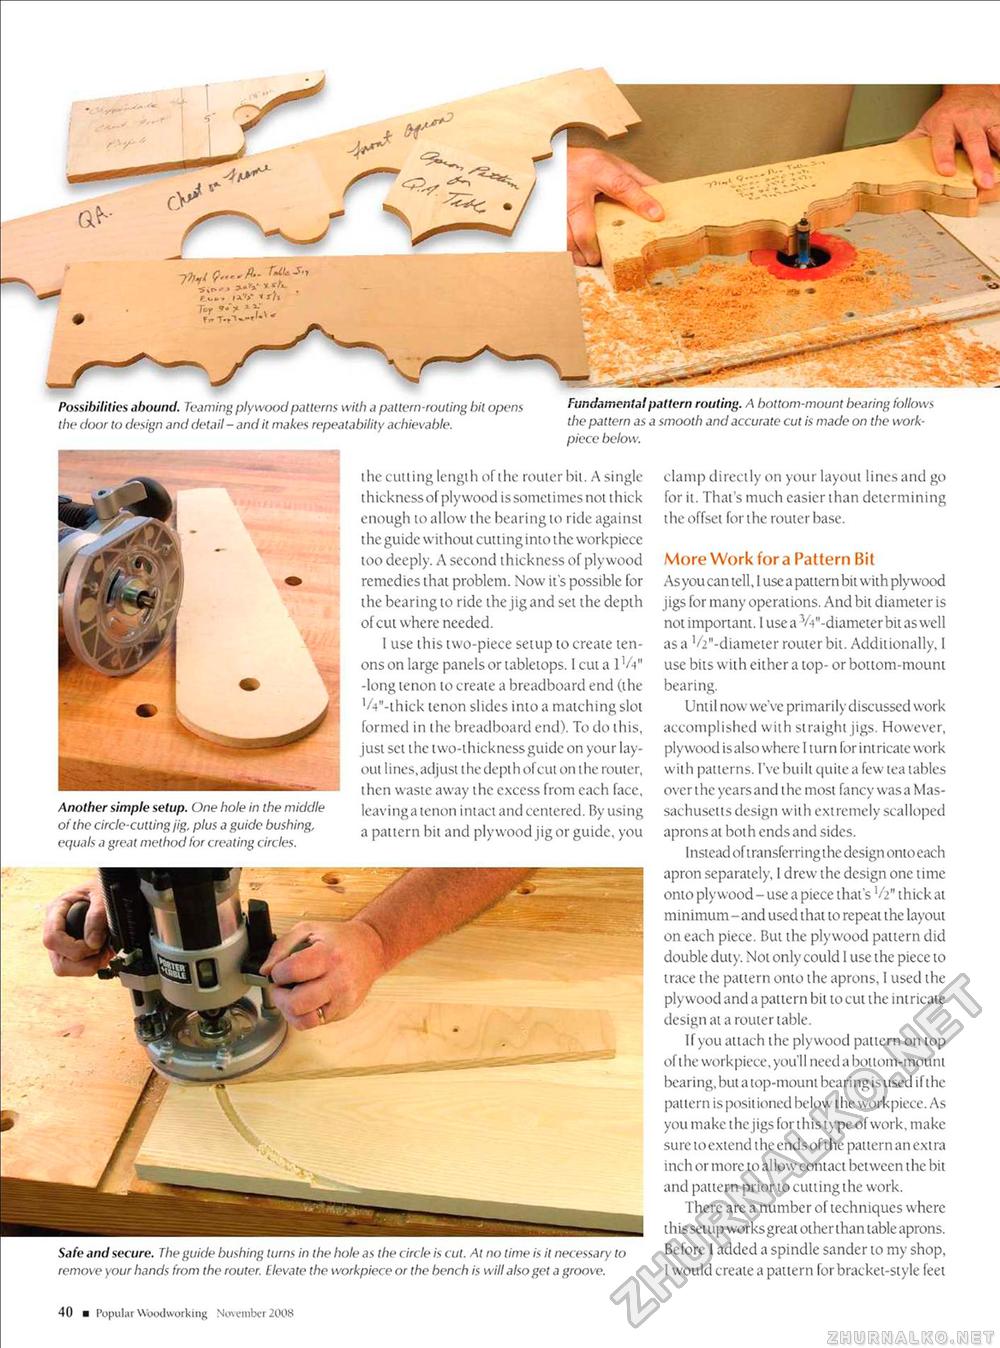
iiV <r/i Tor * y * Possibilities abound. Teaming plywood patterns with a pattern-routing bit opens the door to design and detail - and it makes repeatability achievable. Fundamental pattern routing. A bottom-mount bearing follows the pattern as a smooth and accurate cut is made on the work-piece below. Another simple setup. One hole in the middle of the circle-culling jig, plus a guide bushing, equals a great method for creating circles. the cutting length of the rouier bit. A single thickness of plywood is sometimes not thick enough to allow the bearing to ride against the guide without cuttinginto the workpiece too deeply. A second thickness of plywood remedies that problem. Now it's possible for the bearing to ride the jig and set the depth of cut where needed. I use this two-piece setup to create tenons on large panels or tabletops. I cut a 1 'A" -long tenon to create a breadboard end (the '/V'-thick tenon slides into a matching slot formed in the breadboard end). To do this, just set the two-thickness guide on your layout lines, adjust the depth of cut on the router, then waste away the excess from each face, leaving a tenon intact and centered. By using a pattern bit and plywood jig or guide, you Safe and secure. The guide bushing turns in the hole as the circle is cut. Al no lime is it necessary to remove your hands from the router. Elevate the workpiece or the bench is will also get a groove. clamp directly on your layout lines and go for it. Thai's much easier than determining ihe offset for the rouier base. More Work for a Pattern Bit As you can tell, 1 use a pattern bit with plywood jigs for many operations. And bit diameter is not important. I usea VV'-diameterbitaswell as a '//'-diameter rouier bit. Additionally, I use bits with either a top- or bottom-mouni bearing. Uniil now we've primarily discussed work accomplished with straight jigs. However, plywood is also where I lurn for intricate work with patterns. I've built quite a few tea tables over t he years and t he most fancy was a Massachusetts design with extremely scalloped aprons at both ends and sides. Instead of transfer ring the design onto each apron separately, I drew the design one time onto plywood - use a piece that's xh" thick at minimum - and used that to repeat the layout on each piece. But the plywood pattern did double duty. Not only could 1 use the piece to trace the pattern onto the aprons, I used the plywood and a pattern bit tocut the intricate design at a rouier table. If you attach the plywood pattern on top of the workpiece, you'll need a bottom-mount bearing, but a top-mount bearing is used if the pattern is positioned below the workpiece. As you make the jigs for th is ty pc of work, m a kc sure toextend the ends of the pattern an extra inch or more to allow contact between the bit and pattern prior to cutting the work. There are a number ol techniques where this setup worksgreat otherthan table aprons. Before I added a spindle sander to my shop, I would create a pattern for bracket-style feet 40 ■ Popul ar Woodworking November 2008 |


