Popular Woodworking 2008-11 № 172, страница 23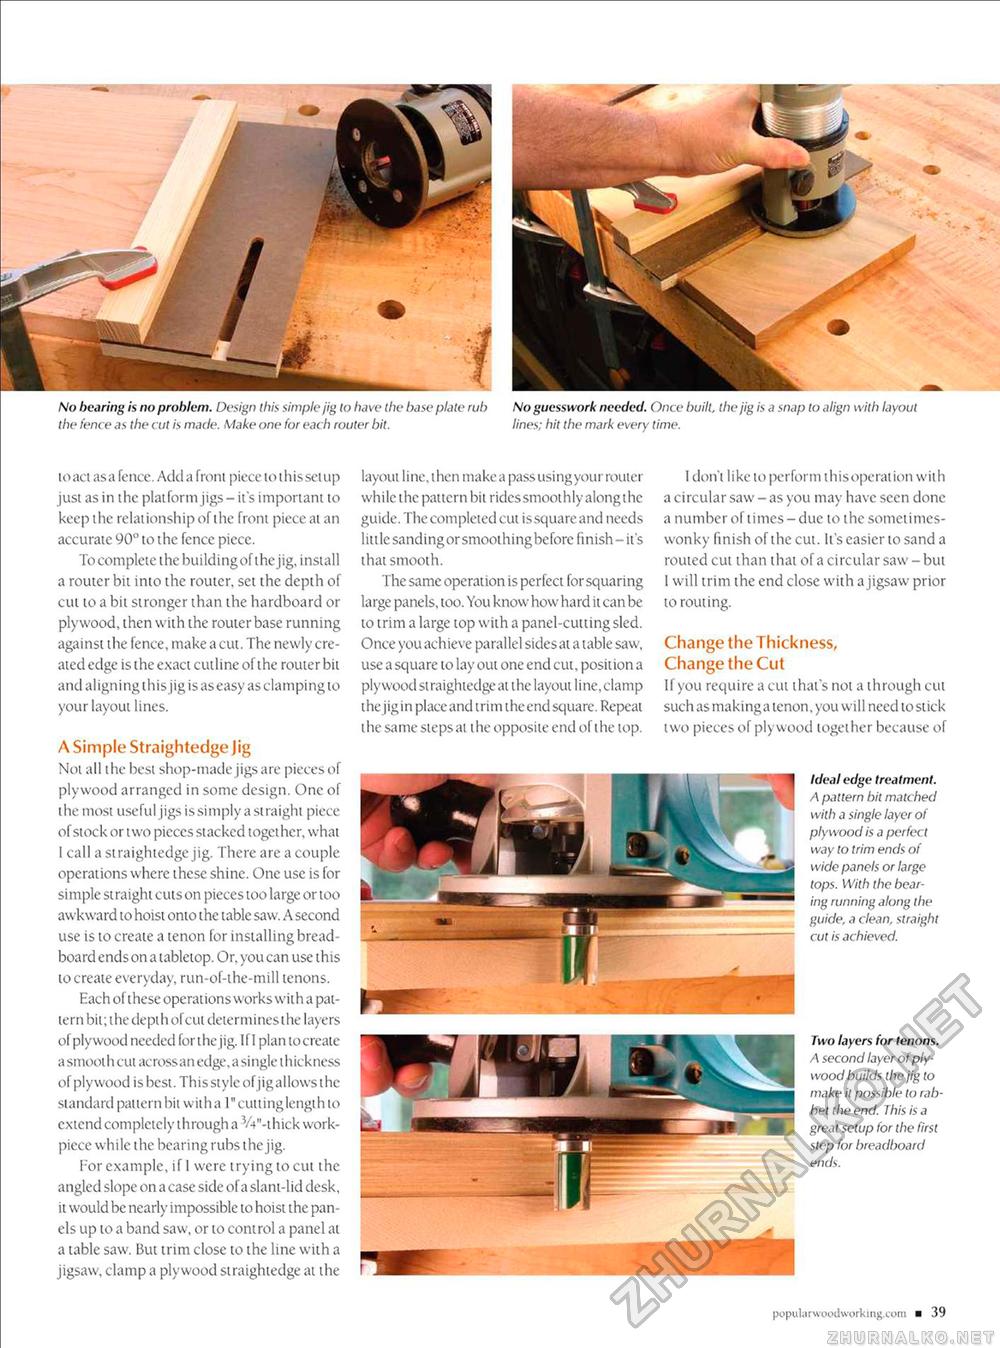
No bearing is no problem. Design (his simple jig to have llie base plate rub No guesswork needed. Once built, thejig is a snap to align with layout the fence as the cut is made. Make one for each router bit. lines; hit the mark every time. toact asa fence. Add a from piece toihissetup just as in the platform jigs - it's important to keep the relationship of the front piece at an accurate 90° to the fence piece. Tocompleie the building of thejig, install a router bit into the router, set the depth of cut to a bit stronger than the hardboard or plywood, then with the router base running against the fence, make a cut. The newly created edge is the exact cutline of the router bit and aligning this jigis as easy as clamping to your layout lines. A Simple Straightedge Jig Not all the best shop-made jigs are pieces of plywood arranged in some design. One of the most useful jigs issimply a straight piece of stock or two pieces stacked together, what I call a straightedge jig. There are a couple operations where these shine. One use is for simple st raight cuts on pieces too large or too awkward to hoist onto the table saw. A second use is to create a tenon for installing breadboard ends on a tabletop. Or, you can use this to create everyday, run-of-the-mill tenons. Each of these operations works with a pattern bit; the depth ofcul determines the layers of plywood needed forthe jig. If 1 plan tocreate a smooth cut across an edge, a single t hickness of plywood is best. Th is style of jig allows t he standard pattern bit with a 1" cut ting length to extend completely through a VV'-thick work-piece while the bearing rubs thejig. For example, if I were trying to cut the angled slope on a case side of a slant-lid desk, it would be nearly impossible to hoist the panels up to a band saw, or to control a panel at a table saw. But trim close to the line with a jigsaw, clamp a plywood straightedge at the layout line,then makea pass using your router while the pattern bit ridessmoothly alongthe guide. The completed cut issquareand needs little sandingorsmoothing before finish - it's that smooth. The same operation is perfect for squaring large panels, too. You know how hard it can be to trim a large top with a panel-cutting sled. Once you achieve parallel sides at a table saw, use a square to lay out one end cut, position a plywood straightedge at the layout line, clamp the jigin place and trim theend square. Repeat the same steps at the opposite end of the top. I don't like to perform thisoperat ion with a circular saw - as you may have seen done a number of times - due to the sometimes-wonky finish of the cut. It's easier to sand a routed cut than that of a circular saw - but I will trim the end close with a jigsaw prior to routing. Change the Thickness, Change the Cut If you require a cut that's not a through cut such as making a tenon, you will need to stick two pieces of plywood together because of Ideal edge treatment. A pattern bit matched with a single layer of plywood is a perfect way to trim ends of wide panels or large tops. With the bearing running along the guide, a clean, straight cut is achieved. Two layers for tenons. A second layer of plywood builds the jig to make it possible to rabbet the end. This is a great setup for the first step for breadboard ends. popularwooclworking.com ■ 39 |


