Popular Woodworking 2008-11 № 172, страница 37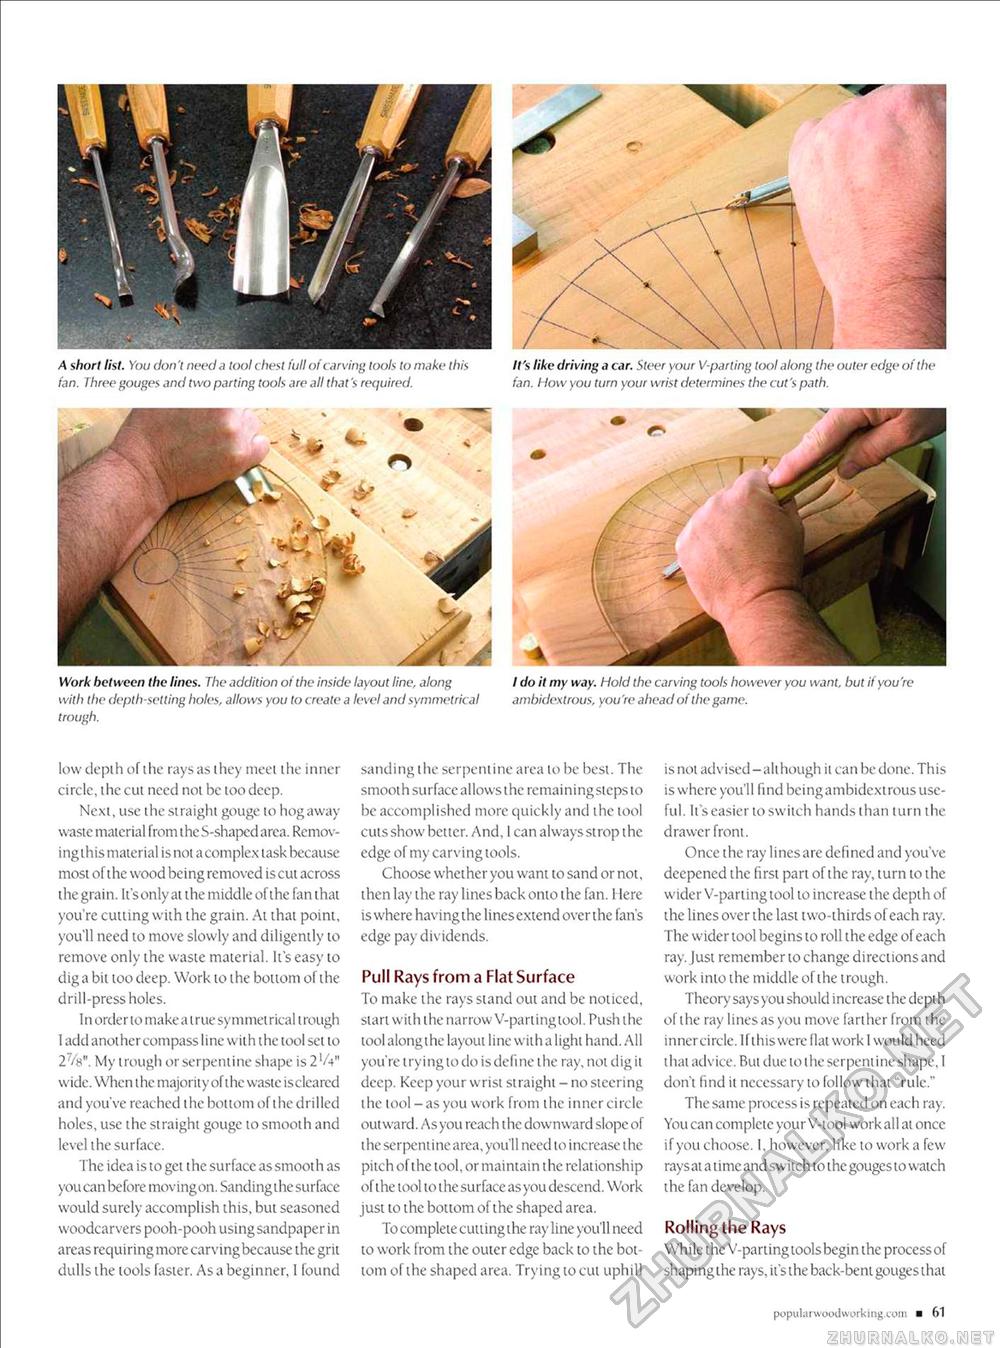
A short list. You don't need a tool chest full of carving tools to make this fan. Three gouges and two parting tools are all that's required. Work between the lines. The addition of the inside layout line, along with the depth-setting holes, allows you lo create a level and symmetrical trough. It's like driving a car. Steer your V-parting tool along the outer edge of the fan. I low you turn your wrist determines the cut's path. I do it my way. Hold the carving tools however you want, but if you're ambidextrous, you're ahead of the game. low tleplh of ihe rays as ihey meet the inner circle, ihe cui need not be too deep. Next, use the straight gouge to hog away waste material from theS-shapedarea. Removing this material is not a complex task because most of the wood being removed iscut across the grain. It'sonly at the middle of the fan that you're cutting with the grain. At that point, you'll need to move slowly and diligently to remove only the waste material. It's easy to diga bit too deep. Work to the bottom of the drill-press holes. In order to make a true symmetrical trough 1 add another compass line with the tool set to 2 /8". My trough or serpentine shape is 2'A" wide. When the majority of the waste is cleared and you've reached the bottom of the drilled holes, use the straight gouge to smooth and level the surface. The idea is to get the surface as smooth as you can before moving on. Sanding the surface would surely accomplish this, but seasoned woodcarvers pooh-pooh using sandpaper in areas requiring more carving because the grit dulls the tools faster. As a beginner, 1 found sanding the serpentine area to be best. The smoot h surface allows t he remainingsteps to be accomplished more quickly and the tool cuts show better. And, 1 can always strop the edge of my carving tools. Choose whether you want to sand or not, then lay the ray lines back onto the fan. 1 lere is where having the lines extend over the fan's edge pay dividends. Pull Rays from a Flat Surface To make the rays stand out and be noticed, start with the narrow V-parting tool. Push the tool along the layout line with a light hand. All you're trying to do is define the ray. not dig it deep. Keep your wrist straight - no steering the tool -as you work from the inner circle outward. As you reach the downward slope of the serpentine area, you'lI need to increase t he pitch of the tool, or maintain the relationship of the tool to the surface as you descend. Work just to the bottom of the shaped area. To complete culling the ray line you'll need to work from the outer edge back to the bottom of the shaped area. Trying tocui uphill is noi advised - alt hough it can be done. This is where you'll find beingambidextrous useful. Its easier to switch hands than turn the drawer front. Once the ray lines are defined and you've deepened the first part of the ray, turn to the wider V-parting tool to increase the depth of the lines over the last two-thirds of each ray. The wider tool begins to roll the edge of each ray. Just remember to change directions and work into the middle of the trough. Theory says you should increase the depth of the ray lines as you move farther from the inner circle. Ifthiswere Hat work 1 would heed that advice. But due to the serpentine shape, 1 don't find it necessary to follow that "rule." The same process is repeated on each ray. You can complete your V-tool work all at once if you choose. I, however, like to work a few raysat a time and switch to the gouges to watch the fan develop. Rolling the Rays While the V-parting tools begin the process of shaping the rays, it's the back-bent gouges that popukirwoodworking.com ■ 61 |


