Popular Woodworking 2008-11 № 172, страница 38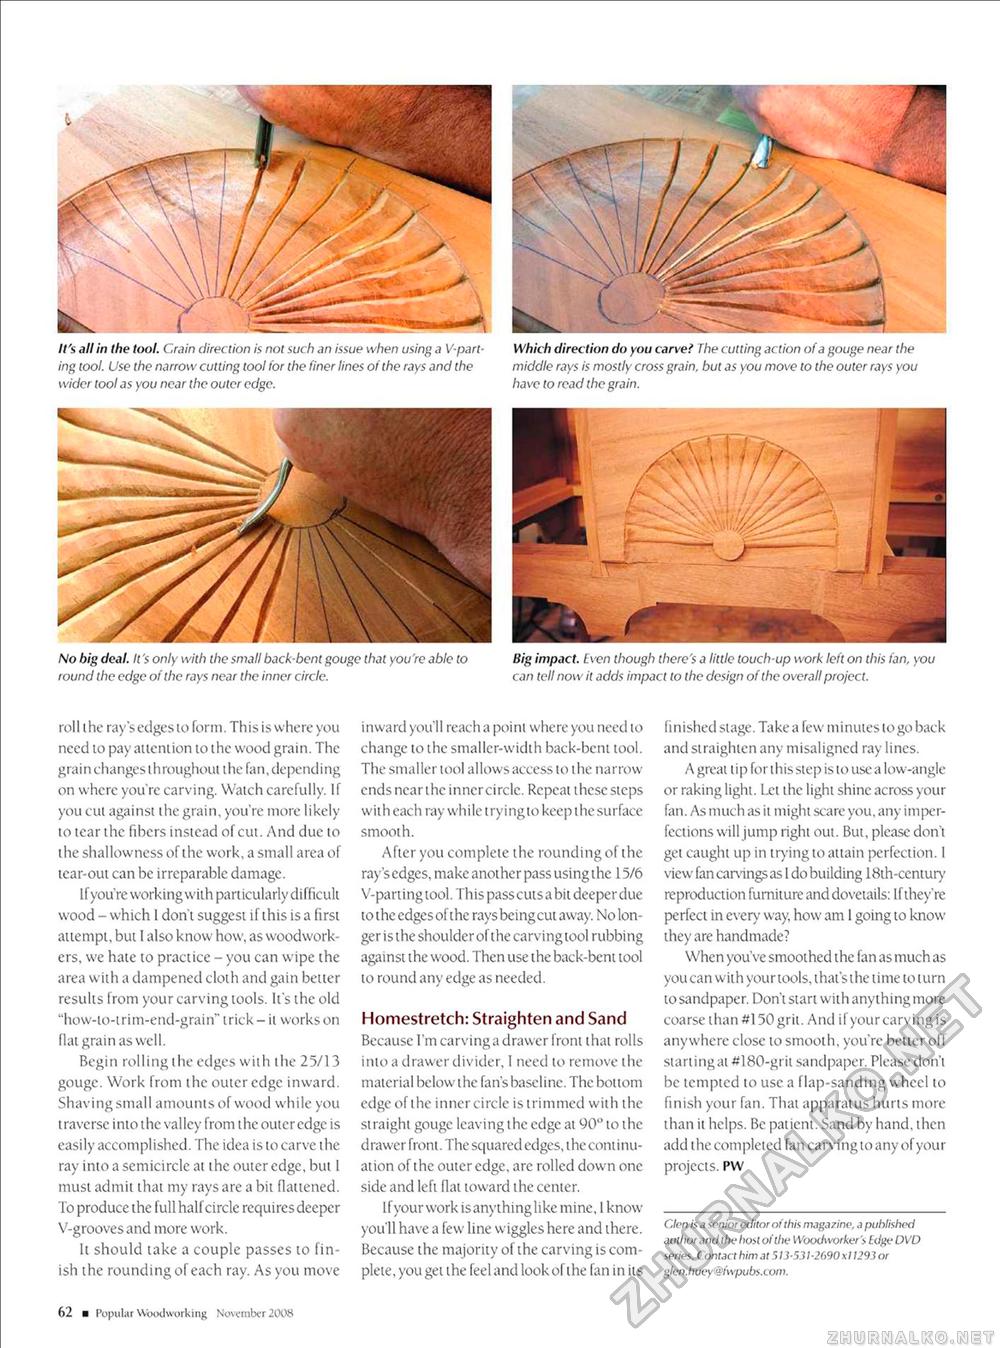
It's all in the tool. Crain direction is not such an issue when using a V-part-ing tool. Use the narrow cutting tool for the finer lines of the rays and the wider tool as you near the outer edge. Which direction do you carve f The culling action of a gouge near the middle rays is mostly cross grain, bul as you move to the outer rays you have to read the grain. No big deal. It's only with the small back-beni gouge that you're able to round the edge of the rays near the inner circle. Big impact. Lven though there's a little touch-up work left on this fan, you can tell now il adds impact lo the design of ihe overall project. roll the ray's edges to form. This is where you need 10 pay atlention to the wood grain. The grain changes t hroughoul ihe fan, dependi ng on where you're carving. Watch carefully. If you cut against the grain, you're more likely to tear the fibers instead of cut. And due to the shallowness of the work, a small area of tear-out can be irreparable damage. Ifyou're working with particularly difficult wood - which 1 don't suggest if this is a first attempt, but I also know how, as woodworkers, we hate to practice - you can wipe the area with a dampened cloth and gain better results from your carving tools. It's the old "how-to-trim-end-grain" trick - il works on flat grain as well. Begin rolling ihe edges with ihe 25/13 gouge. Work from the outer edge inward. Shavingsmall amounts of wood while you traverse into the valley from the outer edge is easily accomplished. The idea is to carve the ray into a semicircle at the outer edge, but I must admit thai my rays are a bit flattened. To produce the full half circle requires deeper V-groovesand more work. It should take a couple passes to finish the rounding of each ray. As you move inward you'll reach a point where you need to change to the smaller-width back-bent tool. The smaller tool allows access to t he narrow-ends near the innercircle. Repeat these steps with each ray wh i le t ry i ng to keep i he su rface smooth. After you complete the rounding of the ray's edges, make another pass using the 15/6 V-parting tool. Th is pass cuts a bit deeper due to the edges of the rays being cut away. No longer is the shoulder of the carving tool rubbing against the wood. Then use the back-bent tool to round any edge as needed. Homestretch: Straighten and Sand Because I'm carvinga drawer front lhai rolls into a drawer divider, 1 need to remove the material below the fan's baseline. The bottom edge of the innercircle is trimmed with the straight gouge leaving the edge at 90" to the drawer front. The squared edges, the continuation of the outer edge, arc rolled down one side and left flat toward the center. Ifyourworkisanvthinglikc mine, 1 know you'll have a few line wiggles here and there. Because the majority of the carving is complete, you get the feel and look ol the fan in its finished stage. Take a few minutes to go back and straighten any misaligned ray lines. A great lip for t his step is to use a low-angle or raking lighi. Let the light shine across your fan. As much as it might scare you, any imperfections will jump right out. But, please don't get caught up in trying to attain perfection. 1 view fan carvings as I do building 18ih-century reproduction furniture and dovetails: If they're perfect in every way, how am 1 going to know they are handmade? When you've smoothed the fan as much as you can with your tools, that's the time to turn to sandpaper. Don't start with anythingmore coarse than #150 grit. And ifyour carving is anywhere close to smooth, you're better off startingai #180-grit sandpaper. Please don't be templed to use a flap-sanding wheel to finish your fan. That apparatus hurts more than ii helps. Be patient. Sand by hand, then add the completed fan carving to any of your projects. pw Glen is a senior editor of this magazine, a published author and the hosl oilhe Woodworker's Edge DVD series. Contac t him at 513 -531 ■2690 *11293 or glen.huey@fwpubs.com. 62 ■ Popul ar Woodworking November 2008 |


