Popular Woodworking 2008-12 № 173, страница 19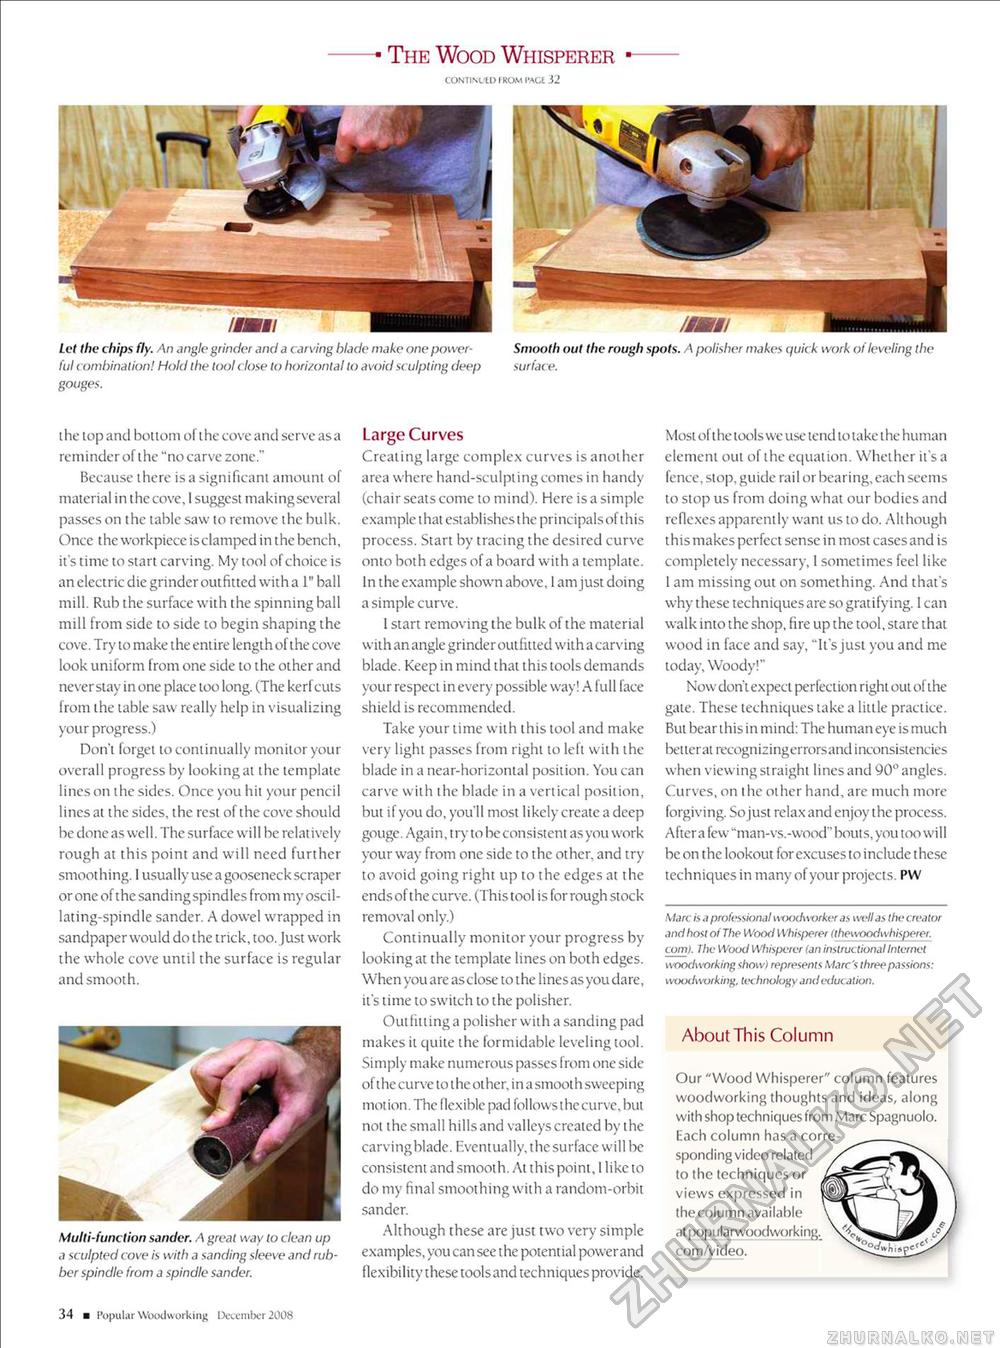
The Wood Whisperer CONTINUED FROM I'ACt i2 Lei the chips fly. An angle grinder and a carving blade make one powerful (ombination! Hold the tool ( lose to horizontal to avoid sculpting deep gouges. /ma Smooth out the rough spots. A polisher makes quick work of leveling the surface. the top and bottom of the cove and serve asa reminder of the "no carve zone." Because there is a significant amount of material in the cove, 1 suggest making several passes on the table saw to remove the bulk. Oncc the workpiece is clamped in the bench, it's time to start carving. My tool of choice is an electric die grinder outfitted with a 1" ball mill. Rub the surface with the spinning ball mill from side to side to begin shaping the cove. Try to make the entire length of the cove look uniform from one side to the other and neverslay in one place loo long. (The kerf cuts from the table saw really help in visualizing your progress.) Don't forget to continually monitor your overall progress by looking at the template lines on the sides. Once you hit your pencil lines at the sides, the rest of the cove should be done as well. The surface wil 1 be relatively rough at this point and will need further smoothing. 1 usually use a gooseneck scraper or one of the sanding spindles from my oscil-lating-spindle sander. A dowel wrapped in sandpaper would do the trick, too. Just work the whole cove until the surface is regular and smooth. Multi-function sander. A great way to clean up a sculpted cove is with a sanding sleeve and rubber spindle from a spindle sander. Large Curves Creating large complex curves is another area where hand-sculpting comes in handy (chair seats come to mind). Here is a simple example that establishes the principals of t his process. Start by tracing the desired curve onto both edges of a board with a template. In the example shown above, 1 am just doing a simple curve. 1 start removing the bulk of the material with an angle grinder outfitted with acarving blade. Keep in mind that this tools demands your respect in every possible way! A full face shield is recommended. Take your time with this tool and make very light passes from right to left with the blade in a near-horizontal position. You can carve with the blade in a vertical position, but if you do, you'll most likely create a deep gouge. Again, trytobe consistent as you work your way from one side to the other, and try to avoid going right up to the edges at the endsof the curve. (This tool is forrough stock removal only.) Continually monitor your progress by looking at the template lines on both edges. When you are asclose to the lines as you dare, it's time to switch to the polisher. Outfitting a polisher with a sanding pad makes it quite the formidable leveling tool. Simply make numerous passes from one sick-oft he curve to t he ot her. i n a smooth sweepi ng mot ion. The flexible pad follows i he curve, but not the small hills and valleys created by the carving blade. Event ually, t he surface wil 1 be consistent and smooth. At this point, I like to do my final smoothing with a random-orbit sander. Although these are just two very simple examples, you can see t he potent ial power and flexibility these tools and techniques provide. Most of the tools we use tend to take the human element out of the equation. Whether it's a fence, stop, guide rail or bearing, each seems to stop us from doing what our bodies and reflexes apparently want us to do. All hough this makes pcrfcct sense in most eases and is completely necessary, 1 sometimes feel like I am missing out on something. And that's why these techniques are so gratifying. 1 can walk into the shop, fire up the tool, stare that wood in face and say, "It's just you and me today, Woody!" Now don't expect perfection right out of the gate. These techniques take a little practice. But bear this in mind: The humaneye is much betier at necognizingerrorsand inconsistencies when viewing straight lines and 90° angles. Curves, on (lie other hand, are much more forgiving. So just relax and enjoy the process. Aftera few"man-vs.-wood" bouts, you too will be on the lookout for excuses to include these techniques in many of your projects. PW Marc is a professional ivrxxlworker as well as the creator and host ot The Wood Whisperer (thewoodwhisperer. com). The Wood Whisperer (an instructional Internet woodworking show) represents Marc's three passions: woodworking, technology and education. About This Column Our "Wood Whisperer" column features woodworking thoughts and ideas, along with shop techniques from Marc Spagnuolo. Each column has a corre- _ sponding video related to the techniques or views expressed in the column available at popularwoodworking com/video. 34 ■ Popul ar Woodworking December 2008 |


