Popular Woodworking 2008-12 № 173, страница 16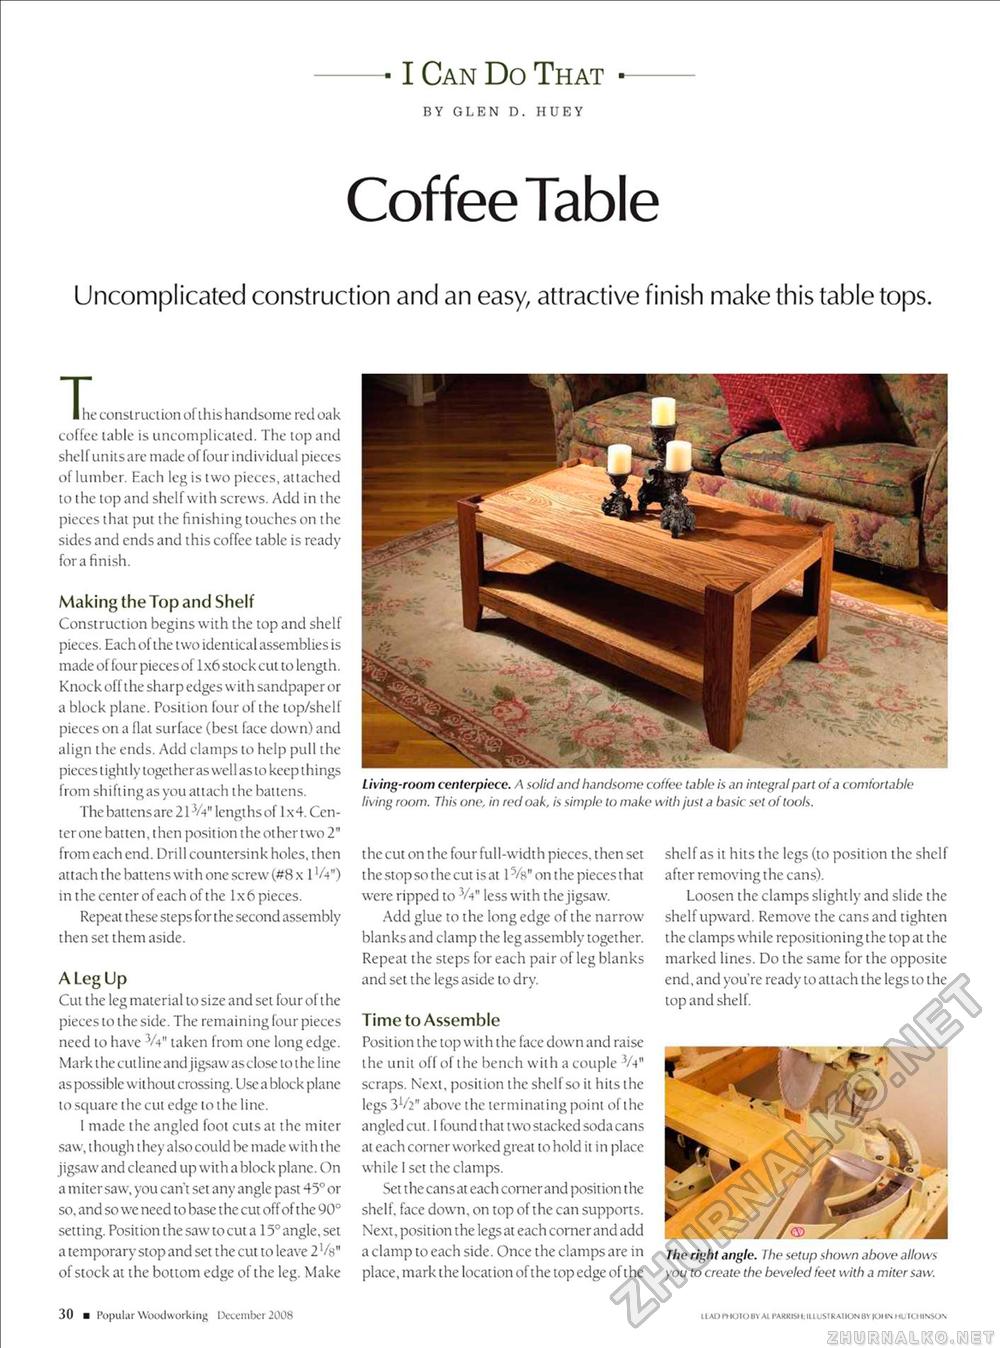
-• I Can Do That •-BY GLEN D. HUEY Coffee TableUncomplicated construction and an easy, attractive finish make this table tops.Living-room centerpicce. A solid and handsome coffee table is an integral part of a comfortable living room. This one, in red oak, is simple to make with just a basic set of tools. I he construction of this handsome red oak coffee table is uncomplicated. The top and shelf unitsare made of four individual pieces of lumber. Each leg is two pieces, attached to the top and shelf with screws. Add in the piecesthat put the finishing touches on the sides and ends and this coffee table is ready for a finish. Making the Top and Shelf Construction begins with the top and shell pieces. Each of the two identical assemblies is made of four pieces of 1 x6 stock cut to length. Knock off the sharp edges with sandpaper or a block plane. Position four of the top/shell pieces on a flat surface (best face down) and align the ends. Add clamps to help pull the pieces tightly togetheras well as to keep things from shifting as you attach the battens. The battensare 21 Vv Icngthsof 1x4. Center one batten, then position the other two 2" from each end. Drill countersink holes, then attach t he battens with one screw (#8 x 1 'A") in the center of each of the 1x6 pieces. Repeat t hese steps for t he second assembly then set them aside. A Leg Up Cut the leg material to size and set four of the pieces to the side. The remaining four pieces need to have V4" taken from one long edge. Mark the culline and jigsaw as close to the line as possible without crossing. Use a block plane to square the cut edge to the line. I made the angled foot cuts at the miter saw, t hough t hey also could be made with the jigsaw and cleaned up with a block plane. C)n a miter saw, you can't set any angle past 45° or so. and so we need to base t he cut off of the 90° setting. Position the saw to cut a 15° angle, set a temporary stop and set the cut to leave 2 Vg" of stock at the bottom edge of the leg. Make the cut on the four full-width pieces, then set t he stop so the cut is at 1 :Vh" on t he pieces that were ripped to VV' less with the jigsaw. Add glue to the long edge of the narrow blanks and clamp the leg assembly together. Repeat the steps for each pair of leg blanks and set the legs aside to dry. Time to Assemble Position the top with the face down and raise the unit offofthe bench with a couple V-t" scraps. Next, position the shelf so it hits the legs 3V2" above the terminating point of the angled cut. 1 found that two stacked soda cans at each corner worked great to hold it in place while I set the clamps. Set the cansat each corner and position the shelf, face down, on top of the can supports. Next, posit ion the legs at each corner and add a clamp to each side. Once the clamps are in place, mark the location of the top edge of the shelf as it hits the legs (to position the shelf after removing the cans). Loosen the clamps slightly and slide the shelf upward. Remove the cans and tighten the clamps while repositioning the top at the marked lines. Do the same for the opposite end, and you're ready to attach the legs to the top and shelf. mm The right angle. The setup shown above allows you to create the beveled feet with a miter saw. 30 ■ Popular Woodworking Dcccmber 2008 ILAOPHOTOBYAL PARXISH:ILLUSTRATIONBV IOII.N MUTUIINSON |


