Popular Woodworking 2008-12 № 173, страница 18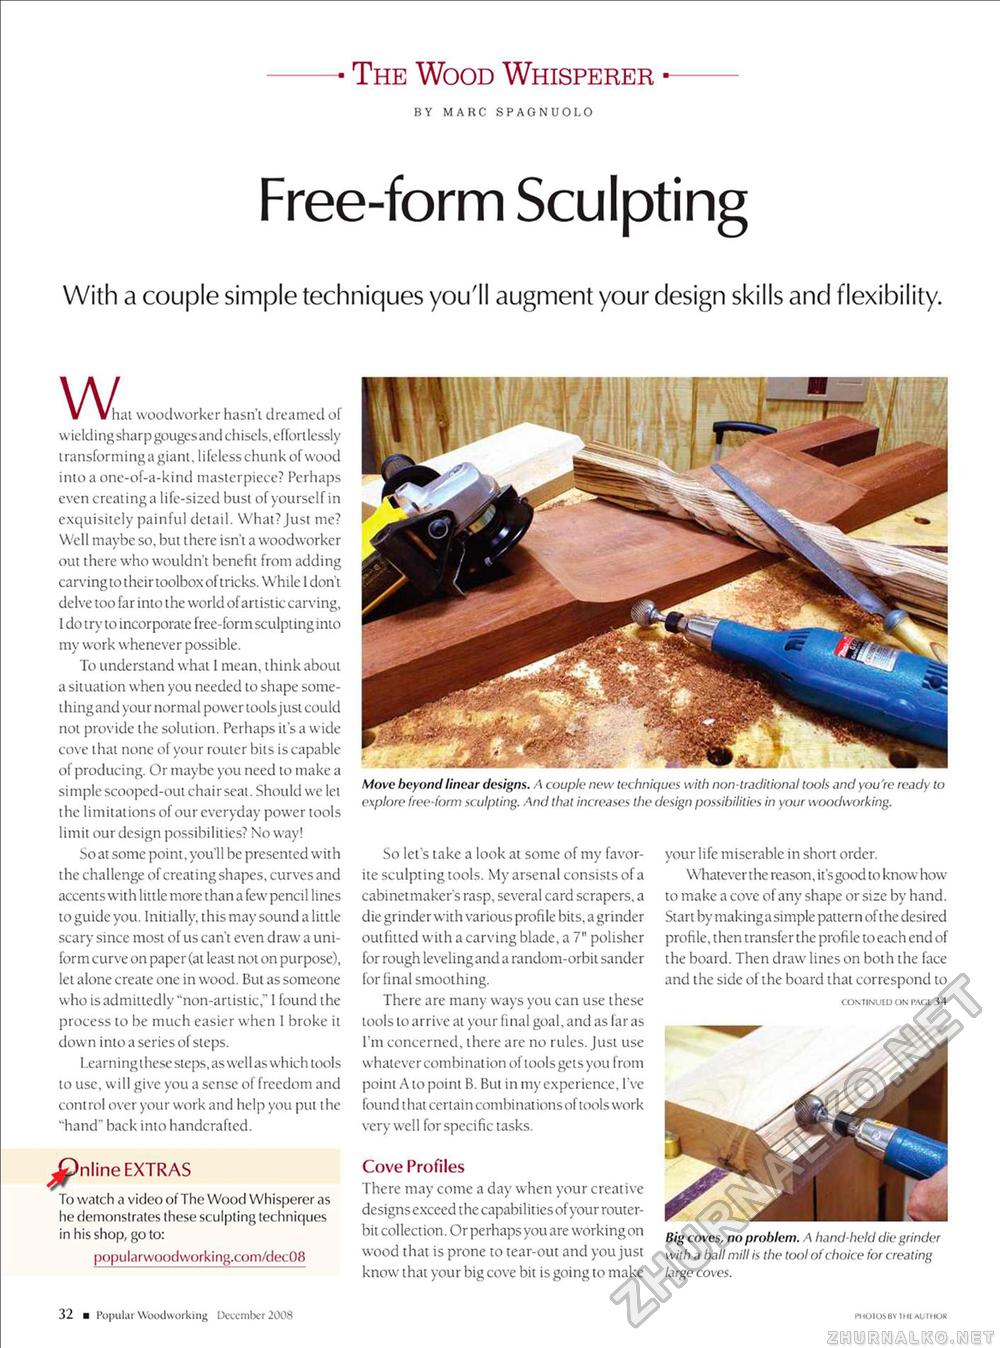
■ The Wood Whisperer ■BY MARC SPAGNUOI.O Free-form SculptingWith a couple simple techniques you'll augment your design skills and flexibility.Move beyond linear designs. A couple new techniques with non-traditional tools and you're ready to explore free-lorm sculpting. And that increases the design possibilities in your woodworking. W at woodworker hasn't dreamed of wielding sharp gougesand chisels, effortlessly transforming a giant, lifeless chunk of wood into a one-of-a-kind masterpiece? Perhaps even creating a life-sized bust of yourself in exquisitely painful detail. What? Just me? Well maybe so, but there isn't a woodworker out there who wouldn't benefit from adding carving to their toolbox of tricks. While I don't delve too far into the world of artistic carving, I do try to incorporate free-form sculpting into my work whenever possible. To understand what I mean, think about a situation when you needed to shape some-thingand your normal power toolsjust could not provide the solution. Perhaps it's a wide cove that none of your router bits is capable of producing. Or maybe you need to make a simple scooped-out chairseal. Should we let the limitations of our everyday power tools limit our design possibilities? No way! So at some point, you'l I be presented wit h t he challenge of creating shapes, curves and accents with little more than a few-pencil lines to guide you. Initially, this may sound a little scary since most of us can't even draw a uniform curve on paper (at least not on purpose), let alone create one in wood. But as someone who is admittedly "non-artistic," I found the process to be much easier when 1 broke it down into a series of steps. 1.earning these steps, as well as which tools to use, will give you a sense of freedom and cont rol over your work and help you put the "hand" back into handcrafted. ^)nline EXTRAS To watch a video of The Wood Whisperer as he demonstrates these sculpting techniques in his shop, go to: popularwoodworking.com/dec08 So let's take a look at some of my favorite sculpting tools. My arsenal consists of a cabinetmaker's rasp, several card scrapers, a die grinderwith various profile bits, agrinder outfitted with a carving blade, a 7" polisher for rough leveling and a random-orbit sander for final smoothing. There are many ways you can use these tools to arrive at your final goal, and as lar as I'm concerned, there arc no rules. Just use whatever combination ol tools gets you from point A to point B. But in my experience, I've found that certain combinations of tools work very well for specific tasks. Cove Profiles There may come a day when your creative designs exceed the capabilities of your router-bit collection. Or perhaps you are working on wood that is prone to tear-out and you just know that your big cove bit is going to make your life miserable in short order. Whatever the reason, it's good to know how to make a cove of any shape or size by hand. Start by making a simple pattern of the desired profile, then transfer the profile to each end of the board. Then draw lines on both the face and the side of the board that correspond to CONTINUED ON PAGI 34 Big coves, no problem. A hand-held die grinder with a ball mill is the tool of choice for creating large coves. 32 ■ Popul ar Woodworking Dcccmber 2008 photosbv thi author |


