Popular Woodworking 2008-12 № 173, страница 30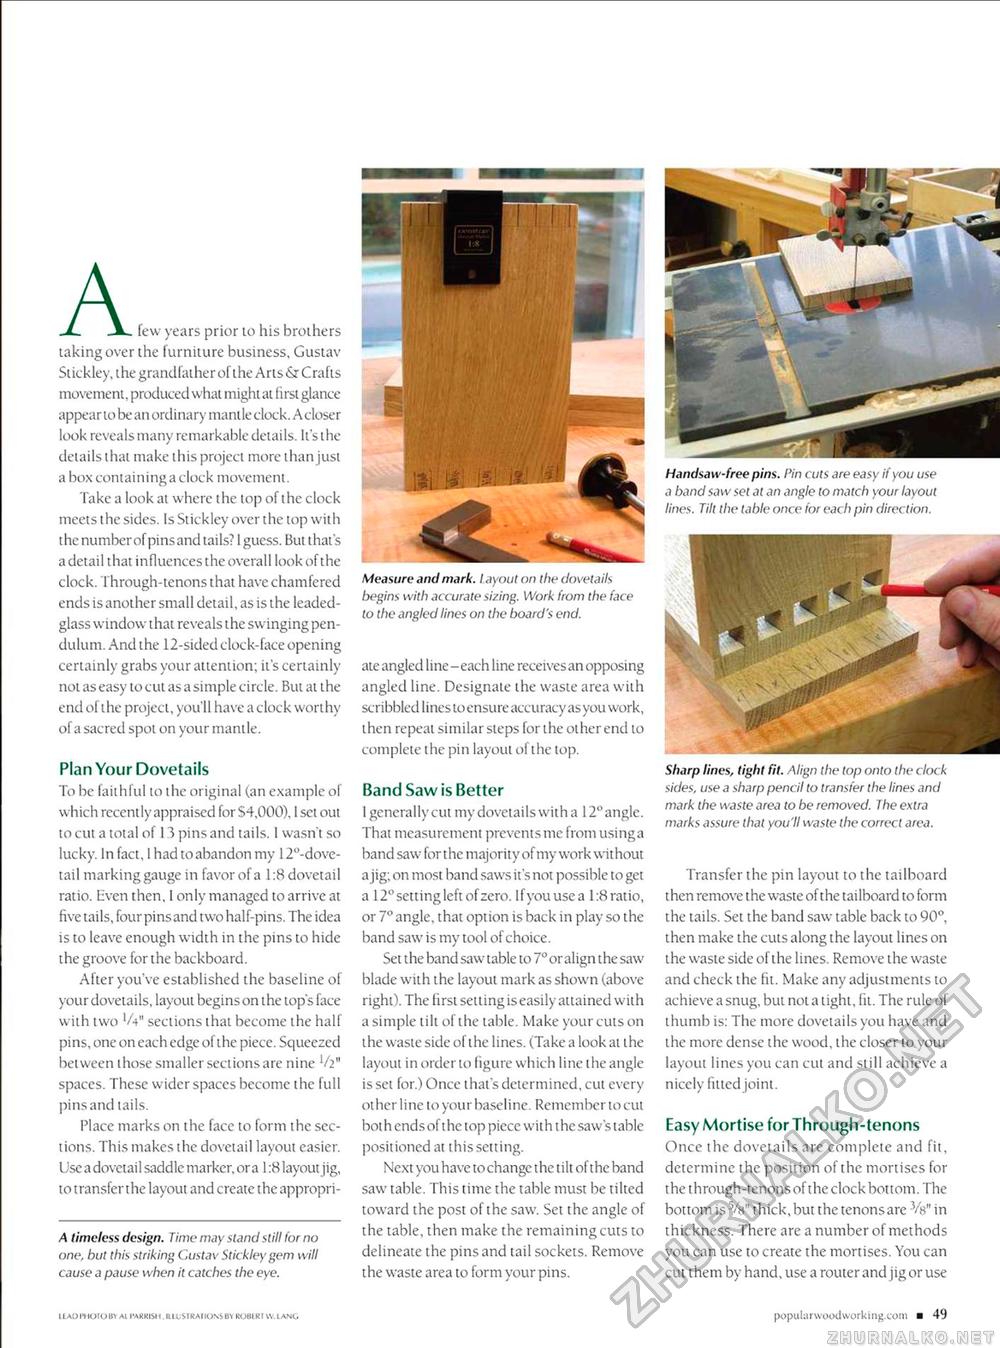
Afew years prior to his brothers taking over the furniture business, Gustav Slickley, the grandfather of the Arts & Crafts movement, produced what might at first glance appear to be an ordinary mantle clock. A closer look reveals many remarkable details. It's the details that make this project more than just a box containing a clock movement. Take a look at where the lop of the clock meets t lie sides. Is Sticklcy over t he top wit h the number of pins and tails? I guess. But that's a detail that influences the overall look of the clock. I hrough-tenonsthat have chamfered ends is another small detail, as is the leaded-glass window that reveals the swinging pendulum. And the 12-sided clock-face opening certainly grabs your attention; it's certainly not as easy to cut as a simple circle. But at the end of the project, you'll have a clock worthy of a sacred spot on your mantle. Plan Your Dovetails To be faithful to the original (an example of which recent ly appraised for $4,000), I set out to cut a total of 13 pins and tails. I wasn't so lucky. In fact, 1 had to abandon my ^"-dovetail marking gauge in favor of a 1:8 dovetail ratio. Even then, 1 only managed to arrive at five tails, four pins and two half-pins. The idea is to leave enough width in the pins to hide the groove for the backboard. After you've established the baseline of your dovetails, layout begins on the top's face with two 'a" sections that become the hall pins, one on each edge of the piece. Squeezed between those smaller sections are nine V2" spaces. These wider spaces become the full pins and tails. Place marks on the face to form the sections. This makes the dovetail layout easier. Use a dovetail saddle marker, or a 1:8 layout jig, to transferthe layout and create the appropri- A timeless design. Time may stand still for no one, but this striking Gustav Stickley gem will cause a pause when it catches the eye. Handsaw-free pins. Pin cuts are easy if you use a band saw set at an angle to match your layout lines. Tilt the table once for each pin direction. Measure and mark, layout on the dovetails begins with accurate sizing. Work from the face to the angled lines on the board's end. ate angled line - each line receives an opposing angled line. Designate the waste area with scribbled lines to ensure accuracy as you work, then repeat similar steps for the other end to complete the pin layout of the top. Band Saw is Better I generally cut my dovetails with a 12" angle. That measurement prevents me from usinga band saw for the majority of my work without a jig; on most band saws it's not possible to get a 12° setting left of zero, lfyouusea 1:8 ratio, or 7° angle, that option is back in play so the band saw is my tool of choice. Set the band saw table to 7° or align the saw blade with the layout mark as shown (above right). The first setting is easily attained with a simple tilt of the table. Make your cuts on the waste side of the lines. (Take a look at the layout in order to figure which line the angle is set for.) Once that's determined, cut every ot her line to your baseline. Remember to cut hot h ends of the top piece with t he saw's table positioned at this setting. Next you have to change the tilt of the band saw table. This time the table must be tilted toward the post of the saw. Set the angle of the table, then make the remaining cuts to delineate the pins and tail sockets. Remove the waste area to form your pins. Sharp lines, tight fit. Align the top onto the clock sides, use a sharp pencil to transfer the lines and mark the waste area to be removed. The extra marks assure that you'll waste the correct area. Transfer the pin layout to the tailboard then remove the waste of the tailboard to form the tails. Set the band saw table back to 90°, then make the cuts along the layout lines on the waste side of the lines. Remove the waste and check the fit. Make any adjustments to achieve a snug, but not a tight, fit. The rule of thumb is: The more dovetails you have and the more dense the wood, the closer to your layout lines you can cut and still achieve a nicely fitted joint. Easy Mortise for Through-tenons Once the dovetails are complete and fit, determine the position of the mortises for the through-tenons of the clock bottom. The bottom is Vh" thick,but the tenonsare Vg" in thickness. There are a number of methods you can use to create the mortises. You can cut them by hand, use a router and jig or use HAD IItOTOBV Al I'AKKISI t IIICSIRAIKJNS BV KOIIIKIIV. IANC. poputarwoodworking.eom ■ 49 |


