Popular Woodworking 2008-12 № 173, страница 33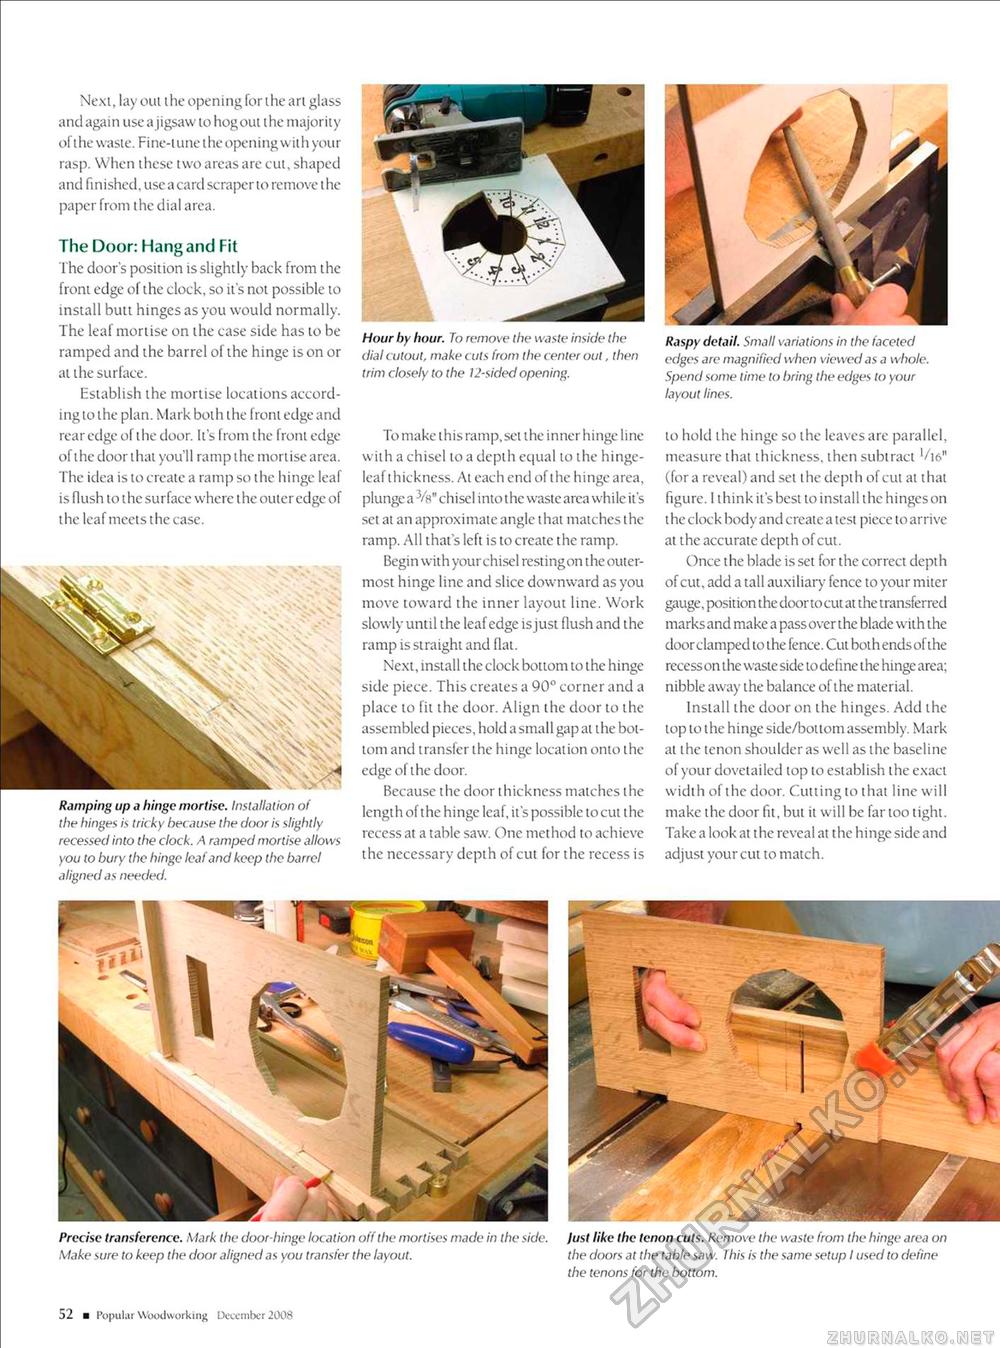
Next, lay out the opening for the art glass and again use a jigsaw to hog out the majority of the waste. Fine-tune the opening with your rasp. When these two areas are cut, shaped and finished, use a card scraper to remove the paper from the dial area. Precise transference. Mark the door hinge location off the mortises made in the side. Make sure to keep the door aligned as you transfer the layout. Just like the tenon cuts. Remove the waste from the hinge area on the doors at the table saw. This is the same setup I used to define the tenons for the bottom. Hour by hour. To remove the waste inside the dial cutout, make cuts from the center out, then trim closely to the 12-sided opening. To make this ramp, set the inner h inge I i ne with a chisel to a depth equal to the hinge-leal thickness. Al each end of the hinge area, plunge a Vs" chisel into t he waste area while it's set at an approximate angle that matches the ramp. All that's left is to create the ramp. Begin with your chisel resting on the outermost hinge line and slice downward as you move toward the inner layout line. Work slowly until the leaf edge is just flush and the ramp is straight and flat. Next, install the clock bottom to the hinge side piece. This creates a 90° corner and a place to fit the door. Align the door to the assembled pieces, hold a small gap at the bottom and transfer the hinge location onto the edge of the door. Because the door thickness matches the length of the hinge leaf, it's possible tocut the recess at a table saw. One method to achieve the necessary depth of cut for the recess is Raspy detail. Small variations in the faceted edges are magnified when viewed as a whole. Spend some time to bring the edges to your layout lines. to hold the hinge so the leaves are parallel, measure that thickness, then subtract l/i6" (for a reveal) and set the depth of cut at that figure. I think it's best to install the hinges on t he clock body and create a test piece to arrive at the accurate depth of cut. Once the blade is set for the correct depth of cut, add a tall auxiliary fence to your miter gauge, position the door to cut at the transferred marks and make a passover the blade with the door clamped to the fence. Cut bothendsof the recess on the waste side to define the hinge area; nibble away the balance of the material. Install the door on the hinges. Add the top to the hinge side/bottom assembly. Mark at the tenon shoulder as well as the baseline of your dovetailed top to establish the exact width of the door. Cutting to that line will make the door fit, but it will be far too tight. Take a look at the reveal at t he hinge side and adjust your cut to match. The Door: Hang and Fit The door's position is slightly back from the front edge of the clock, so it's not possible to install butt hinges as you would normally. The leaf mortise on the case side has to be ramped and the barrel of the hinge is on or at the surface. Establish the mortise locations according to the plan. Mark both the front edge and rear edge of the door. It's from the front edge of the door that you'll ramp the mortise area. The idea is to create a ramp so the hinge leaf is flush to the surface where the outcredge of t he leaf meets t he case. Ramping up a hinge mortise. Installation of the hinges is tricky because the door is slightly recessed into the clock. A ramped mortise allows you to bury the hinge leaf and keep the barrel aligned as needed. 52 ■ Popul ar Woodworking December 2008 |


