Popular Woodworking 2008-12 № 173, страница 35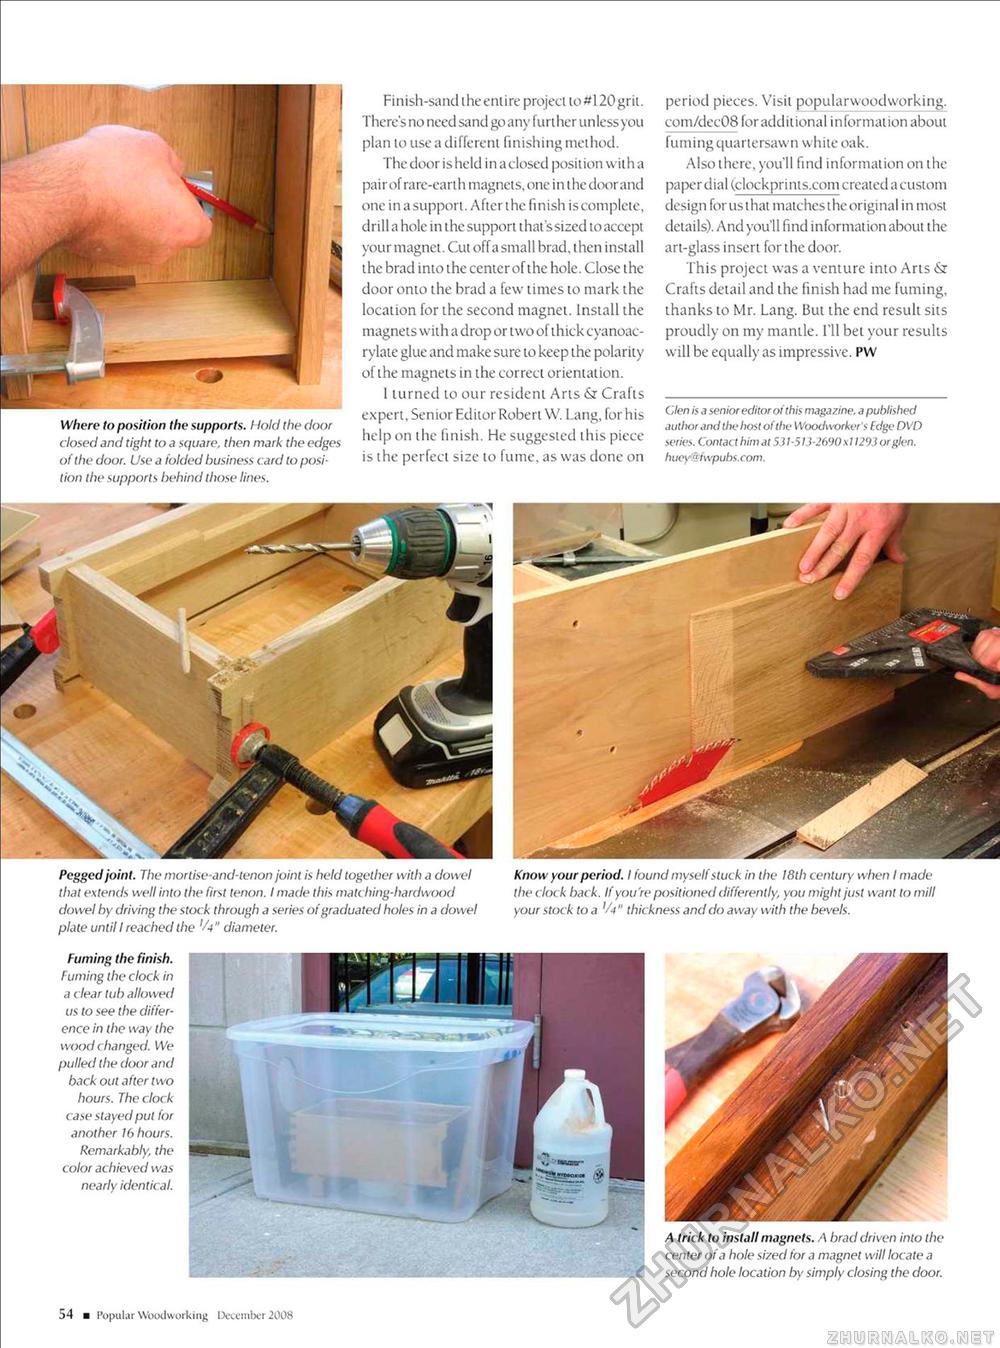
A trick to install magnets. A brad driven into the center of a hole sized for a magnet will locate a second hole location by simply closing the door. Pegged joint. The mortise-and-tenon joint is held together with a dowel that extends well into the first tenon. I made this matching-hardwood dowel by driving the stock through a series of graduated holes in a dowel plate until I reached the 'A" diameter. Know your period. I found myself stuck in the 18th century when I made the clock back. If you're positioned differently, you might just want to mill your stock to a 'A" thickness and do away with the bevels. Fuming the finish. Fuming the clock in a clear tub allowed us to see the difference in the way the wood changed. We pulled the door and back out after two hours. The clock case stayed put for another 76 hours. Remarkably, the color achieved was nearly identical. Finish-sand t fie ent i re project to #120 grit. There's no need sand go any further unless you plan lo use a different finishing method. The door is held in a closed position with a pair of rare-earl h magnets, one i n t he door and one in asupport. Afterthe finish iscomplete, drill a hole in the support that ssized to accept your magnet. Cut off a small brad, then install the brad into the center of the hole. Close the door onto the brad a few limes to mark the location for the second magnet. Install ihe magnets with a drop or two of thick cyanoac-rvlaie glue and make sure to keep the polarity of the magneis in the correct orientation. I turned to our resident Arts & Crafts expert, Senior Editor Robert W. Lang, for his help on the finish. He suggested this piece is the perfect size to fume, as was done on period pieces. Visit popularwoodworking. com/dec08 foraddilional information about fumingquartersawn white oak. Also there, you'll find information on the paperdial (clockprints.com created a custom design forusthat matches the original in most details). And you'll find information about the ari-glass insert for the door. This project was a venture into Arts & Crafts detail and ihe finish had me fuming, thanks to Mr. Lang. Bui the end result siis proudly on my mantle. I'll bet your results will be equally as impressive. PW Clen is a senior editor of this magazine, a published author and the host of the Woodworker's Edge DVD series. Contact him at 53 7-513-2690 x11293 or glen. hucyvfwpubs.com. Where to position the supports. Hold the door closed and tight to a square, then mark the edges of the door. Use a folded business card to position the supports behind those lines. 54 ■ Popul ar Woodworking December 2008 |


