Popular Woodworking 2008-12 № 173, страница 32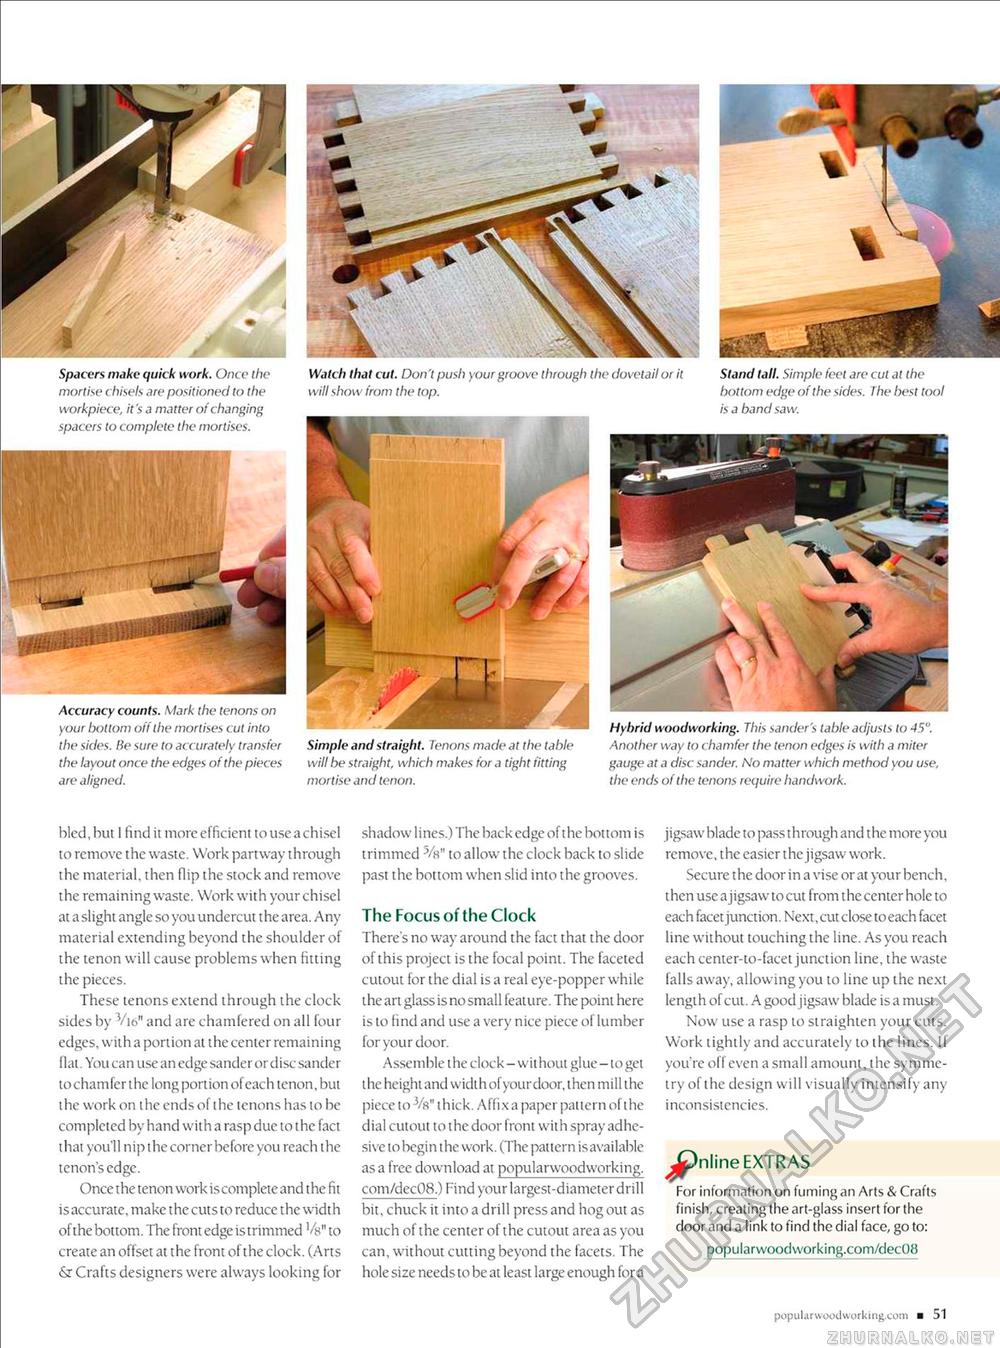
Spacers make quick work. Once the mortise chisels are positioned to the workpiece, it's a matter of changing spacers to complete the mortises. Accuracy counts. Mark the tenons on your bottom off the mortises cut into the sides. He sure to accurately transfer the layout once the edges of the pieces are aligned. bled,hut I find it more efficient touseachisel to remove the waste. Work partway through the material, then flip the stock and remove the remaining waste. Work with your chisel at a slight angle so you undercut the area. Any material extending beyond the shoulder of the tenon will cause problems when fitting the pieces. These tenons extend through the clock sides by Vu>" and are chamfered on all four edges, with a portion at the center remaining flat. You can use an edge sander or disc sander tochamfer i he long portion of each tenon, but the work on the ends of the tenons has to be completed by hand with a rasp due to t he fact t hat you'll nipt he corner before you reach t he tenon's edge. Once the tenon work is complete and t he fit is accurate, make the cuts to reduce the width of the bottom. The front edge is trimmed Vy" to create an offset at the front of the clock. (Arts & Crafts designers were always looking for shadow lines.) The back edge of the bottom is trimmed 5/a" to allow the clock back to slide past the bottom when slid into the grooves. The Focus of the Clock There's no way around the fact that the door of this project is the focal point. The faceted cutout for the dial is a real eye-popper while the art glass is no small feature. The point here is to find and use a very nice piece oflumber for your door. Assemble the clock - wit hout glue - to get the height and width of yourdoor, then mill the piece to Vs" t hick. Affix a paper pattern of the dial cutout to the door front with spray adhe-sive to begin the work. (The pattern isavailable as a free download at popularwoodworking. com/dec08.) Find your largest-diameter drill bit, chuck it into a drill press and hog out as much of the center of the cutout area as you can, without cutting beyond the facets. The hole size needs to be at least large enough for a jigsaw blade to pass through and the more you remove, the easier the jigsaw work. Secure the door in a vise or at your bench, then use a jigsaw to cut from the center hole to each facet junction. Next,cut close toeach facet line without touching the line. As you reach each center-to-facet junction line, the waste falls away, allowing you to line up the next length of cut. A good jigsaw blade is a must. Now use a rasp to straighten your cuts. Work tightly and accurately to the lines. If you're oil even a small amount, the symmetry of the design will visually intensify any inconsistencies. JPnWne EXTRAS For information on fuming an Arts & Crafts finish, creating the art-glass insert for the door and a link to find the dial face, go to: popularwoodworking.com/dec08 Watch that cut. Don 'I push your groove through the dovetail or it Stand tall. Simple feet are cut at the will show from the top. bottom edge of the sides. The best tool is a band saw. Simple and straight. Tenons made at the table will be straight, which makes for a tight fitting mortise and tenon. Hybrid woodworking. This sander's table adjusts to 45". Another way to chamfer the tenon edges is with a miter gauge at a disc sander. No matter which method you use, the ends of the tenons require handwork. popularwoodworking.com ■ 51 |


