Popular Woodworking 2009-02 № 174, страница 14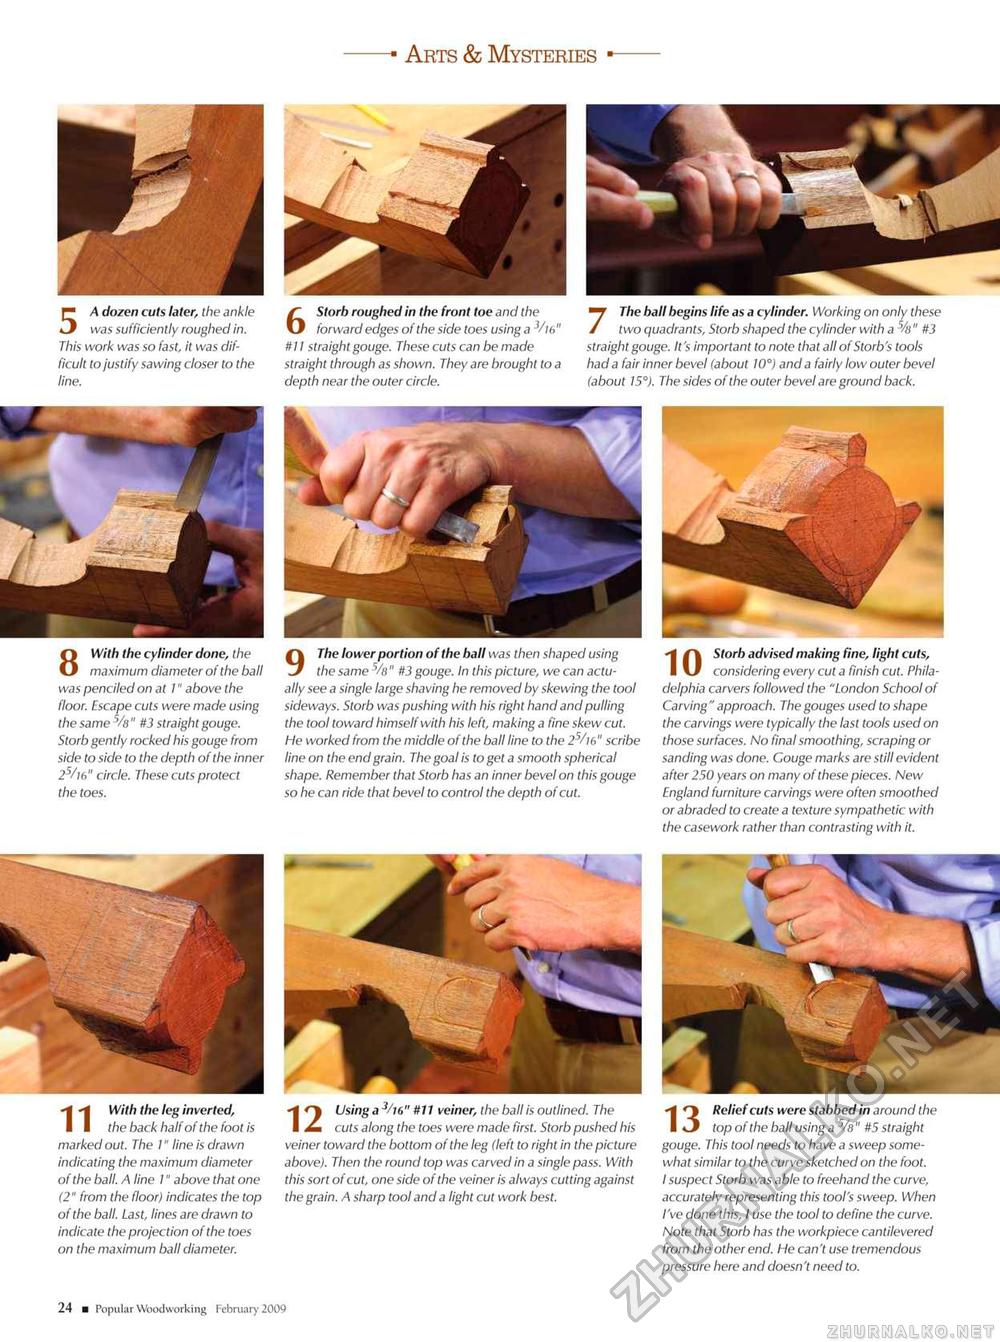
-• Arts & Mysteries •— f% Using a J//6" It11 veiner, the ball is outlined. The I cuts along the toes were made first. Storb pushed his veiner toward the bottom of the leg (left to right in the picture above). Then the round top was carved in a single pass. With this sort of cut, one side of the veiner is always cutting against the grain. A sharp tool and a light cut work best. -| Relief cuts were stabbed in around the I «J top of the ball using a 5/s" #5 straight gouge. This tool needs to have a sweep somewhat similar to the curve sketched on the foot. I suspect Storb was able to freehand the curve, accurately representing this tool's sweep. When I've done this, I use the tool to define the curve. Note that Storb has the workpiece cantilevered from the other end. He can't use tremendous pressure here and doesn't need to. 5 A dozen cuts later, the ankle was sufficiently roughed in. This work was so fast, it was difficult to justify sawing closer to the 8 With the cylinder done, the maximum diameter of the ball was penciled on at I" above the floor. Escape cuts were made using the same /e" #3 straight gouge. Storb gently rocked his gouge from side to side to the depth of the inner 2s/i6" circle. These cuts protect the toes. -J -J With the leg inverted, I I the back half of the foot is marked out. The I" line is drawn indicating the maximum diameter of the ball. A line I" above that one (2" from the floor) indicates the top of the ball. Last, lines are drawn to indicate the projection of the toes on the maximum ball diameter. ; and the using a3/l6" 6 Storb roughed in the front It forward edges of the side toe #11 straight gouge. These cuts can be made straight through as shown. They are brought depth near the outer circle. 7 The ball begins life as a cylinder. Working on only these two quadrants, Storb shaped the cylinder with a %" #3 straight gouge. It's important to note that all of Storb's tools had a fair inner bevel (about 10°) and a fairly low outer bevel (about 15"). The sides of the outer bevel are ground back. 9 The lower portion of the ball was then shaped using the same 5/a" #3 gouge. In this picture, we can actually see a single large shaving he removed by skewing the tool sideways. Storb was pushing with his right hand and pulling the tool toward himself with his left, making a fine skew cut. He worked from the middle of the ball line to the 25/16" scribe line on the end grain. The goal is to get a smooth spherical shape. Remember that Storb has an inner bevel on this gouge so he can ride that bevel to control the depth of cut. Storb advised making fine, light cuts, considering every cut a finish cut. Philadelphia carvers followed the "London School of Carving" approach. The gouges used to shape the carvings were typically the last tools used on those surfaces. No final smoothing, scraping or sanding was done. Couge marks are still evident after 250 years on many of these pieces. New England furniture carvings were often smoothed or abraded to create a texture sympathetic with the casework rather than contrasting with it. 24 ■ Popular Woodworking February 2009 |


