Popular Woodworking 2009-02 № 174, страница 15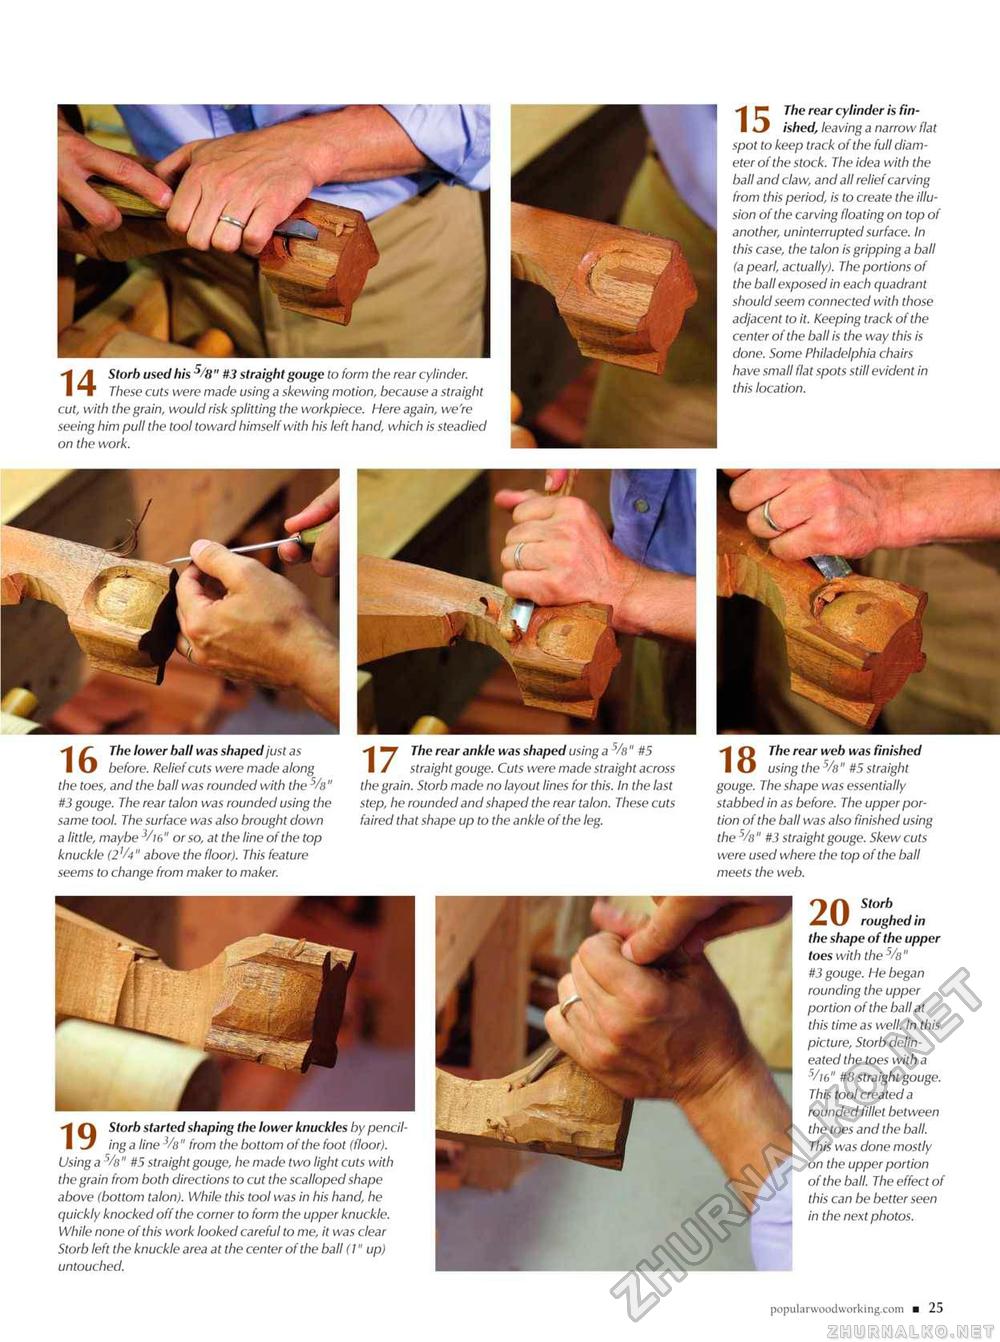
-t The lower ball was shaped just as The rear ankle was shaped using a ty" #5 -t Q The rear web was finished I U before. Relief cuts were made along I/ straight gouge. Cuts were made straight across I O using the Vs" #5 straight the toes, and the ball was rounded with the s/s " the grain. Storb made no layout lines for this. In the last gouge. The shape was essentially #3 gouge. The rear talon was rounded using the step, he rounded and shaped the rear talon. These cuts stabbed in as before. The upper por- same tool. The surface was also brought down faired that shape up to the ankle of the leg. tion of the ball was also finished using a little, maybe 16" or so, at the line of the top the % " #3 straight gouge. Skew cuts knuckle (2'/4" above the floor). This feature were used where the top of the ball seems to change from maker to maker. meets the web. the shape of the upper toes with the 5/s" #3 gouge. He began rounding the upper portion of the ball at this time as well. In this picture, Storb delineated the toes with a 5//6" #8 straight gouge. This tool created a rounded fillet between the toes and the ball. This was done mostly on the upper portion of the ball. The effect of this can be better seen in the next photos. Storb used his -V8" #3 straight gouge to form the rear cylinder. These cuts were made using a skewing motion, because a straight cut, with the grain, would risk splitting the workpiece. Here again, we're seeing him pull the tool toward himself with his left hand, which is steadied on the work. -t J™ The rear cylinder is fin-I ished, leaving a narrow flat spot to keep track of the full diameter of the stock. The idea with the ball and claw, and all relief carving from this period, is to create the illusion of the carving floating on top of another, uninterrupted surface. In this case, the talon is gripping a ball (a pearl, actually). The portions of the ball exposed in each quadrant should seem connected with those adjacent to it. Keeping track of the center of the ball is the way this is done. Some Philadelphia chairs have small flat spots still evident in this location. 1 O Storb started shaping the lower knuckles by pencil-I J ing a line 3/a" from the bottom of the foot (floor). Using a % " If5 straight gouge, he made two light cuts with the grain from both directions to cut the scalloped shape above (bottom talon). While this tool was in his hand, he quickly knocked off the comer to form the upper knuckle. While none of this work looked careful to me, it was clear Storb left the knuckle area at the center of the ball (I" up) untouched. |


