Popular Woodworking 2009-02 № 174, страница 27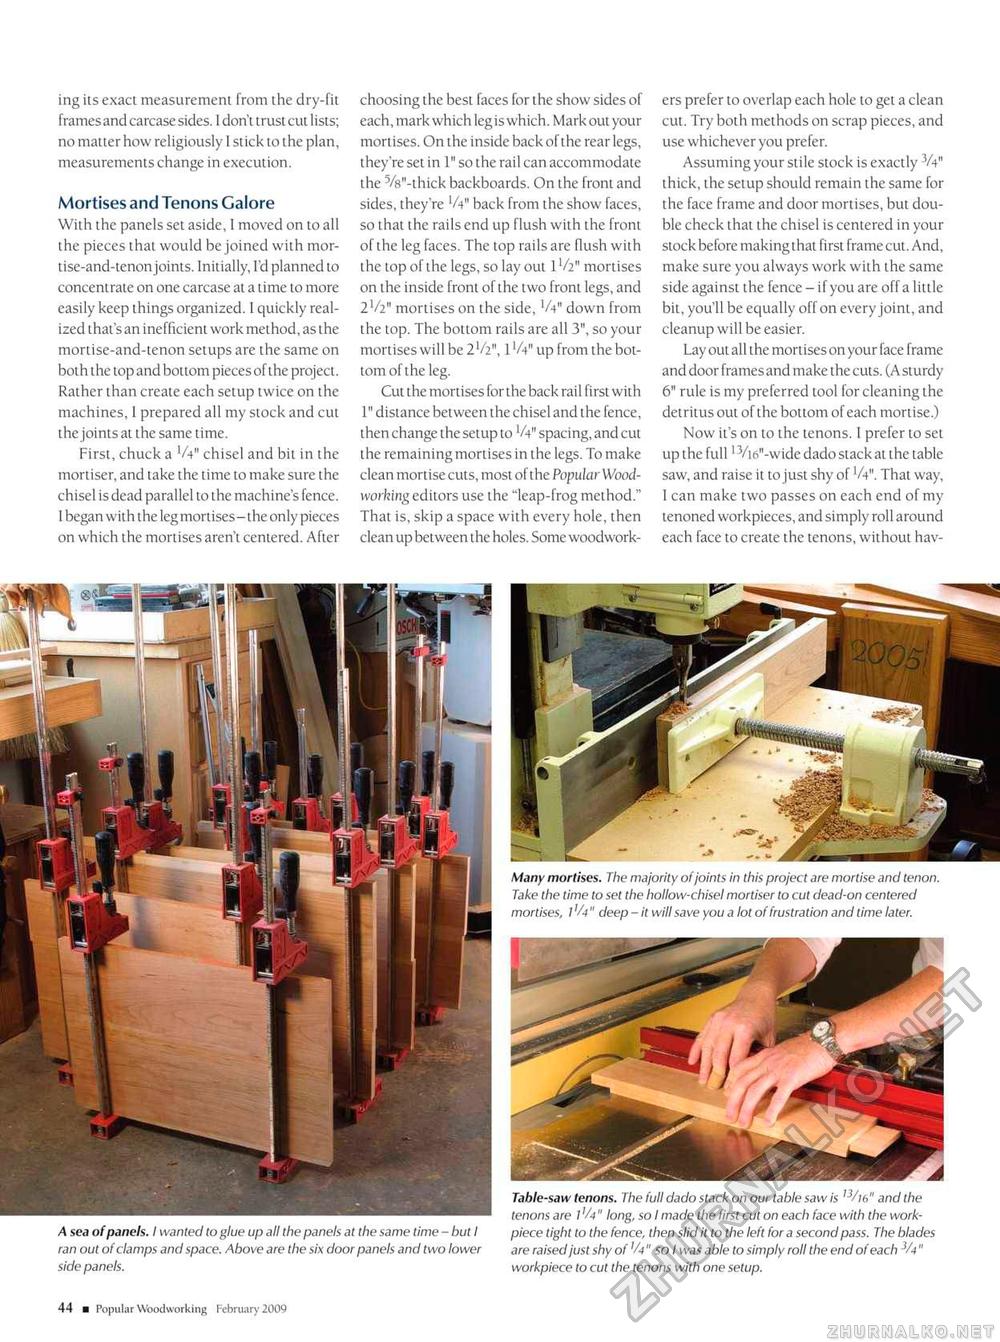
ing its exact measurement from the dry-fit frames and carcase sides. I don't trust cut lists; no matter how religiously I stick to the plan, measurements change in e Mortises and Tenons Galore With the panels set aside, I moved on to all the pieces that would be joined with mor-tise-and-tenon joints. Initially, I'd planned to concentrate on one carcase at a time to more easily keep things organized. 1 quickly realized that's an inefficient work method, as the mortise-and-tenon setups are the same on both the lop and bottom pieces of the project. Rather than create each setup twice on the machines, 1 prepared all my stock and cut the joints at the same time. First, chuck a 'A" chisel and bit in the mortiser, and take the time to make sure the chisel is dead parallel to the machine's fence. I began with the legmortises-the only pieces on which the mortises aren't centered. After choosing the best faces for the show sides of each, mark which leg is which. Mark out your mortises. On the inside back of the rear legs, they're set in 1" so the rail can accommodate the 5/8"-thick backboards. On the front and sides, they're 'A" back from the show faces, so that the rails end up flush with the front of the leg faces. The top rails are flush with the top of the legs, so lay out 1Vi" mortises on the inside front of the two front legs, and 2V2" mortises on the side, 'A" down from the top. The bottom rails are all 3", so your mortises will be 2 V2", 1 'A" up from the bottom of the leg. Cut the mortises forthe back rail first with 1" distance between the chisel and the fence, then change the setup to 'A" spacing, and cut the remaining mortises in the legs. To make clean mortise cuts, most of the Popular Woodworking editors use the "leap-frog method." That is, skip a space with every hole, then clean up between the holes. Some woodwork ers prefer to overlap each hole to get a clean cut. Try both methods on scrap pieces, and use whichever you prefer. Assuming your stile stock is exactly 3A" thick, the setup should remain the same for the face frame and door mortises, but double check that the chisel is centered in your stock before making that first frame cut. And, make sure you always work with the same side against the fence - if you are off a little bit, you'll be equally off on every joint, and cleanup will be easier. Lay out all the mortises on your face frame and door frames and make the cuts. (A sturdy 6" rule is my preferred tool for cleaning the detritus out of the bottom of each mortise.) Now it's on to the tenons. I prefer to set up the full13/i6"-wide dado stack at the table saw, and raise it to just shy of 'A". That way, 1 can make two passes on each end of my tenoned workpieces, and simply roll around each face to create the tenons, without hav- Many mortises. The majority of joints in this project are mortise and teno Take the time to set the hollow-chisel mortiser to cut dead-on centered mortises, I 'A" deep - it will save you a lot of frustration and time later. A sea of panels. I wanted to glue up all the panels at the same time - but I ran out of clamps and space. Above are the six door panels and two lower side panels. Table-saw tenons. The full dado stack on our table saw is 13Alb" and the tenons are 7'A" long, so I made the first cut on each face with the work-piece tight to the fence, then slid it to the left for a second pass. The blades are raised just shy of 'A" so I was able to simply roll the end of each " workpiece to cut the tenons with one setup. 44 ■ Popular Woodworking February 2009 |


