Popular Woodworking 2009-02 № 174, страница 30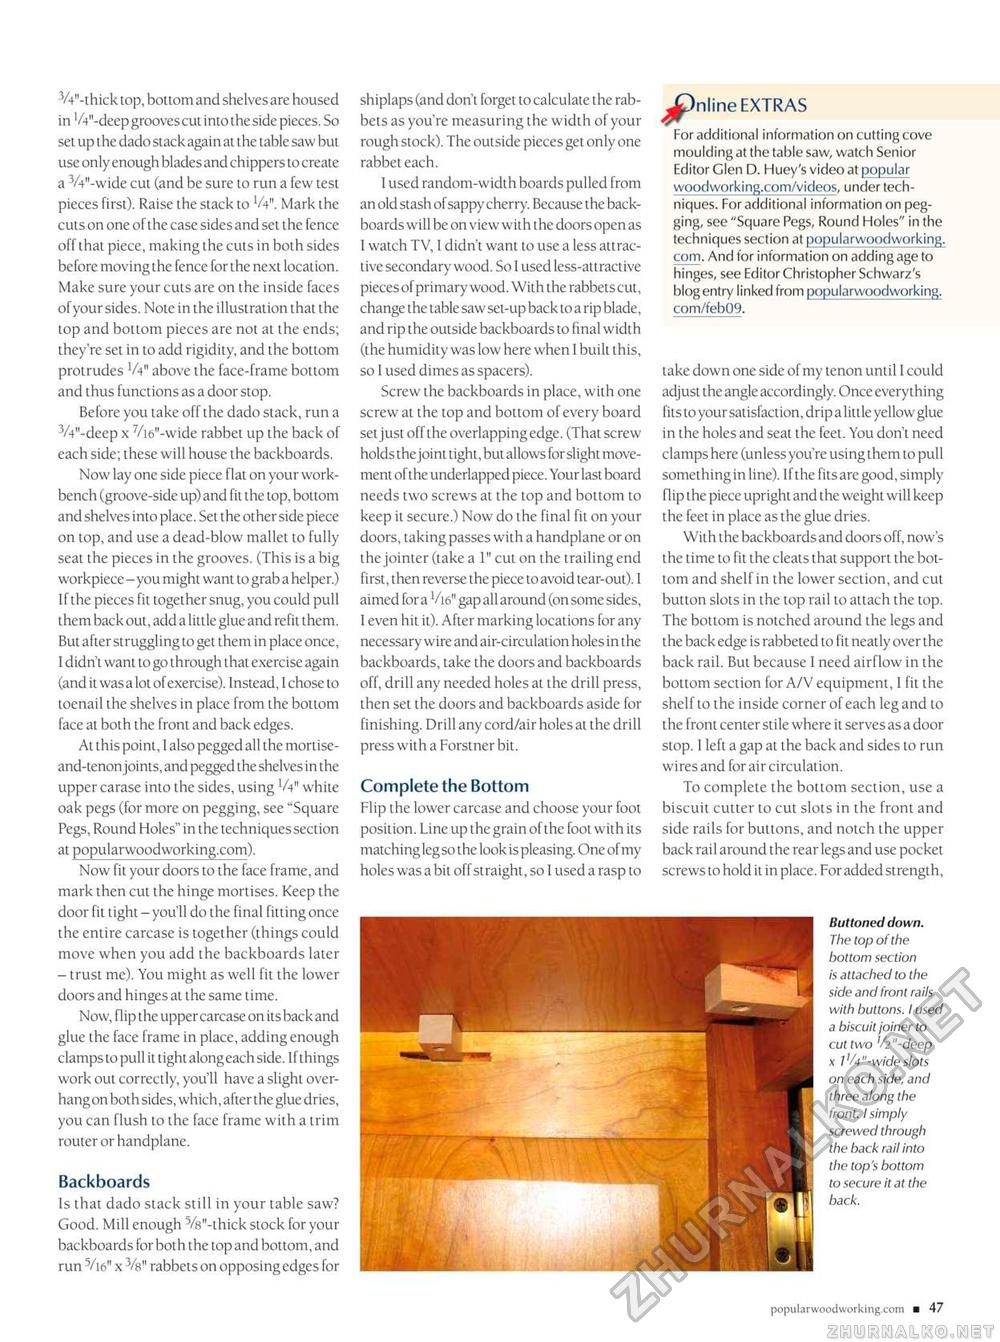
3/4B-thick top, bottom and shelves are housed in W-deep grooves cut into the side pieces. So set up the dado stack again at the table saw but use only enough blades and chippers to create a VV-wide cut (and be sure to run a few test pieces first). Raise the stack to 'A". Mark the cuts on one of the case sides and set the fence off that piece, making the cuts in both sides before moving the fence for the next location. Make sure your cuts are on the inside faces of your sides. Note in the illustration that the top and bottom pieces are not at the ends; they're set in to add rigidity, and the bottom protrudes V4" above the face-frame bottom and thus functions as a door stop. Before you take off the dado stack, run a 3/4"-deep x 7/i6"-wide rabbet up the back of each side; these will house the backboards. Now lay one side piece flat on your workbench (groove-side up) and fit the top, bottom and shelves into place. Set the other side piece on top, and use a dead-blow mallet to fully seat the pieces in the grooves. (This is a big workpiece - you might want to grab a helper.) If the pieces fit together snug, you could pull them back out, add a little glue and refit them. But after struggling to get them in place once, I didn't want to go through that exercise again (and it was a lot of exercise). Instead, I chose to toenail the shelves in place from the bottom face at both the front and back edges. At this point, I also pegged all the mortise-and-tenon joints, and pegged the shelves in the upper carase into the sides, using 'A" white oak pegs (for more on pegging, see "Square Pegs, Round Holes" in the techniques section at popularwoodworking.com). Now fit your doors to the face frame, and mark then cut the hinge mortises. Keep the door fit tight - you'll do the final fitting once the entire carcase is together (things could move when you add the backboards later - trust me). You might as well fit the lower doors and hinges at the same time. Now, flip the upper carcase on its back and glue the face frame in place, adding enough clamps to pull it tight along each side. If things work out correctly, you'll have a slight overhang on both sides, which, after the glue dries, you can flush to the face frame with a trim router or handplane. Backboards Is that dado stack still in your table saw? Good. Mill enough Vs'-thick stock for your backboards for both the top and bottom, and run V16" x Vs" rabbets on opposingedges for shiplaps (and don't forget to calculate the rabbets as you're measuring the width of your rough stock). The outside pieces get only one rabbet each. 1 used random-width boards pulled from an old stash of sappy cherry. Because t he backboards will be on view with the doors open as I watch TV, I didn't want to use a less attractive secondary wood. So I used less-attractive pieces of primary wood. With the rabbets cut, change the table saw set-up back to a rip blade, and rip the outside backboards to final width (the humidity was low here when I built this, so I used dimes as spacers). Screw the backboards in place, with one screw at the top and bottom of every board set just off the overlapping edge. (That screw holds the joint tight, but allows for slight movement of the underlapped piece. Your last board needs two screws at the top and bottom to keep it secure.) Now do the final fit on your doors, taking passes with a handplane or on the jointer (take a 1" cut on the trailing end first, then reverse the piece to avoid tear-out). 1 aimed for a'/16" gap all around (on some sides, I even hit it). After marking locations for any necessary wire and air-circulation holes in the backboards, take the doors and backboards off, drill any needed holes at the drill press, then set the doors and backboards aside for finishing. Drill any cord/air holes at the drill press with a Forstner bit. Complete the Bottom Flip the lower carcase and choose your foot position. Line up the grain of the foot with its matching leg so the look is pleasing. One of my holes was a bit off straight, so 1 used a rasp to ^)nline EXTRAS For additional information on cutting cove moulding at the table saw, watch Senior Editor Glen D. Huey's video at popular woodworking.com/videos, under techniques. For additional information on pegging, see "Square Pegs, Round Holes" in the techniques section at popularwoodworking. com. And for information on adding age to hinges, see Editor Christopher Schwarz's blog entry linked from popularwoodworking. com/feb09. take down one side of my tenon until I could adjust the angle accordingly. Once everything fits to your satisfaction, drip alittle yellow glue in the holes and seat the feet. You don't need clamps here (unless you're using them to pull something in line). If the fits are good, simply flip the piece upright and the weight will keep the feet in place as the glue dries. With the backboards and doors off, now's the time to fit the cleats that support the bottom and shelf in the lower section, and cut button slots in the top rail to attach the top. The bottom is notched around the legs and the back edge is rabbeted to fit neatly over the back rail. But because I need airflow in the bottom section for A/V equipment, 1 fit the shelf to the inside corner of each leg and to the front center stile where it serves as a door stop. I left a gap at the back and sides to run wires and for air circulation. To complete the bottom section, use a biscuit cutter to cut slots in the front and side rails for buttons, and notch the upper back rail around the rear legs and use pocket screws to hold it in place. For added strength, Buttoned down. The top of the bottom section is attached to the side and front rails with buttons. I used a biscuit joiner to cut two'/.? "-deep x 1'A"-wide slots on each side, and three along the front. I simply screwed through the back rail into the top's bottom to secure it at the
populara-oodworking.com ■ 47 |


