Popular Woodworking 2009-02 № 174, страница 32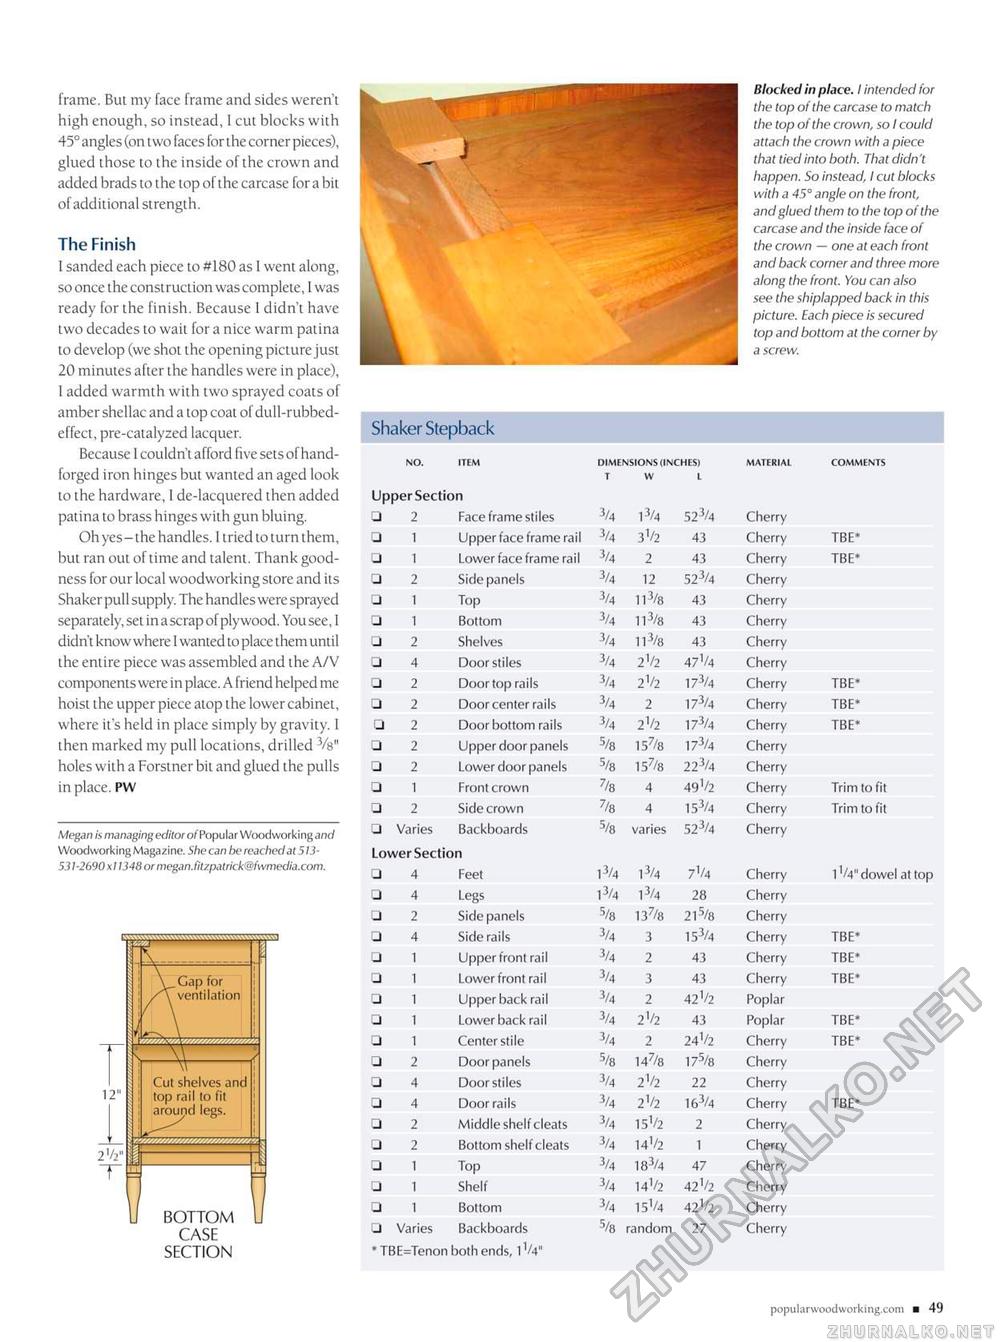
frame. But my face frame and sides weren't high enough, so instead, I cut blocks with 45° angles (on two faces for the corner pieces), glued those to the inside of the crown and added brads to the top of the carcase for a bit of additional strength. The Finish 1 sanded each piece to #180 as 1 went along, so once the construction was complete, 1 was ready for the finish. Because 1 didn't have two decades to wait for a nice warm patina to develop (we shot the opening picture just 20 minutes after the handles were in place), 1 added warmth with two sprayed coats of amber shellac and a top coat of dull-rubbed-effect, pre-catalyzed lacquer. Because 1 couldn't afford five sets of hand-forged iron hinges but wanted an aged look to the hardware, 1 de-lacquered then added patina to brass hinges with gun bluing. Oh yes-the handles. I tried to turn them, but ran out of time and talent. Thank goodness for our local woodworking store and its Shaker pull supply. The handles were sprayed separately, set in a scrap of plywood. You see, 1 didn't know where 1 wanted to place them until the entire piece was assembled and the A/V components were in place. A friend helped me hoist the upper piece atop the lower cabinet, where it's held in place simply by gravity. 1 then marked my pull locations, drilled 3/s" holes with a Forstner bit and glued the pulls in place. PW Megan is managing editor of Popular Woodworking and Woodworking Magazine. She can be reached at 513-531-2690X11348 or megan.Htzpalrick@fwmedia.com. Blocked in place. I intended for the top of the carcase to match the top of the crown, so I could attach the crown with a piece that tied into both. That didn't happen. So instead, I cut blocks with a 45° angle on the front, and glued them to the top of the carcase and the inside face of the crown — one at each front and back corner and three more along the front. You can also see the shiplapped back in this picture. Each piece is secured top and bottom at the corner by Shaker Stepback DIMENSIONS (INCHES) DIMENSIONS (INCHES)
* TBE=Tenon both ends, 11/4" * TBE=Tenon both ends, 11/4" populara-oodworking.com ■ 49 |
||||||||||||||||||||||||||||||||||||||||||||||||||||||||||||||||||||||||||||||||||||||||||||||||||||||||||||||||||||||||||||||||||||||||||||||||||||||||||||||||||||||||||||||||||||||||||||||||||||||||||||||||||


