Popular Woodworking 2009-04 № 175, страница 29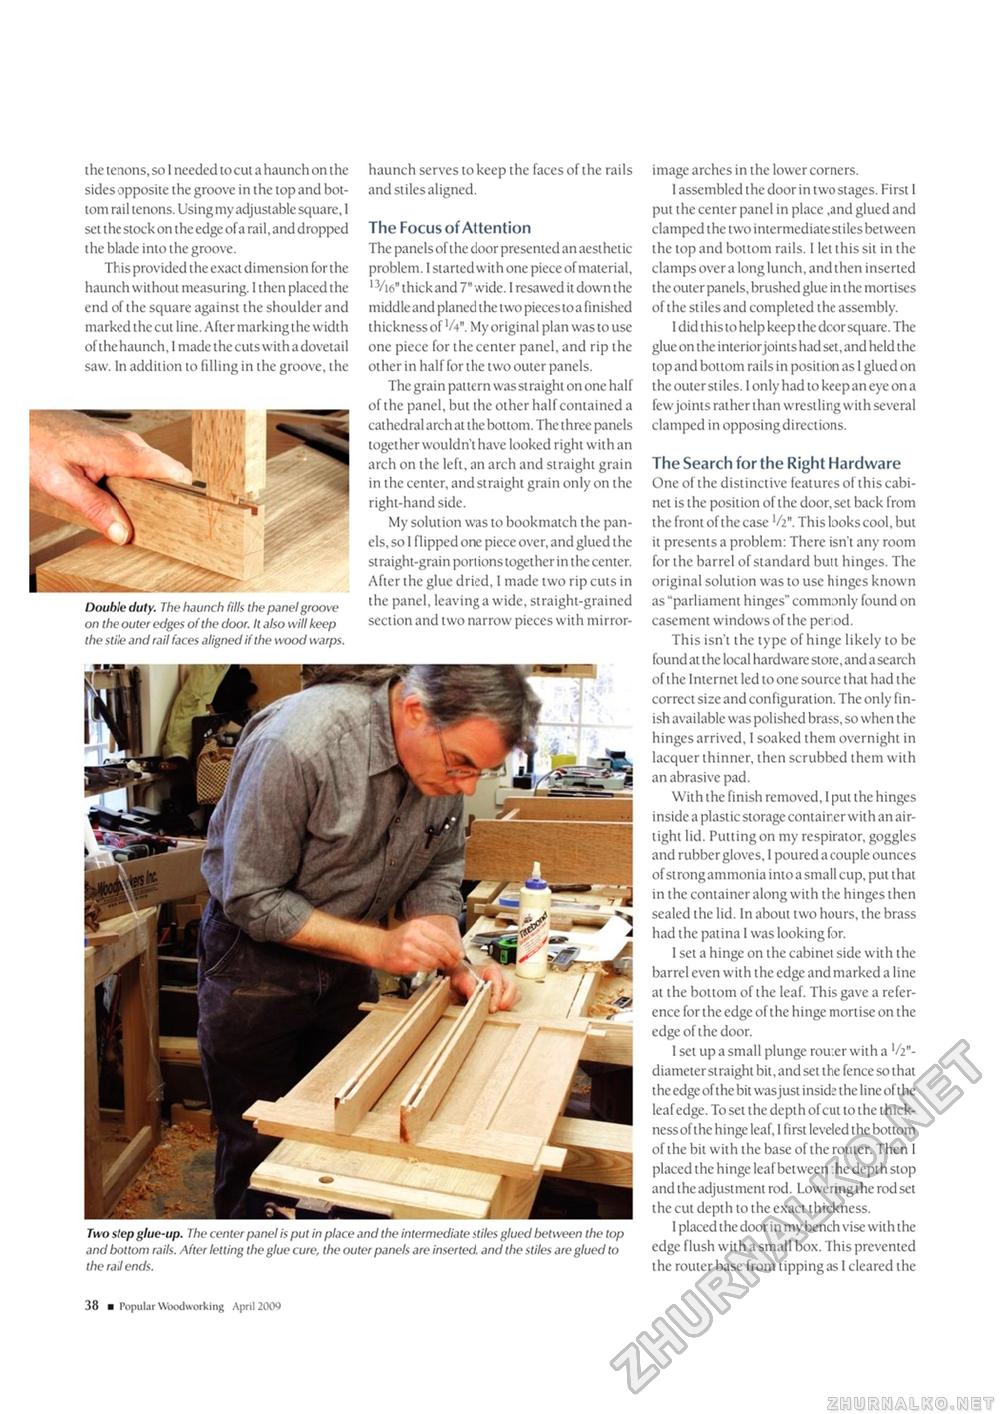
image arches in ihe lower corners. 1 assembled the door in two stages. First 1 put the center panel in place ,and glued and clamped the two intermediatestilesbetween the top and bottom rails. I let this sit in the clamps over a long lunch, and then inserted the outer panels, brushed glue in the mortises ofthe stiles and completed the assembly. I did this to help keep the dcor square. The glue on the interior joints had set, and held the top and bottom rails in position as I glued on the outer stiles. 1 only had to keep an eye on a few joints rather than wrestling with several clamped in opposing directions. The Search for the Right Hardware One ofthe distinctive features ofthis cabinet is the position ofthe door, set back from the front of the case 1/2". This looks cool, but it presents a problem: There isn't any room for the barrel of standard butt hinges. The original solution was to use hinges known as "parliament hinges" commonly found on casement windows ofthe per.od. This isn't the type of hinge likely to be found at the local hardware store, and a search ofthe Internet led to one source that had the correct size and configuration. The only finish available was polished brass, so when the hinges arrived, 1 soaked them overnight in lacquer thinner, then scrubbed them with an abrasive pad. With the finish removed, 1 put the hinges inside a plastic storage container with an airtight lid. Putting on my respirator, goggles and rubber gloves, I poured a couple ounces of strongammonia into a small cup, put that in the container along with the hinges then sealed the lid. In about two hours, the brass had the patina I was looking for. I set a hinge on the cabinet side with the barrel even with the edge and marked a line at the bottom ofthe leaf. This gave a reference for the edge ofthe hinge mortise on the edge ofthe door. I set up a small plunge rou:er with a Vi"-diameter straight bit, and set the fence so that the edge of the bit wasjust inside the line ofthe leaf edge. To set the depth of cut to the thickness of the hinge leaf, 1 first leveled the bottom of the bit with the base of the router. Then I placed the hinge leaf between :he depth stop and the adjustment rod. Lowering the rod set the cut depth to the exact thickness. I placed the door in my bench vise with the edge flush with a small box. This prevented the router base from lipping as I cleared the Two step glue-up. The center panel is put in place and the intermediate stiles glued between the top and bottom rails. After letting the glue cure, the outer panels are inserted, and the stiles are glued to the rail ends. haunch serves to keep the faces of the rails and stiles aligned. The Focus of Attention The panels ofthe door presented an aesthetic problem. I started with one piece of material, 13/i6" thick and 7" wide. I resawed it down the middle and planed the two pieces to a finished thickness of Vv. My original plan was to use one piece for the center panel, and rip the other in half for the two outer panels. The grain pattern was straight on one half ofthe panel, but the other half contained a cathedral arch at the bottom. The three panels together wouldn't have looked right with an arch on the left, an arch and straight grain in the center, and straight grain only on the right-hand side. My solution was to bookmatch the panels, so I flipped one piece over, and glued the straight-grain portions together in the center. After the glue dried, I made two rip cuts in the panel, leaving a wide, straight-grained section and two narrow pieces with mirror- Double duty. The haunch fills the panel groove on the outer edges ofthe door. It also will keep the stile and rail faces aligned if the wood warps. the tenons, so I needed to cut a haunch on the sides opposite the groove in the top and bottom rail tenons. Using my adjustable square, I set the stock on the edge of a rail, and dropped the blade into the groove. This provided the exact dimension for the haunch without measuring. I then placed the end of the square against the shoulder and marked the cut line. After markingthe width ofthe haunch, 1 made the cuts with a dovetail saw. In addition to filling in the groove, the 10 ■ Popular Woodworking April 2009 |


