Popular Woodworking 2009-04 № 175, страница 34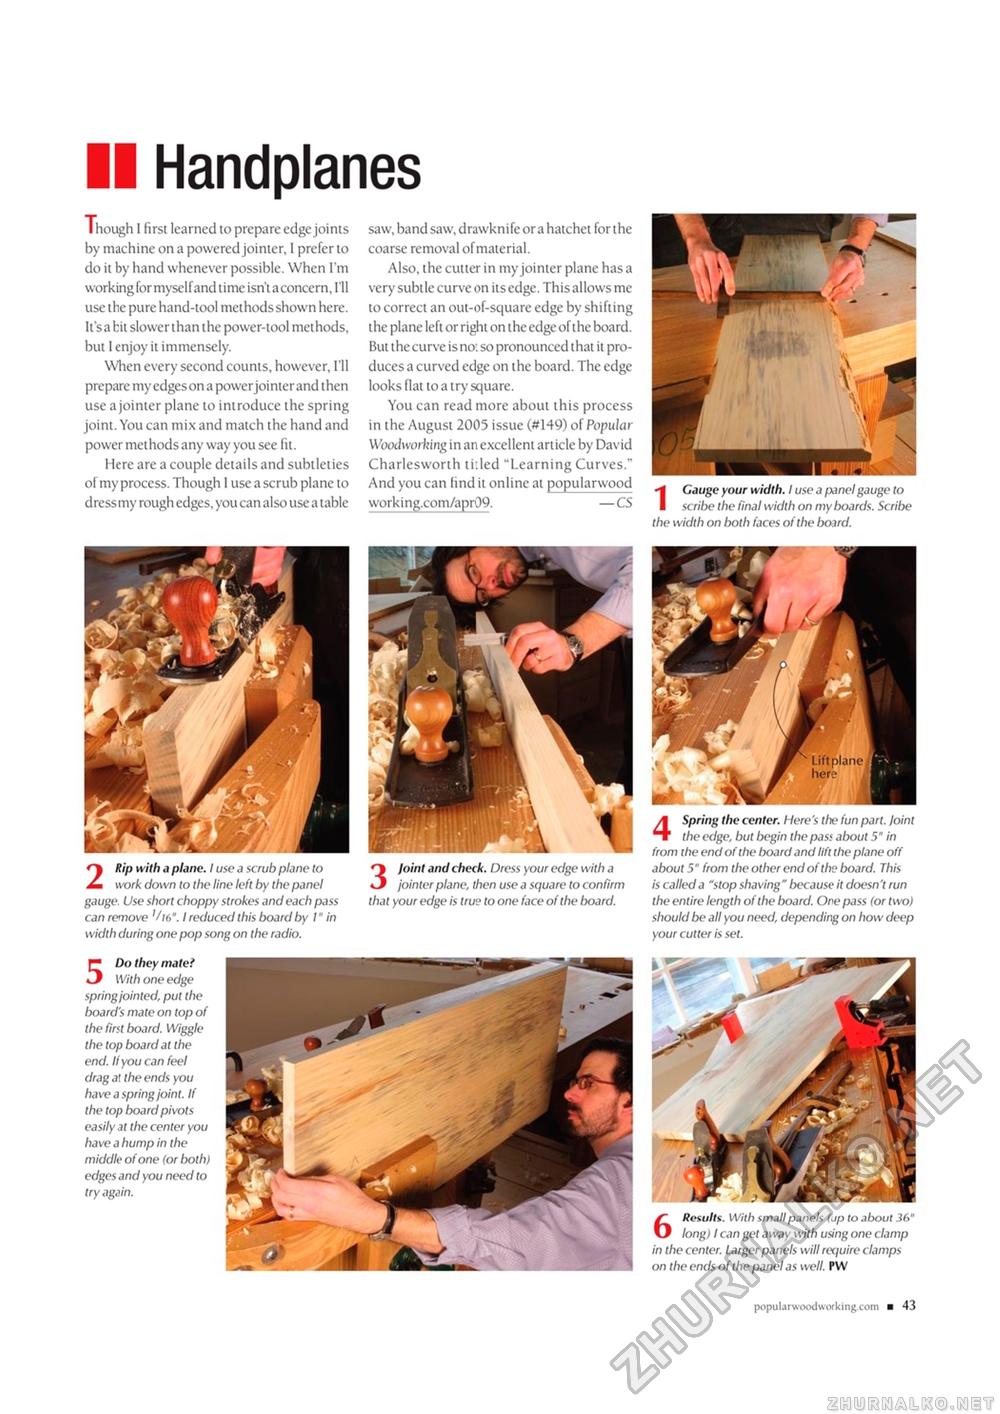
Handplanes Though I first learned to prepare edge joints by machine on a powered jointer, 1 prefer to do it by hand whenever possible. When I'm working for myself and time isn't a concern, I'll use the pure hand-tool methods shown here. It's a tit slower than the power-tool methods, but I enjoy it immensely. When every second counts, however, I'll prepare my edges on a powerjointerand then use a jointer plane to introduce the spring joint. You can mix and match the hand and power methods any way you see fit. Here are a couple details and subtleties of my process. Though I use a scrub plane to dress my rough edges, you can also use a table saw, band saw, drawknife ora hatchet for the coarse removal of material. Also, the cutter in my jointer plane has a very subtle curve on its edge. This allows me to correct an out-of-square edge by shifting the plane left or right on the edge of the board. But the curve is no: so pronounced that it produces a curved edge on the board. The edge looks flat to a try square. You can read more about this process in the August 2005 issue (#149) of Popular Woodworking in an excellent article by David Charlesworth tilled "Learning Curves." And you can find it online at popularwood working.com/apr09. —CS 1 Gauge your width. I use a panel gauge to scribe the final width on my boards. Scribe the width on both faces of the boird. 3 Joint and check. Dress your edge with a jointer plane, then use a square to confirm that your edge is true to one face of the board. 4 Spring the center. Here's the fun part. Joint the edge, but begin the pass about 5" in from the end of the board and lift the plane off about 5" from the other end of the board. This is called a "stop shaving" because it doesn't run the entire length of the board. One pass (or two) should be all you need, depending on how deep your cutter is set. 6 Results. With small panels (jp to about 36" long) I can get away with using one clamp in the center. Larger panels will require clamps on the ends of the panel as well. PW 2 Rip with a plane. I use a scrub plane to work down to the line left by the panel gauge. Use short choppy strokes and each pass can remove '/16". I reduced this board by 1" in width during one pop song on the radio. 5 Do they mate? With one edge spring jointed, put the board's mate on top of the first board. Wiggle the top board at the end. If you can feel drag al the ends you have a spring joint. If the top board pivots easily at the center you have a hump in the middle of one (or both) edges and you need to try again. popular wxxiworki ng.com ■ 43 |


