Popular Woodworking 2009-10 № 178, страница 31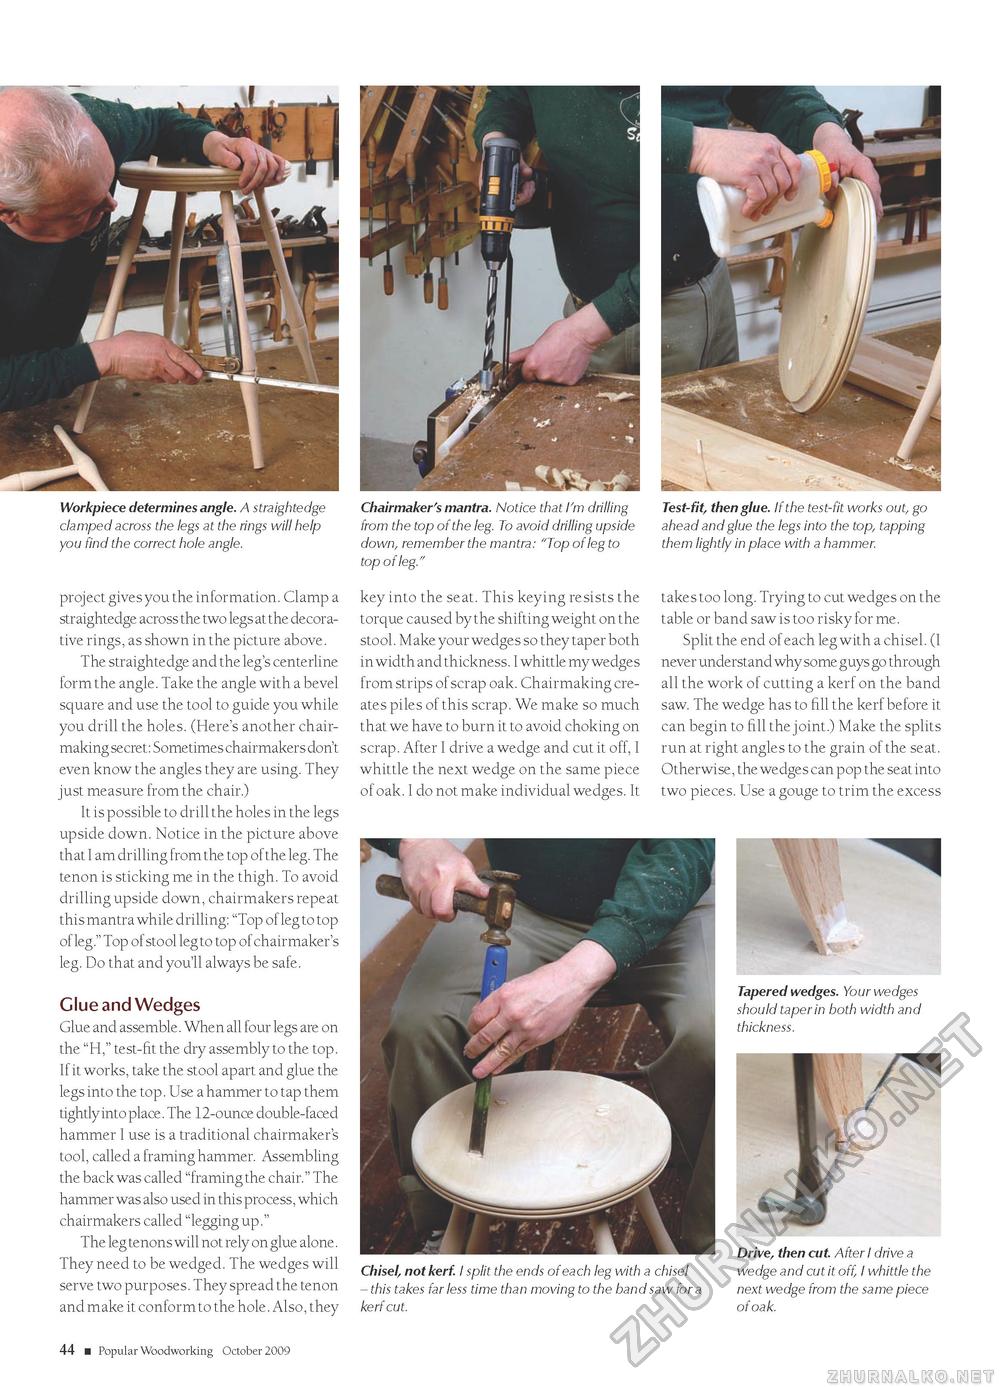
Workpiece determines angle. A straightedge clamped across the legs at the rings will help you find the correct hole angle. project gives you the information. Clamp a straightedge across the two legs at the decorative rings, as shown in the picture above. The straightedge and the leg's centerline form the angle. Take the angle with a bevel square and use the tool to guide you while you drill the holes. (Here's another chair-making secret: Sometimes chairmakers don't even know the angles they are using. They just measure from the chair.) It is possible to drill the holes in the legs upside down. Notice in the picture above that I am drilling from the top of the leg. The tenon is sticking me in the thigh. To avoid drilling upside down, chairmakers repeat this mantra while drilling: "Top of leg to top of leg." Top of stool leg to top of chairmaker's leg. Do that and you'll always be safe. Glue and Wedges Glue and assemble. When all four legs are on the "H," test-fit the dry assembly to the top. If it works, take the stool apart and glue the legs into the top. Use a hammer to tap them tightly into place. The 12-ounce double-faced hammer I use is a traditional chairmaker's tool, called a framing hammer. Assembling the back was called "framing the chair." The hammer was also used in this process, which chairmakers called "legging up." The leg tenons will not rely on glue alone. They need to be wedged. The wedges will serve two purposes. They spread the tenon and make it conform to the hole. Also, they Chairmaker's mantra. Notice that I'm drilling from the top of the leg. To avoid drilling upside down, remember the mantra: "Top of leg to top of leg." key into the seat. This keying resists the torque caused by the shifting weight on the stool. Make your wedges so they taper both in width and thickness. I whittle my wedges from strips of scrap oak. Chairmaking creates piles of this scrap. We make so much that we have to burn it to avoid choking on scrap. After I drive a wedge and cut it off, I whittle the next wedge on the same piece of oak. I do not make individual wedges. It Test-fit, then glue. If the test-fit works out, go ahead and glue the legs into the top, tapping them lightly in place with a hammer. takes too long. Trying to cut wedges on the table or band saw is too risky for me. Split the end of each leg with a chisel. (I never understand why some guys go through all the work of cutting a kerf on the band saw. The wedge has to fill the kerf before it can begin to fill the joint.) Make the splits run at right angles to the grain of the seat. Otherwise, the wedges can pop the seat into two pieces. Use a gouge to trim the excess Tapered wedges. Your wedges should taper in both width and thickness. Chisel, not kerf. I split the ends of each leg with a chisel - this takes far less time than moving to the band saw for a kerf cut. Drive, then cut. After I drive a wedge and cut it off, I whittle the next wedge from the same piece of oak. 44 ■ Popular Woodworking October 2009 |


