Popular Woodworking 2009-10 № 178, страница 29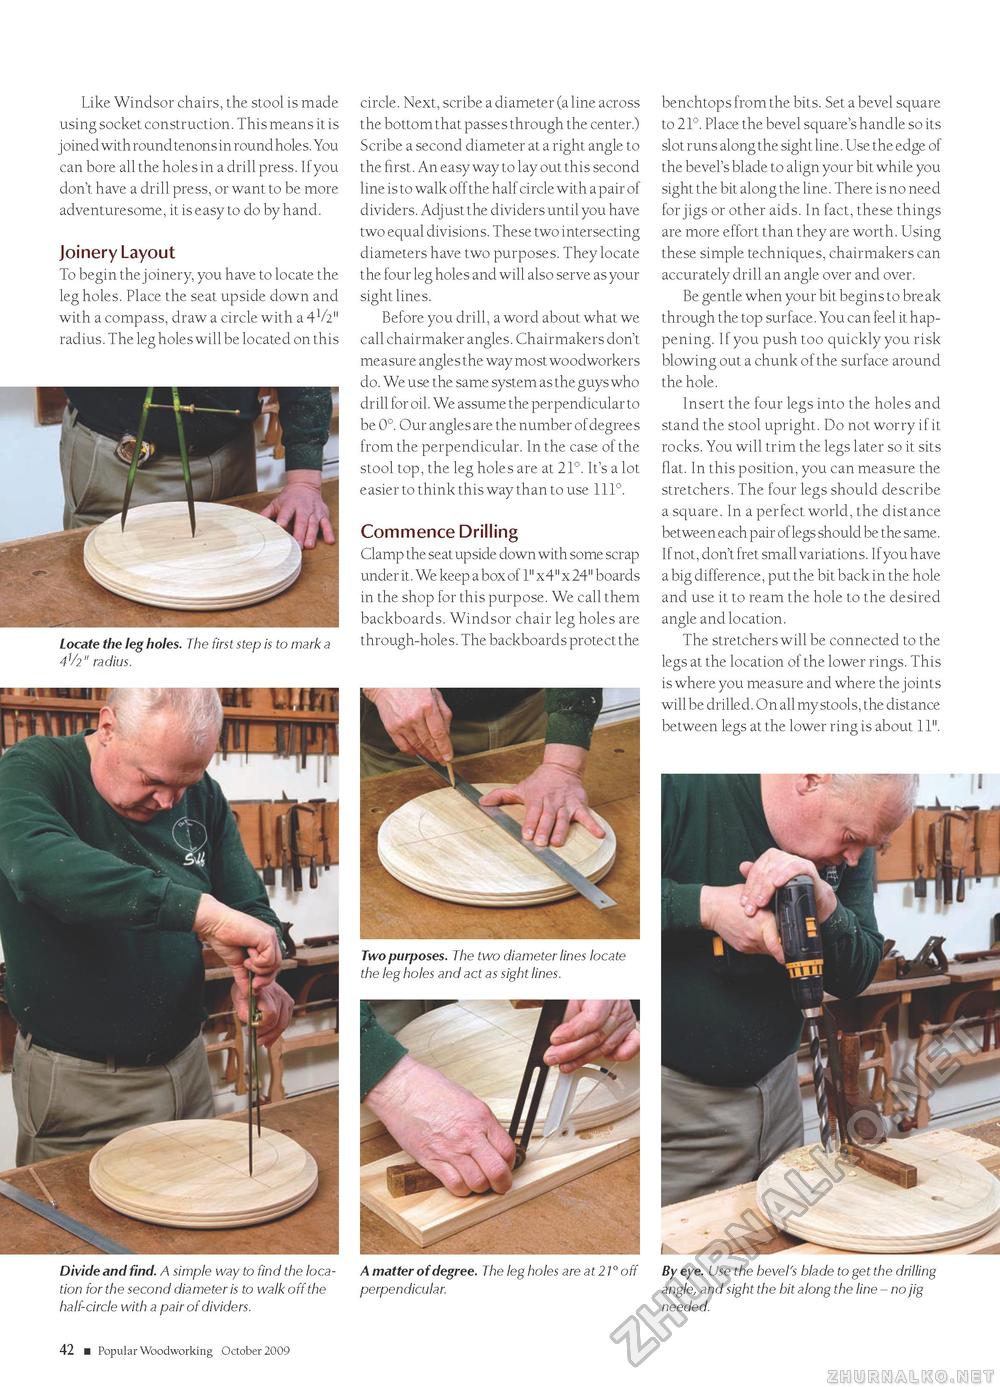
Like Windsor chairs, the stool is made using socket construction. This means it is joined with round tenons in round holes. You can bore all the holes in a drill press. If you don't have a drill press, or want to be more adventuresome, it is easy to do by hand. Joinery Layout To begin the joinery, you have to locate the leg holes. Place the seat upside down and with a compass, draw a circle with a 4V2" radius. The leg holes will be located on this Locate the leg holes. The first step is to mark a 4V2" radius. Divide and find. A simple way to find the location for the second diameter is to walk off the half-circle with a pair of dividers. circle. Next, scribe a diameter (a line across the bottom that passes through the center.) Scribe a second diameter at a right angle to the first. An easy way to lay out this second line is to walk off the half circle with a pair of dividers. Adjust the dividers until you have two equal divisions. These two intersecting diameters have two purposes. They locate the four leg holes and will also serve as your sight lines. Before you drill, a word about what we call chairmaker angles. Chairmakers don't measure angles the way most woodworkers do. We use the same system as the guys who drill for oil. We assume the perpendicular to be 0°. Our angles are the number of degrees from the perpendicular. In the case of the stool top, the leg holes are at 21°. It's a lot easier to think this way than to use 111°. Commence Drilling Clamp the seat upside down with some scrap under it. We keep a box of 1" x 4" x 24" boards in the shop for this purpose. We call them backboards. Windsor chair leg holes are through-holes. The backboards protect the Two purposes. The two diameter lines locate the leg holes and act as sight lines. A matter of degree. The leg holes are at 21° off perpendicular. benchtops from the bits. Set a bevel square to 21°. Place the bevel square's handle so its slot runs along the sight line. Use the edge of the bevel's blade to align your bit while you sight the bit along the line. There is no need for jigs or other aids. In fact, these things are more effort than they are worth. Using these simple techniques, chairmakers can accurately drill an angle over and over. Be gentle when your bit begins to break through the top surface. You can feel it happening. If you push too quickly you risk blowing out a chunk of the surface around the hole. Insert the four legs into the holes and stand the stool upright. Do not worry if it rocks. You will trim the legs later so it sits flat. In this position, you can measure the stretchers. The four legs should describe a square. In a perfect world, the distance between each pair of legs should be the same. If not, don't fret small variations. If you have a big difference, put the bit back in the hole and use it to ream the hole to the desired angle and location. The stretchers will be connected to the legs at the location of the lower rings. This is where you measure and where the joints will be drilled. On all my stools, the distance between legs at the lower ring is about 11". By eye. Use the bevel's blade to get the drilling angle, and sight the bit along the line - no jig needed. 42 ■ Popular Woodworking October 2009 |


