Popular Woodworking 2009-10 № 178, страница 49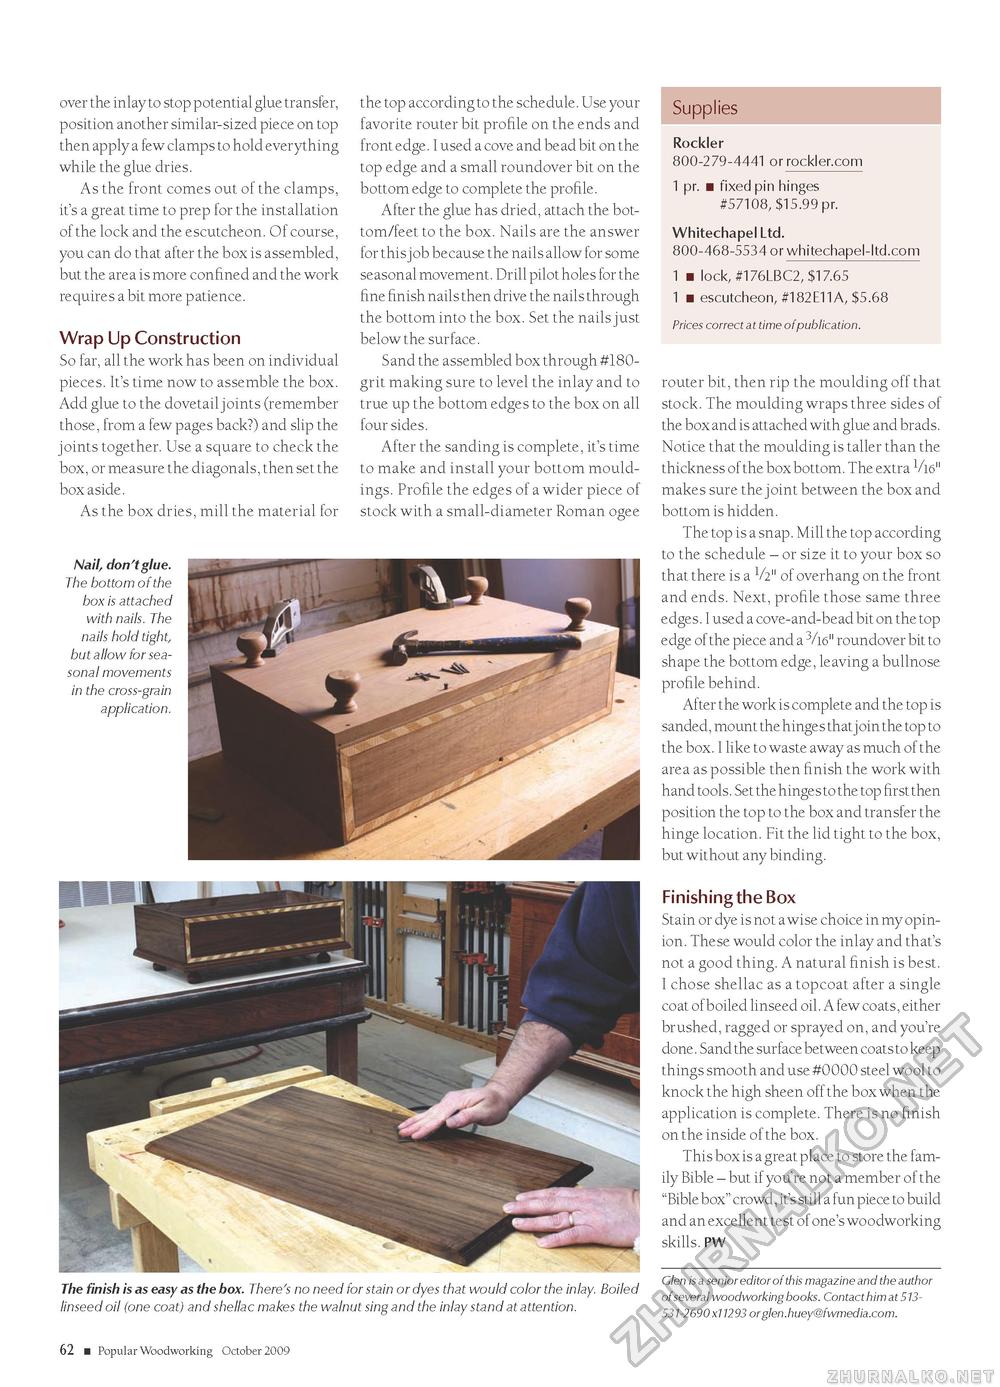
over the inlay to stop potential glue transfer, position another similar-sized piece on top then apply a few clamps to hold everything while the glue dries. As the front comes out of the clamps, it's a great time to prep for the installation of the lock and the escutcheon. Of course, you can do that after the box is assembled, but the area is more confined and the work requires a bit more patience. Wrap Up Construction So far, all the work has been on individual pieces. It's time now to assemble the box. Add glue to the dovetail joints (remember those, from a few pages back?) and slip the joints together. Use a square to check the box, or measure the diagonals, then set the box aside. As the box dries, mill the material for Nail, don't glue. The bottom of the box is attached with nails. The nails hold tight, but allow for seasonal movements in the cross-grain application. the top according to the schedule. Use your favorite router bit profile on the ends and front edge. I used a cove and bead bit on the top edge and a small roundover bit on the bottom edge to complete the profile. After the glue has dried, attach the bottom/feet to the box. Nails are the answer for this job because the nails allow for some seasonal movement. Drill pilot holes for the fine finish nails then drive the nails through the bottom into the box. Set the nails just below the surface. Sand the assembled box through #180-grit making sure to level the inlay and to true up the bottom edges to the box on all four sides. After the sanding is complete, it's time to make and install your bottom mouldings. Profile the edges of a wider piece of stock with a small-diameter Roman ogee Supplies Rockler 800-279-4441 or rockler.com The finish is as easy as the box. There's no need for stain or dyes that would color the inlay. Boiled linseed oil (one coat) and shellac makes the walnut sing and the inlay stand at attention. 1 pr. ■ fixed pin hinges #57108, $15.99 pr. Whitechapel Ltd. 800-468-5534 or whitechapel-ltd.com 1 ■ lock, #176LBC2, $17.65 1 ■ escutcheon, #182E11A, $5.68 Prices correct at time of publication. router bit, then rip the moulding off that stock. The moulding wraps three sides of the box and is attached with glue and brads. Notice that the moulding is taller than the thickness of the box bottom. The extra V16" makes sure the joint between the box and bottom is hidden. The top is a snap. Mill the top according to the schedule - or size it to your box so that there is a V2" of overhang on the front and ends. Next, profile those same three edges. I used a cove-and-bead bit on the top edge of the piece and a 3/16" roundover bit to shape the bottom edge, leaving a bullnose profile behind. After the work is complete and the top is sanded, mount the hinges that j oin the top to the box. I like to waste away as much of the area as possible then finish the work with hand tools. Set the hinges to the top first then position the top to the box and transfer the hinge location. Fit the lid tight to the box, but without any binding. Finishing the Box Stain or dye is not a wise choice in my opinion. These would color the inlay and that's not a good thing. A natural finish is best. I chose shellac as a topcoat after a single coat of boiled linseed oil. A few coats, either brushed, ragged or sprayed on, and you're done. Sand the surface between coats to keep things smooth and use #0000 steel wool to knock the high sheen off the box when the application is complete. There is no finish on the inside of the box. This box is a great place to store the family Bible - but if you're not a member of the "Bible box" crowd, it's still a fun piece to build and an excellent test of one's woodworking skills. PW Glen is a senior editor of this magazine and the author of several woodworking books. Contact him at 513-531-2690x11293 orglen.huey@fwmedia.com. 62 ■ Popular Woodworking October 2009 |


