Popular Woodworking 2009-10 № 178, страница 46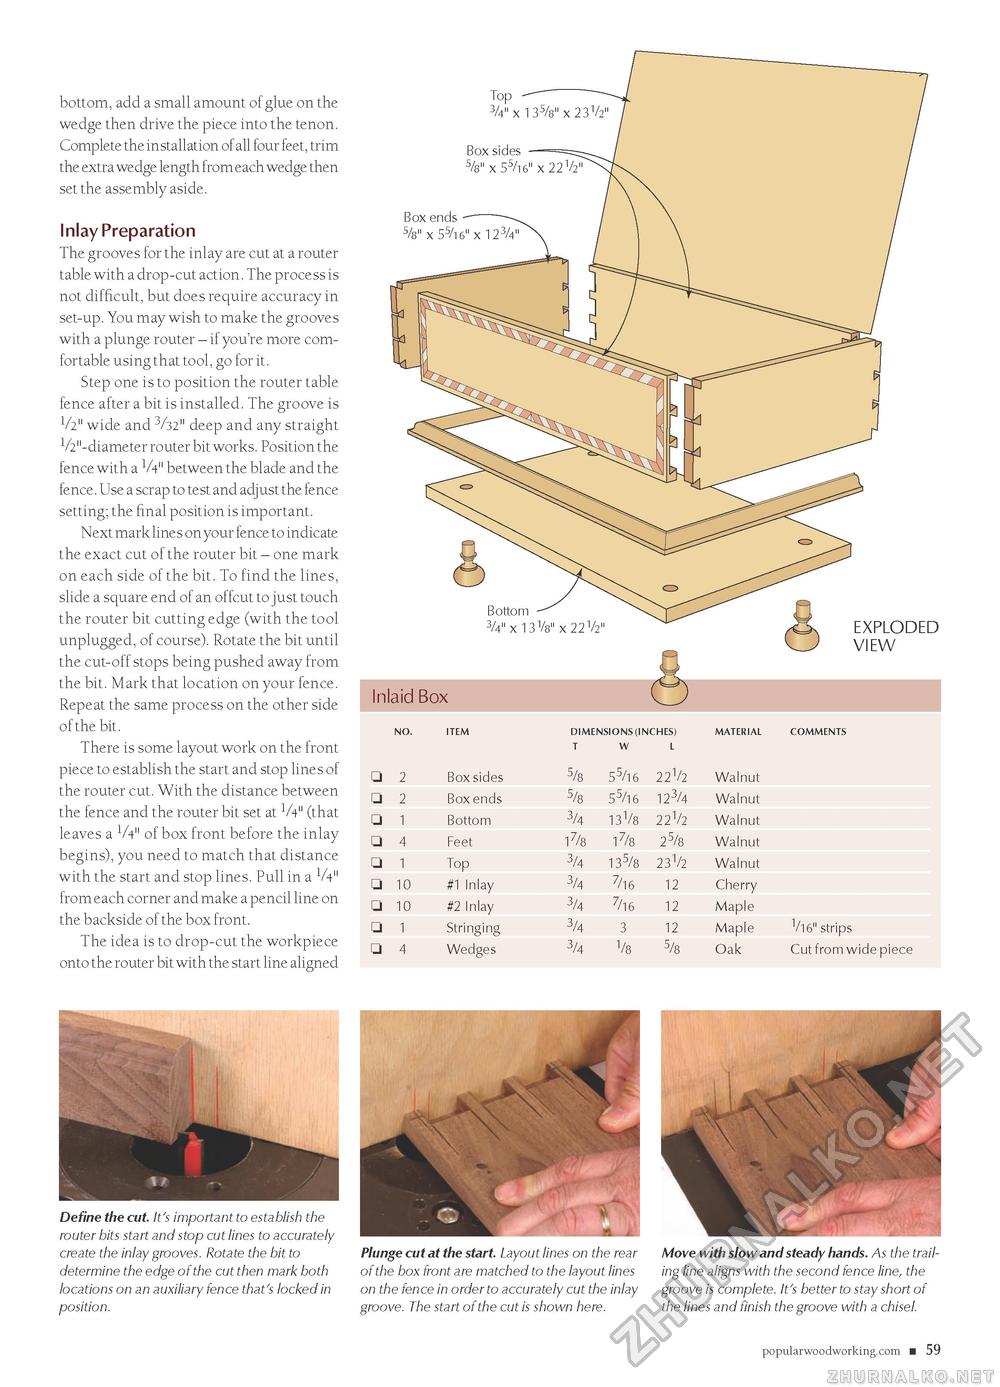
bottom, add a small amount of glue on the wedge then drive the piece into the tenon. Complete the installation of all four feet, trim the extra wedge length from each wedge then set the assembly aside. Inlay Preparation The grooves for the inlay are cut at a router table with a drop-cut action. The process is not difficult, but does require accuracy in set-up. You may wish to make the grooves with a plunge router - if you're more comfortable using that tool, go for it. Step one is to position the router table fence after a bit is installed. The groove is V2" wide and 3/32" deep and any straight V2"-diameter router bit works. Position the fence with a V4" between the blade and the fence. Use a scrap to test and adjust the fence setting; the final position is important. Next mark lines on your fence to indicate the exact cut of the router bit - one mark on each side of the bit. To find the lines, slide a square end of an offcut to just touch the router bit cutting edge (with the tool unplugged, of course). Rotate the bit until the cut-off stops being pushed away from the bit. Mark that location on your fence. Repeat the same process on the other side of the bit. There is some layout work on the front piece to establish the start and stop lines of the router cut. With the distance between the fence and the router bit set at V4" (that leaves a V4" of box front before the inlay begins), you need to match that distance with the start and stop lines. Pull in a V4" from each corner and make a pencil line on the backside of the box front. The idea is to drop-cut the workpiece onto the router bit with the start line aligned Top 3/4" x
Define the cut. It's important to establish the router bits start and stop cut lines to accurately create the inlay grooves. Rotate the bit to determine the edge of the cut then mark both locations on an auxiliary fence that's locked in position. Plunge cut at the start. Layout lines on the rear of the box front are matched to the layout lines on the fence in order to accurately cut the inlay groove. The start of the cut is shown here. Move with slow and steady hands. As the trailing line aligns with the second fence line, the groove is complete. It's better to stay short of the lines and finish the groove with a chisel. popularwoodworking.com ■ 59 |
||||||||||||||||||||||||||||||||||||||||||||||||||||||||||||||||||||||||||||||||||||


