Popular Woodworking 2009-10 № 178, страница 47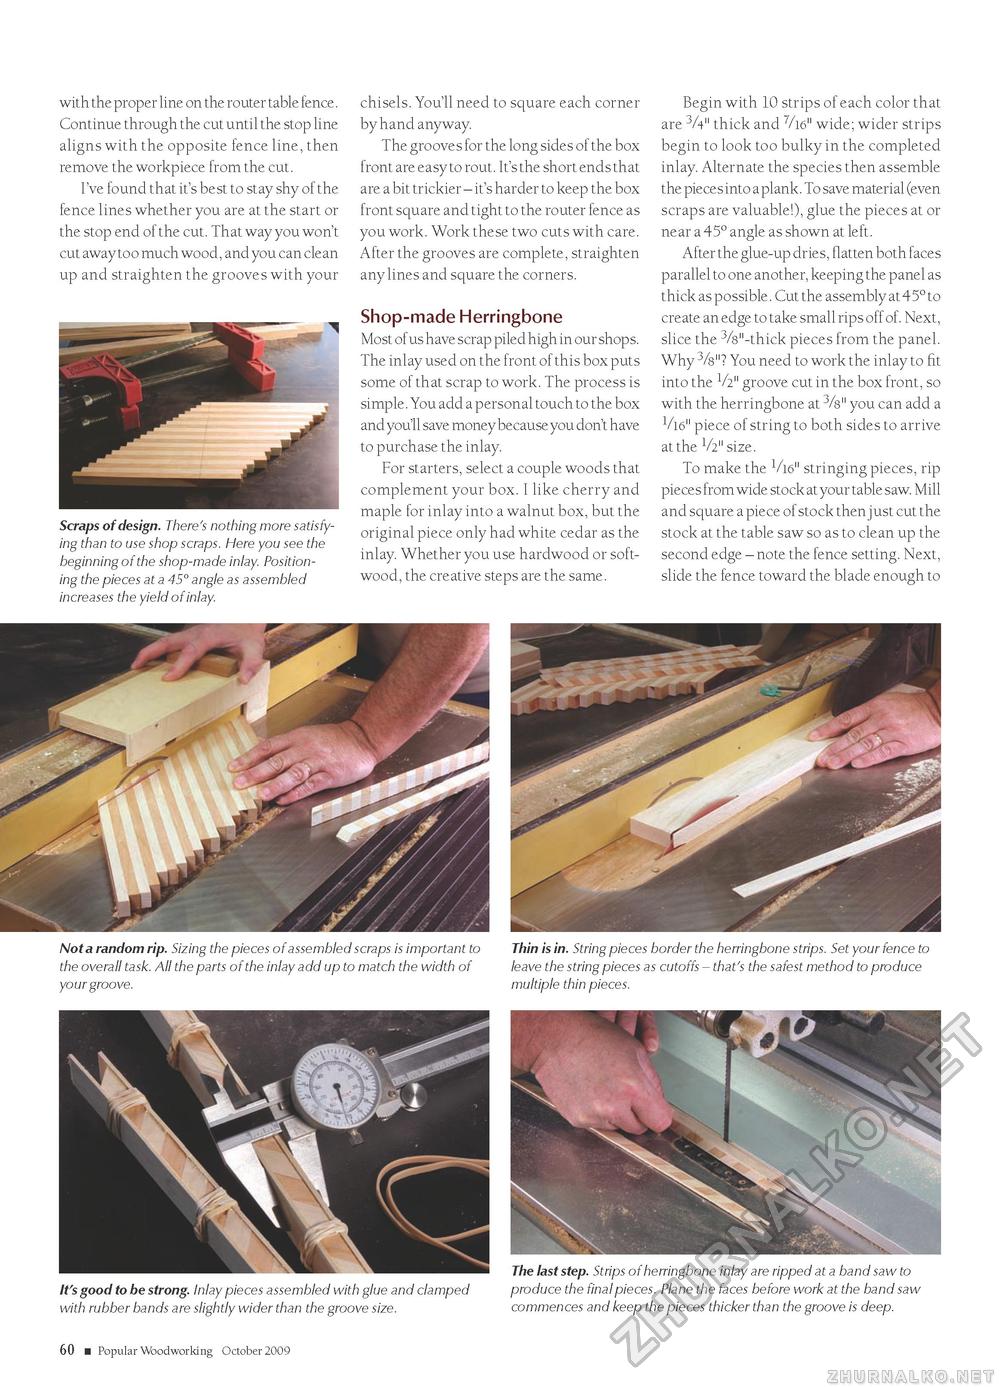
with the proper line on the router table fence. Continue through the cut until the stop line aligns with the opposite fence line, then remove the workpiece from the cut. I've found that it's best to stay shy of the fence lines whether you are at the start or the stop end of the cut. That way you won't cut away too much wood, and you can clean up and straighten the grooves with your Scraps of design. There's nothing more satisfying than to use shop scraps. Here you see the beginning of the shop-made inlay. Positioning the pieces at a 45° angle as assembled increases the yield of inlay. chisels. You'll need to square each corner by hand anyway. The grooves for the long sides of the box front are easy to rout. It's the short ends that are a bit trickier - it's harder to keep the box front square and tight to the router fence as you work. Work these two cuts with care. After the grooves are complete, straighten any lines and square the corners. Shop-made Herringbone Most of us have scrap piled high in our shops. The inlay used on the front of this box puts some of that scrap to work. The process is simple. You add a personal touch to the box and you'll save money because you don't have to purchase the inlay. For starters, select a couple woods that complement your box. I like cherry and maple for inlay into a walnut box, but the original piece only had white cedar as the inlay. Whether you use hardwood or softwood, the creative steps are the same. Begin with 10 strips of each color that are 3A" thick and 7/16" wide; wider strips begin to look too bulky in the completed inlay. Alternate the species then assemble the pieces into a plank. To save material (even scraps are valuable!), glue the pieces at or near a 45° angle as shown at left. After the glue-up dries, flatten both faces parallel to one another, keeping the panel as thick as possible. Cut the assembly at 45° to create an edge to take small rips off of. Next, slice the 3/8"-thick pieces from the panel. Why 3/8"? You need to work the inlay to fit into the V2" groove cut in the box front, so with the herringbone at 3/8" you can add a V16" piece of string to both sides to arrive at the V2" size. To make the 1/16" stringing pieces, rip pieces from wide stock at your table saw. Mill and square a piece of stock then just cut the stock at the table saw so as to clean up the second edge - note the fence setting. Next, slide the fence toward the blade enough to Not a random rip. Sizing the pieces of assembled scraps is important to the overall task. All the parts of the inlay add up to match the width of your groove. Thin is in. String pieces border the herringbone strips. Set your fence to leave the string pieces as cutoffs - that's the safest method to produce multiple thin pieces. It's good to be strong. Inlay pieces assembled with glue and clamped with rubber bands are slightly wider than the groove size. The last step. Strips of herringbone inlay are ripped at a band saw to produce the final pieces. Plane the faces before work at the band saw commences and keep the pieces thicker than the groove is deep. 60 ■ Popular Woodworking October 2009 |


