Popular Woodworking 2009-10 № 178, страница 48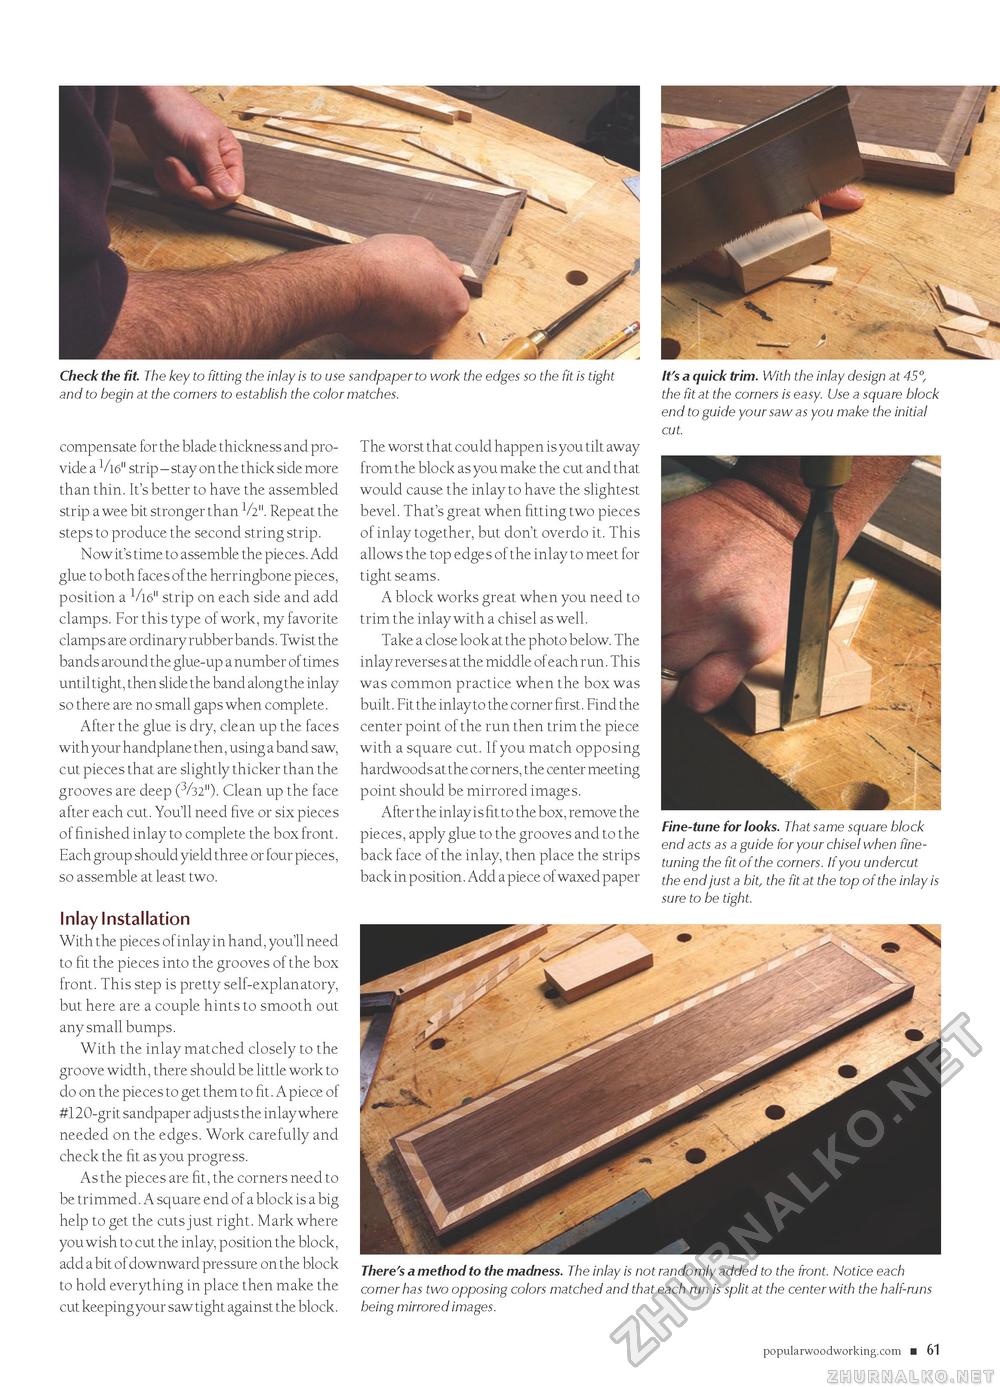
Check the fit. The key to fitting the inlay is to use sandpaper to work the edges so the fit is tight and to begin at the corners to establish the color matches. It's a quick trim. With the inlay design at 45°, the fit at the corners is easy. Use a square block end to guide your saw as you make the initial cut. compensate for the blade thickness and provide a strip - stay on the thick side more than thin. It's better to have the assembled strip a wee bit stronger than V2". Repeat the steps to produce the second string strip. Now it's time to assemble the pieces. Add glue to both faces of the herringbone pieces, position a 1/l6" strip on each side and add clamps. For this type of work, my favorite clamps are ordinary rubber bands. Twist the bands around the glue-up a number of times until tight, then slide the band along the inlay so there are no small gaps when complete. After the glue is dry, clean up the faces with your handplane then, using a band saw, cut pieces that are slightly thicker than the grooves are deep (3/32"). Clean up the face after each cut. You'll need five or six pieces of finished inlay to complete the box front. Each group should yield three or four pieces, so assemble at least two. Inlay Installation With the pieces of inlay in hand, you'll need to fit the pieces into the grooves of the box front. This step is pretty self-explanatory, but here are a couple hints to smooth out any small bumps. With the inlay matched closely to the groove width, there should be little work to do on the pieces to get them to fit. A piece of #120-grit sandpaper adjusts the inlay where needed on the edges. Work carefully and check the fit as you progress. As the pieces are fit, the corners need to be trimmed. A square end of a block is a big help to get the cuts just right. Mark where you wish to cut the inlay, position the block, add a bit of downward pressure on the block to hold everything in place then make the cut keeping your saw tight against the block. The worst that could happen is you tilt away from the block as you make the cut and that would cause the inlay to have the slightest bevel. That's great when fitting two pieces of inlay together, but don't overdo it. This allows the top edges of the inlay to meet for tight seams. A block works great when you need to trim the inlay with a chisel as well. Take a close look at the photo below. The inlay reverses at the middle of each run. This was common practice when the box was built. Fit the inlay to the corner first. Find the center point of the run then trim the piece with a square cut. If you match opposing hardwoods at the corners, the center meeting point should be mirrored images. After the inlay is fit to the box, remove the pieces, apply glue to the grooves and to the back face of the inlay, then place the strips back in position. Add a piece of waxed paper Fine-tune for looks. That same square block end acts as a guide for your chisel when fine-tuning the fit of the corners. If you undercut the end just a bit, the fit at the top of the inlay is sure to be tight. There's a method to the madness. The inlay is not randomly added to the front. Notice each corner has two opposing colors matched and that each run is split at the center with the half-runs being mirrored images. popularwoodworking.com ■ 61 |


