Popular Woodworking 2009-11 № 179, страница 10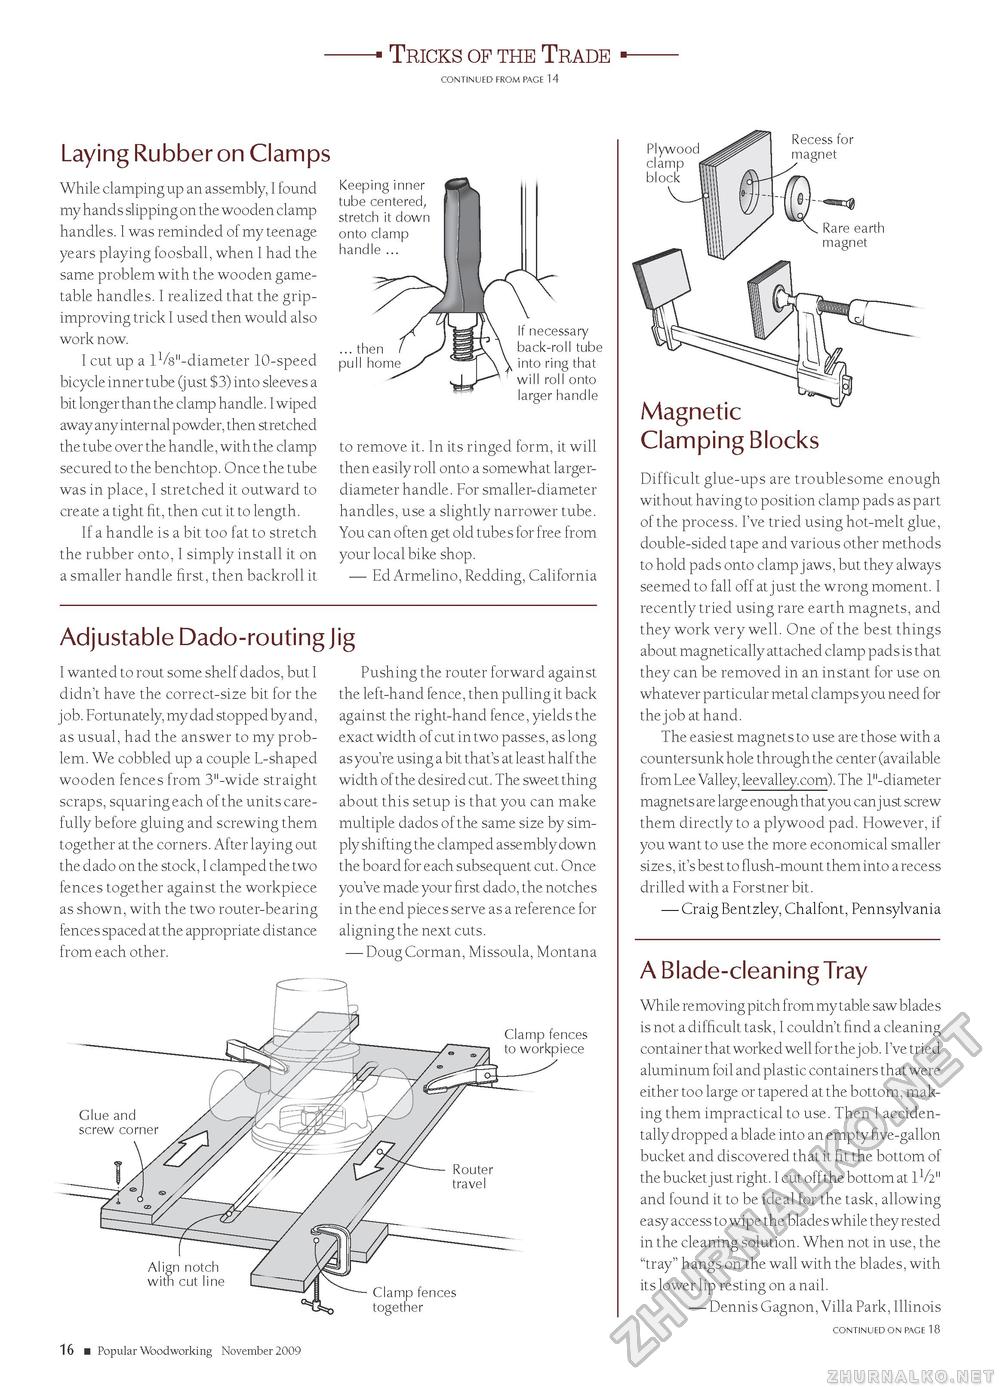
Tricks of the Trade CONTiNUED FROM PAGE 14 Laying Rubber on Clamps While clamping up an assembly, I found my hands slipping on the wooden clamp handles. I was reminded of my teenage years playing foosball, when I had the same problem with the wooden game-table handles. I realized that the grip-improving trick I used then would also work now. I cut up a 11/8"-diameter 10-speed bicycle inner tube (just $3) into sleeves a bit longer than the clamp handle. I wiped away any internal powder, then stretched the tube over the handle, with the clamp secured to the benchtop. Once the tube was in place, I stretched it outward to create a tight fit, then cut it to length. If a handle is a bit too fat to stretch the rubber onto, I simply install it on a smaller handle first, then backroll it Keeping inner tube centered, stretch it down onto clamp handle ... ... then pull home If necessary back-roll tube into ring that will roll onto larger handle to remove it. In its ringed form, it will then easily roll onto a somewhat larger-diameter handle. For smaller-diameter handles, use a slightly narrower tube. You can often get old tubes for free from your local bike shop. — Ed Armelino, Redding, California Adjustable Dado-routing Jig I wanted to rout some shelf dados, but I didn't have the correct-size bit for the job. Fortunately, my dad stopped by and, as usual, had the answer to my problem. We cobbled up a couple L-shaped wooden fences from 3"-wide straight scraps, squaring each of the units carefully before gluing and screwing them together at the corners. After laying out the dado on the stock, I clamped the two fences together against the workpiece as shown, with the two router-bearing fences spaced at the appropriate distance from each other. Pushing the router forward against the left-hand fence, then pulling it back against the right-hand fence, yields the exact width of cut in two passes, as long as you're using a bit that's at least half the width of the desired cut. The sweet thing about this setup is that you can make multiple dados of the same size by simply shifting the clamped assembly down the board for each subsequent cut. Once you've made your first dado, the notches in the end pieces serve as a reference for aligning the next cuts. — Doug Corman, Missoula, Montana 16 ■ Popular Woodworking November 2009 Clamping Blocks Difficult glue-ups are troublesome enough without having to position clamp pads as part of the process. I've tried using hot-melt glue, double-sided tape and various other methods to hold pads onto clamp jaws, but they always seemed to fall off at just the wrong moment. I recently tried using rare earth magnets, and they work very well. One of the best things about magnetically attached clamp pads is that they can be removed in an instant for use on whatever particular metal clamps you need for the job at hand. The easiest magnets to use are those with a countersunk hole through the center (available from Lee Valley, leevalley.com). The 1"-diameter magnets are large enough that you canjust screw them directly to a plywood pad. However, if you want to use the more economical smaller sizes, it's best to flush-mount them into a recess drilled with a Forstner bit. — Craig Bentzley, Chalfont, Pennsylvania A Blade-cleaning Tray While removing pitch from my table saw blades is not a difficult task, I couldn't find a cleaning container that worked well for the job. I've tried aluminum foil and plastic containers that were either too large or tapered at the bottom, making them impractical to use. Then I accidentally dropped a blade into an empty five-gallon bucket and discovered that it fit the bottom of the bucket just right. I cut off the bottom at 11/2" and found it to be ideal for the task, allowing easy access to wipe the blades while they rested in the cleaning solution. When not in use, the "tray" hangs on the wall with the blades, with its lower lip resting on a nail. — Dennis Gagnon, Villa Park, Illinois CONTiNUED ON PAGE 18 |


