Popular Woodworking 2009-11 № 179, страница 29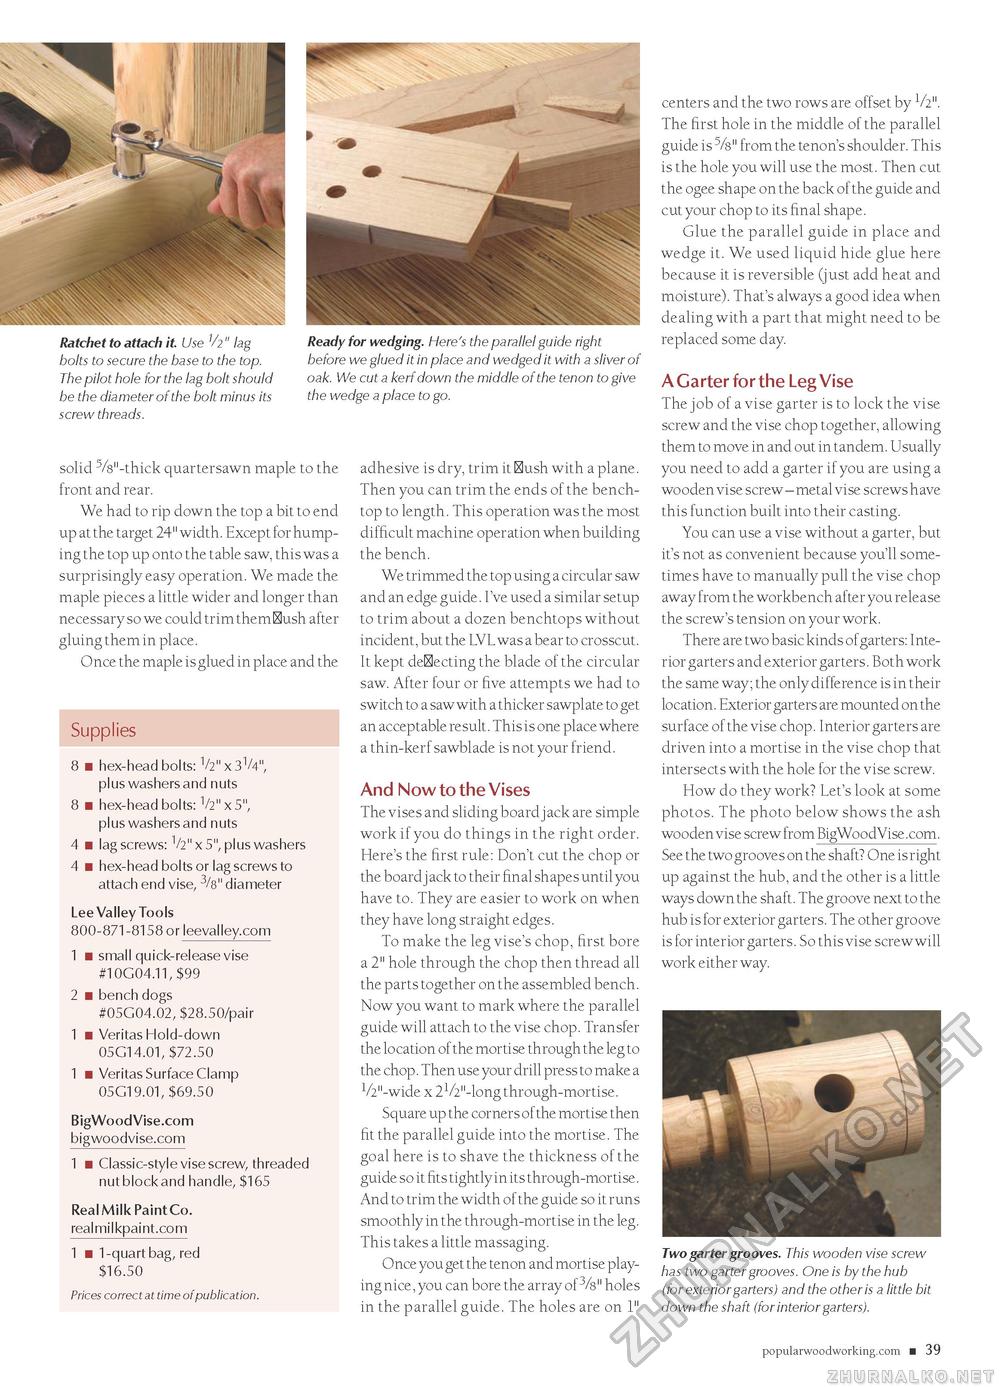
Ratchet to attach it Use Vi" lag bolts to secure the base to the top. The pilot hole for the lag bolt should be the diameter of the bolt minus its screw threads. Ready for wedging. Here's the parallel guide right before we glued it in place and wedged it with a sliver of oak. We cut a kerf down the middle of the tenon to give the wedge a place to go. solid 5/8"-thick quartersawn maple to the front and rear. We had to rip down the top a bit to end up at the target 24" width. Except for humping the top up onto the table saw, this was a surprisingly easy operation. We made the maple pieces a little wider and longer than necessary so we could trim them flush after gluing them in place. Once the maple is glued in place and the Supplies 8 ■ hex-head bolts: V2" x 3V4", plus washers and nuts 8 ■ hex-head bolts: V2" x 5", plus washers and nuts 4 ■ lag screws: V2" x 5", plus washers 4 ■ hex-head bolts or lag screws to attach end vise, 3/8" diameter Lee Valley Tools 800-871-8158 or leevalley.com 1 ■ small quick-release vise #10G04.11, $99 2 ■ bench dogs #05G04.02, $28.50/pair 1 ■ Veritas Hold-down 05G14.01, $72.50 1 ■ Veritas Surface Clamp 05G19.01, $69.50 BigWoodVise.com bigwoodvise.com 1 ■ Classic-style vise screw, threaded nut block and handle, $165 Real Milk Paint Co. realmilkpaint.com 1 ■ 1-quart bag, red $16.50 Prices correct at time of publication. adhesive is dry, trim it flush with a plane. Then you can trim the ends of the bench-top to length. This operation was the most difficult machine operation when building the bench. We trimmed the top using a circular saw and an edge guide. I've used a similar setup to trim about a dozen benchtops without incident, but the LVL was a bear to crosscut. It kept deflecting the blade of the circular saw. After four or five attempts we had to switch to a saw with a thicker sawplate to get an acceptable result. This is one place where a thin-kerf sawblade is not your friend. And Now to the Vises The vises and sliding board j ack are simple work if you do things in the right order. Here's the first rule: Don't cut the chop or the board j ack to their final shapes until you have to. They are easier to work on when they have long straight edges. To make the leg vise's chop, first bore a 2" hole through the chop then thread all the parts together on the assembled bench. Now you want to mark where the parallel guide will attach to the vise chop. Transfer the location of the mortise through the leg to the chop. Then use your drill press to make a V2"-wide x 21/2"-long through-mortise. Square up the corners of the mortise then fit the parallel guide into the mortise. The goal here is to shave the thickness of the guide so it fits tightly in its through-mortise. And to trim the width of the guide so it runs smoothly in the through-mortise in the leg. This takes a little massaging. Once you get the tenon and mortise playing nice, you can bore the array of 3/8" holes in the parallel guide. The holes are on 1" centers and the two rows are offset by V2". The first hole in the middle of the parallel guide is 5/8" from the tenon's shoulder. This is the hole you will use the most. Then cut the ogee shape on the back of the guide and cut your chop to its final shape. Glue the parallel guide in place and wedge it. We used liquid hide glue here because it is reversible (just add heat and moisture). That's always a good idea when dealing with a part that might need to be replaced some day. A Garter for the Leg Vise The job of a vise garter is to lock the vise screw and the vise chop together, allowing them to move in and out in tandem. Usually you need to add a garter if you are using a wooden vise screw - metal vise screws have this function built into their casting. You can use a vise without a garter, but it's not as convenient because you'll sometimes have to manually pull the vise chop away from the workbench after you release the screw's tension on your work. There are two basic kinds of garters: Interior garters and exterior garters. Both work the same way; the only difference is in their location. Exterior garters are mounted on the surface of the vise chop. Interior garters are driven into a mortise in the vise chop that intersects with the hole for the vise screw. How do they work? Let's look at some photos. The photo below shows the ash wooden vise screw from BigWoodVise.com. See the two grooves on the shaft? One is right up against the hub, and the other is a little ways down the shaft. The groove next to the hub is for exterior garters. The other groove is for interior garters. So this vise screw will work either way. Two garter grooves. This wooden vise screw has two garter grooves. One is by the hub (for exterior garters) and the other is a little bit down the shaft (for interior garters). popularwoodworking.com ■ 39 |


