Popular Woodworking 2009-11 № 179, страница 30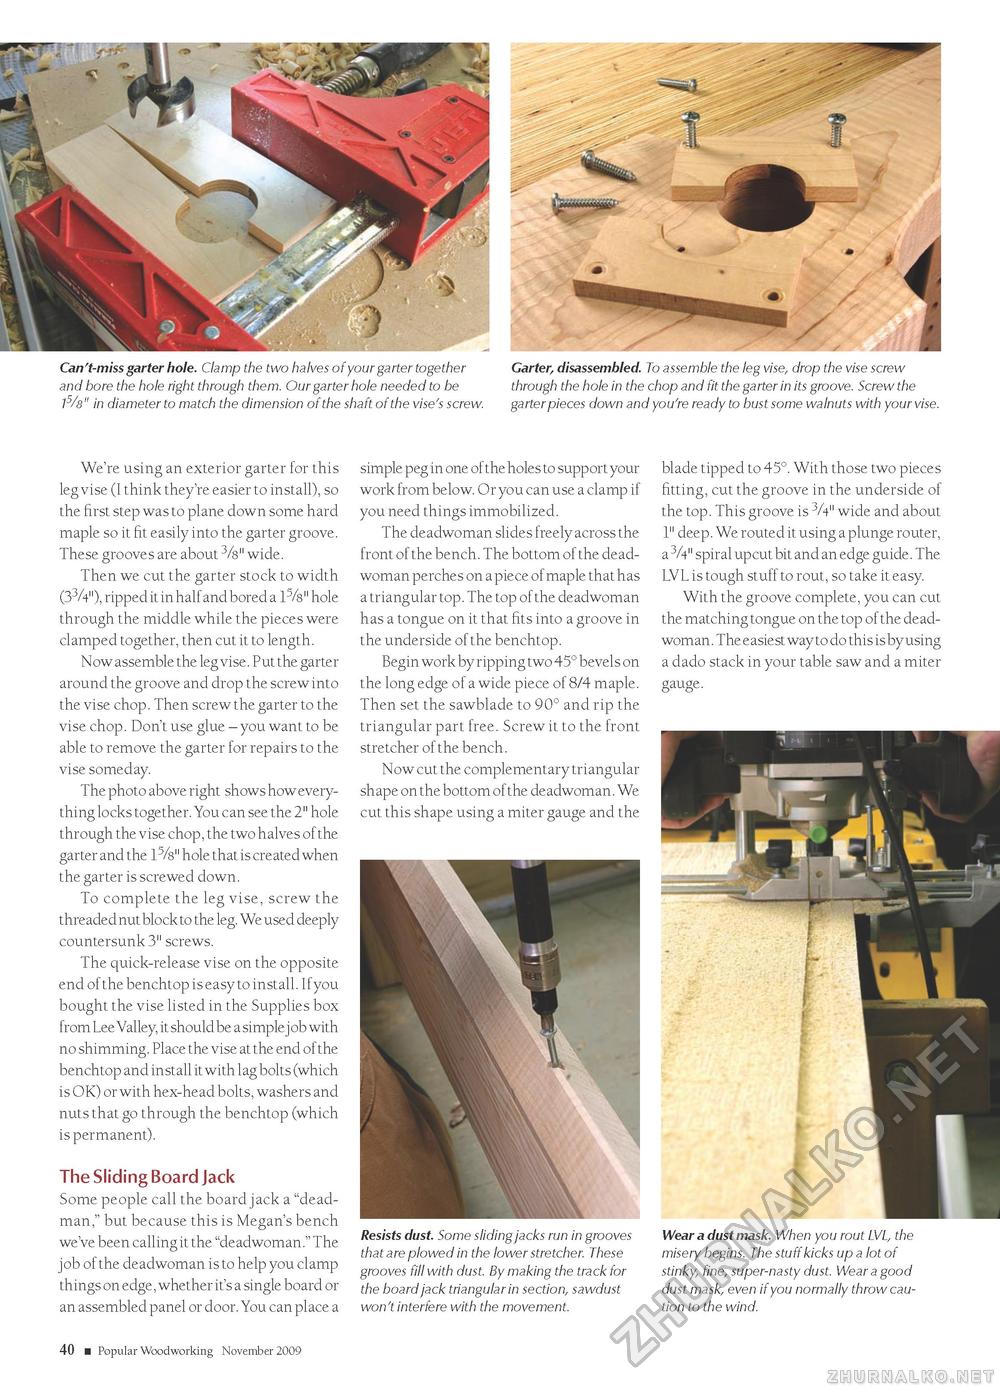
Can't-miss garter hole. Clamp the two halves of your garter together and bore the hole right through them. Our garter hole needed to be I5/b" in diameter to match the dimension of the shaft of the vise's screw. Garter, disassembled. To assemble the leg vise, drop the vise screw through the hole in the chop and fit the garter in its groove. Screw the garter pieces down and you're ready to bust some walnuts with your vise. We're using an exterior garter for this leg vise (I think they're easier to install), so the first step was to plane down some hard maple so it fit easily into the garter groove. These grooves are about 3/8" wide. Then we cut the garter stock to width (33A"), ripped it in half and bored a 1%" hole through the middle while the pieces were clamped together, then cut it to length. Now assemble the leg vise. Put the garter around the groove and drop the screw into the vise chop. Then screw the garter to the vise chop. Don't use glue - you want to be able to remove the garter for repairs to the vise someday. The photo above right shows how everything locks together. You can see the 2" hole through the vise chop, the two halves of the garter and the 1%" hole that is created when the garter is screwed down. To complete the leg vise, screw the threaded nut block to the leg. We used deeply countersunk 3" screws. The quick-release vise on the opposite end of the benchtop is easy to install. If you bought the vise listed in the Supplies box from Lee Valley, it should be a simple j ob with no shimming. Place the vise at the end of the benchtop and install it with lag bolts (which is OK) or with hex-head bolts, washers and nuts that go through the benchtop (which is permanent). The Sliding Board Jack Some people call the board jack a "dead-man," but because this is Megan's bench we've been calling it the "deadwoman." The job of the deadwoman is to help you clamp things on edge, whether it's a single board or an assembled panel or door. You can place a simple peg in one of the holes to support your work from below. Or you can use a clamp if you need things immobilized. The deadwoman slides freely across the front of the bench. The bottom of the dead-woman perches on a piece of maple that has a triangular top. The top of the deadwoman has a tongue on it that fits into a groove in the underside of the benchtop. Begin work by ripping two 45° bevels on the long edge of a wide piece of 8/4 maple. Then set the sawblade to 90° and rip the triangular part free. Screw it to the front stretcher of the bench. Now cut the complementary triangular shape on the bottom of the deadwoman. We cut this shape using a miter gauge and the Resists dust. Some sliding jacks run in grooves that are plowed in the lower stretcher. These grooves fill with dust. By making the track for the board jack triangular in section, sawdust won't interfere with the movement. blade tipped to 45°. With those two pieces fitting, cut the groove in the underside of the top. This groove is 3/4" wide and about 1" deep. We routed it using a plunge router, a 3A" spiral upcut bit and an edge guide. The LVL is tough stuff to rout, so take it easy. With the groove complete, you can cut the matching tongue on the top of the dead-woman . The e asiest way to do this is by using a dado stack in your table saw and a miter gauge. Wear a dust mask. When you rout LVL, the misery begins. The stuff kicks up a lot of stinky, fine, super-nasty dust. Wear a good dust mask, even if you normally throw caution to the wind. 40 ■ Popular Woodworking November 2009 |


