Popular Woodworking 2009-11 № 179, страница 49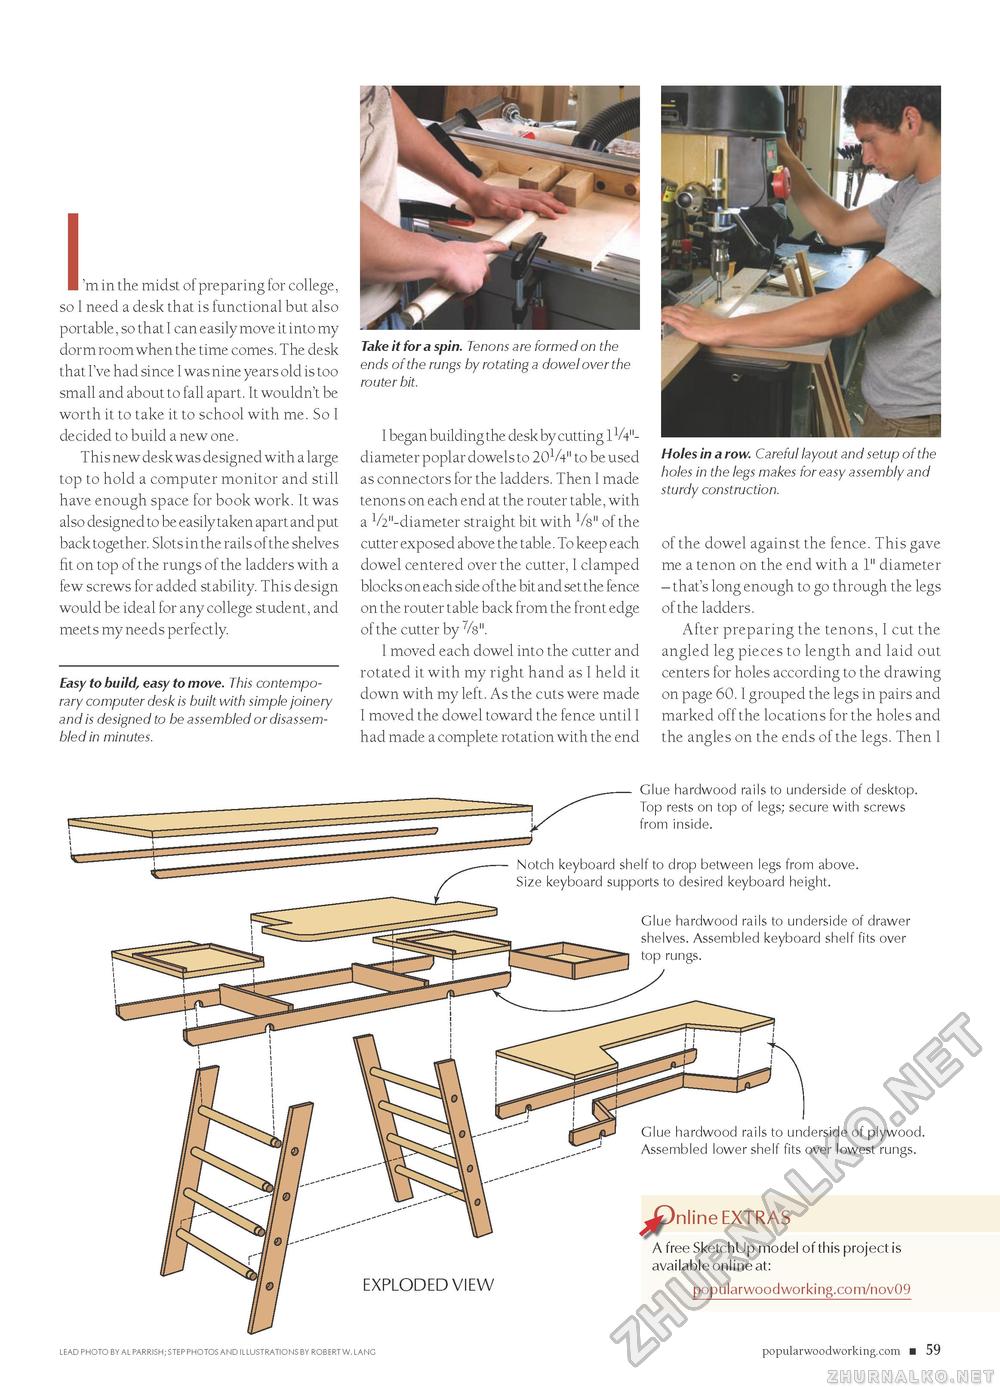
Holes in a row. Careful layout and setup of the holes in the legs makes for easy assembly and sturdy construction. 'm in the midst of preparing for college, so I need a desk that is functional but also portable, so that I can easily move it into my dorm room when the time comes. The desk that I've had since I was nine years old is too small and about to fall apart. It wouldn't be worth it to take it to school with me. So I decided to build a new one. This new desk was designed with a large top to hold a computer monitor and still have enough space for book work. It was also designed to be easily taken apart and put back together. Slots in the rails of the shelves fit on top of the rungs of the ladders with a few screws for added stability. This design would be ideal for any college student, and meets my needs perfectly. Easy to build, easy to move. This contemporary computer desk is built with simple joinery and is designed to be assembled or disassembled in minutes. I began building the desk by cutting IV411-diameter poplar dowels to 201A" to be used as connectors for the ladders. Then I made tenons on each end at the router table, with a V2"-diameter straight bit with Vs" of the cutter exposed above the table. To keep each dowel centered over the cutter, I clamped blocks on each side of the bit and set the fence on the router table back from the front edge of the cutter by %". I moved each dowel into the cutter and rotated it with my right hand as I held it down with my left. As the cuts were made I moved the dowel toward the fence until I had made a complete rotation with the end of the dowel against the fence. This gave me a tenon on the end with a 1" diameter - that's long enough to go through the legs of the ladders. After preparing the tenons, I cut the angled leg pieces to length and laid out centers for holes according to the drawing on page 60. I grouped the legs in pairs and marked off the locations for the holes and the angles on the ends of the legs. Then I Glue hardwood rails to underside of desktop. Top rests on top of legs; secure with screws from inside. Notch keyboard shelf to drop between legs from above. Size keyboard supports to desired keyboard height. Glue hardwood rails to underside of drawer shelves. Assembled keyboard shelf fits over top rungs. EXPLODED ViEW Glue hardwood rails to underside of plywood. Assembled lower shelf fits over lowest rungs. A free SketchUp model of this project is available online at: popularwoodworking.com/nov09 LEAD PHoTo BY AL PARRisH; sTEPPHQTQs And ILLusTRATIQNs BY RoBERT w. Lang popularwoodworking.com ■ 59 |


