Popular Woodworking 2009-11 № 179, страница 50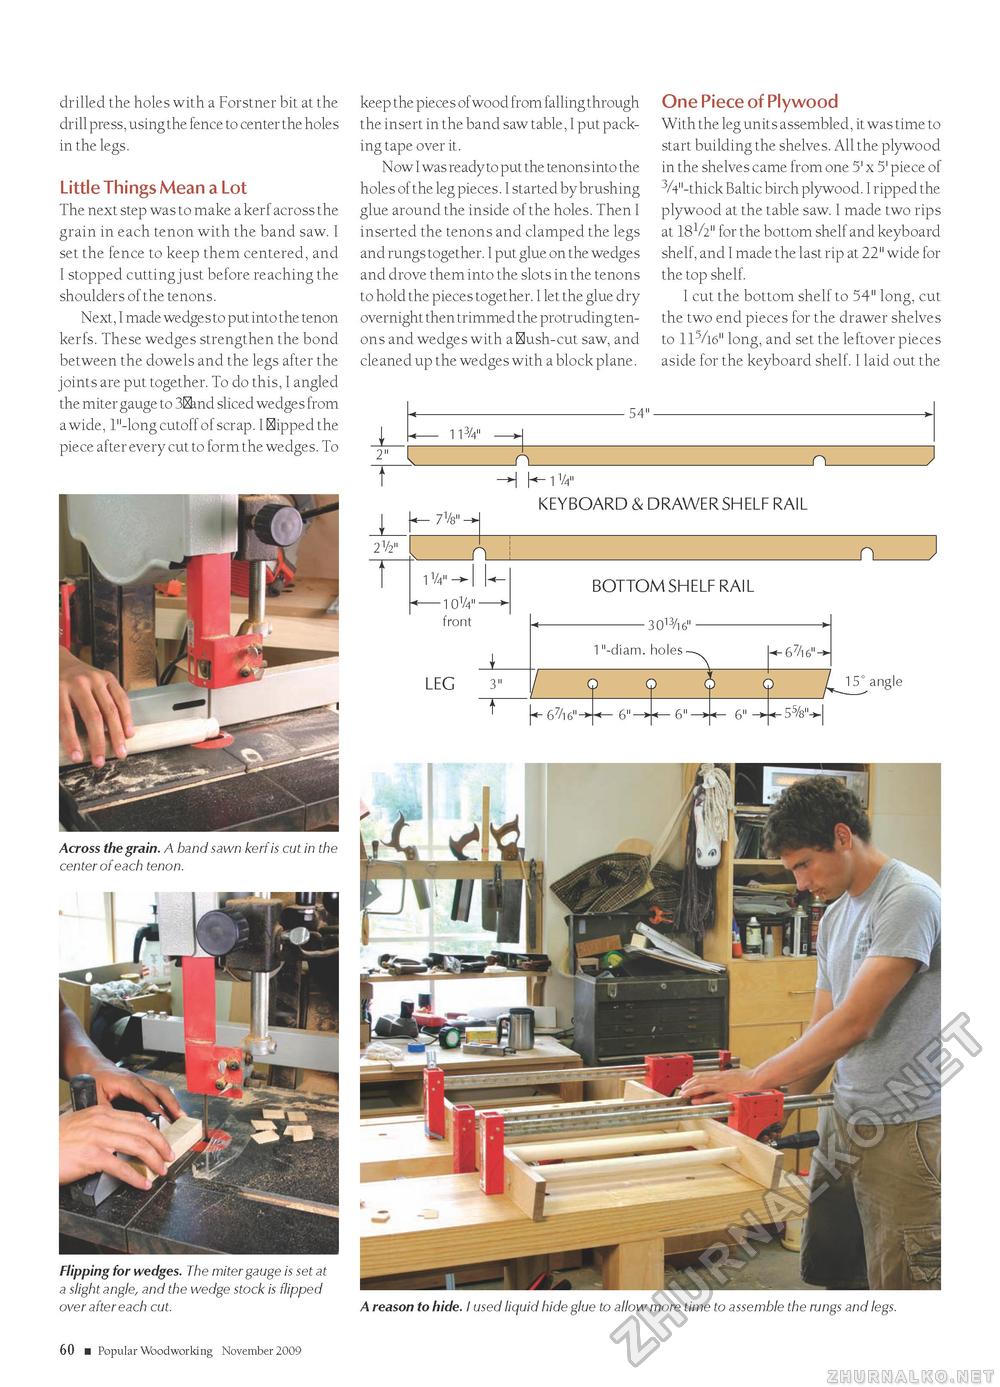
drilled the holes with a Forstner bit at the drill press, using the fence to center the holes in the legs. Little Things Mean a Lot The next step was to make a kerf across the grain in each tenon with the band saw. I set the fence to keep them centered, and I stopped cutting just before reaching the shoulders of the tenons. Next, I made wedges to put into the tenon kerfs. These wedges strengthen the bond between the dowels and the legs after the joints are put together. To do this, I angled the miter gauge to 3&nd sliced wedges from a wide, 1"-long cutoff of scrap. I flipped the piece after every cut to form the wedges. To Across the grain. A band sawn kerf is cut in the center of each tenon. Flipping for wedges. The miter gauge is set at a slight angle, and the wedge stock is flipped over after each cut. keep the pieces of wood from falling through the insert in the band saw table, I put packing tape over it. N ow I was ready to put the tenons into the holes of the leg pieces. I started by brushing glue around the inside of the holes. Then I inserted the tenons and clamped the legs and rungs together. I put glue on the wedges and drove them into the slots in the tenons to hold the pieces together. I let the glue dry overnight then trimmed the protruding tenons and wedges with a flush-cut saw, and cleaned up the wedges with a block plane. One Piece of Plywood With the leg units assembled, it was time to start building the shelves. All the plywood in the shelves came from one 5' x 5' piece of 3/4"-thick Baltic birch plywood. I ripped the plywood at the table saw. I made two rips at I8V2" for the bottom shelf and keyboard shelf, and I made the last rip at 22" wide for the top shelf. I cut the bottom shelf to 54" long, cut the two end pieces for the drawer shelves to 115/16" long, and set the leftover pieces aside for the keyboard shelf. I laid out the - 54"- 113/4" _n_rv -H I—1V4" KEYBOARD & DRAWER SHELF RAiL
front -3013/16" - 1"-diam. holes front LEG 3" -3013/16" - 1"-diam. holes Q O f«-67/16 6"- -67/l6 ■ 6"- Q 6" 15° angle -55/8"-> A reason to hide. I used liquid hide glue to allow more time to assemble the rungs and legs. 60 ■ Popular Woodworking November 2009 |
||||||||||||


